• Home
  • Blog
  • Gallery
  • Music
  • STORE
  • About
  • Contact
Posted by Egor 
· June 16, 2010 

The Eternal Leica M6 TTL (Part 2)

(Continued from Part 1)

In the mid-1990’s, I was an impetuous young(ish) photographer who couldn’t wait until the day I would boot my last film camera out the front door. In my career as a music products designer, I helped hasten the era of digital recording and software-based recording studios, and I was anxious for the same fate to befall the photography industry. But fifteen years later, with all my dreams and visions come true, a curious phenomenon emerged — I had developed a burning desire to supplement my digital shots with film.

I decided to purchase a mechanical Leica M film body, since it could share lenses with my digital M while doubling as its backup. Film cameras aren’t exactly in high demand — quite the opposite, really — so I knew I could take my time and choose wisely. Almost immediately, a Leica M4-P appeared for a ridiculously low price. I knew enough to know it was a good deal, and the M4-P was one of the models I desired. But, suddenly, I started to vacillate — questioning my motives, my reasons, my desires. By the time I picked up the phone to get the camera, it had sold. “No problem,” I thought, “there’ll be plenty of other bargains to capitalize on.”

So I waited… and waited… for nearly 6 months. Until finally, last fall, I found a beautiful M6 TTL for a rather respectable price. I touched it, fondled it, and listened to its silky, quiet shutter. And then I vacillated — wildly. The next day, when I returned to the shop to get the camera, it had sold.

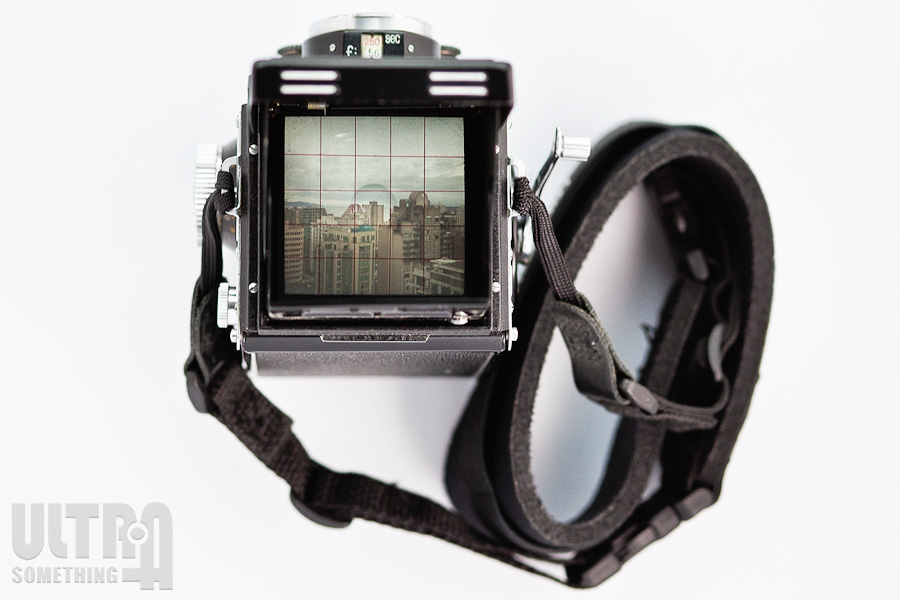
I realized I needed to find a way to circumvent my trepidation. In other words, I needed to test the film waters using the cheapest possible approach. So, last December, I purchased a Yashica Mat TLR. I figured it would be a fun way to experiment with the process and decide, once and for all, if I was experiencing premature senility or if there was merit to my film desire. As it turned out, I love the Yashica Mat and the photos I took (and continue to take) with it. There are, however, a few things I don’t love about it — the bulkiness, the 12-picture limit (per roll) and, most importantly, the fact I can’t carry it for two blocks without being stopped by a dozen people. Everyone wants to ask me about that camera. It draws so much attention on the streets that I rarely get the chance to actually take photos. Come to think of it, maybe the 12-shot limitation isn’t a limitation after all.

In any event, the Yashica Mat experiment paid off, and it helped confirm the validity of my original plan: to get a mechanical Leica M film body to back up my digital Leica M.

Which Leica?
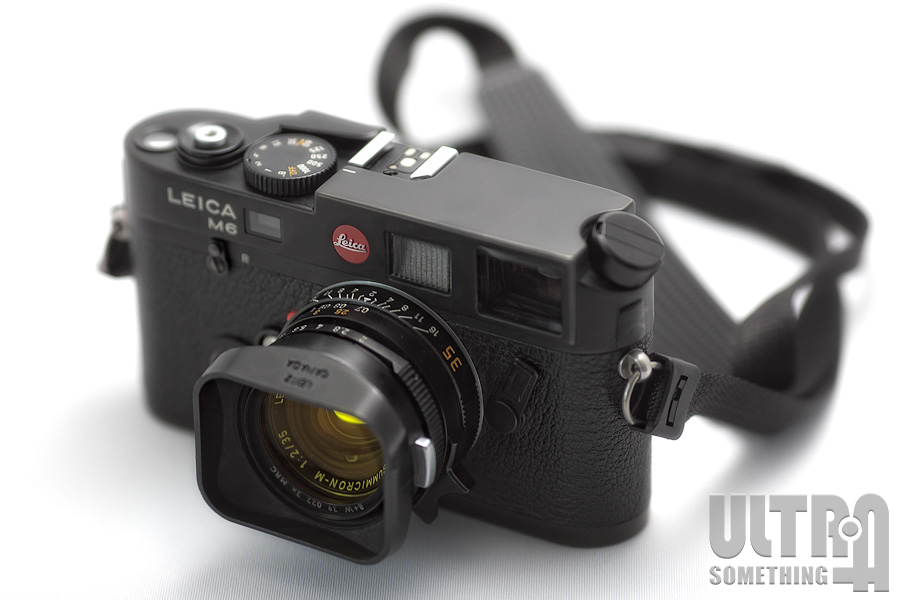
With renewed conviction, I went back to work — researching and fine-tuning my purchase options until I narrowed my “active” search list to four possible bodies:

MP: The most desirable, the most expensive, and therefore the least likely of my four options. If I shot film primarily, then an MP body would make more sense. But I knew this camera’s purpose was to provide an alternate look to my digital M, while serving double duty as its backup. Still, it wouldn’t hurt to keep my eyes open; just in case some doofus unwittingly dumped one on the market at a ridiculously low price — so it made my search list.

M2: I was instinctually drawn to this model, its build quality, and something magical about the way it fit my hand. I wasn’t overly concerned that it possessed framelines for only 35, 50, and 90mm lenses — though I do make frequent use of a 28. I was a little more concerned that the majority of M2’s are chrome, which I thought might be a bit too “flashy” on the streets. Black paint models are available, but they’re collectors items and, as such, command collector prices. I had another concern about the M2’s seemingly hostile film loading. Again, this wasn’t an insurmountable problem, though it did mean I might have to grow a third hand. I knew that a “rapid load” model appeared late in the M2 life cycle but, again, their rarity makes them collector’s items. Still, if I happened to find a good price on a tattered, bog standard M2, I planned to jump on it.

M4-P: This model, from the early 1980’s, sported the addition of 28mm framelines, plus a much friendlier film loading system than the M2. It fixed most of the problems inherent in the previous model M4-2, came in basic black, and was a staple of rangefinder-toting photojournalists (who, in the early 1980’s, were already anachronisms). Like the M2, it had no meter — but I rarely use one anymore.

M6 TTL: This model introduced a “wrong way” shutter speed dial that turns the opposite direction from every other film Leica (except the subsequent M7). But it does turn the same direction as the digital Leicas. Call me crazy, but not having to remember which way each camera’s shutter speed dial rotates is a big plus for me. Effectively, save for the addition of a very rudimentary light meter, there is little difference between any of the M6 bodies and the M4-P. At 15 years newer than the similarly built M4-P, and 40 years newer than the impeccably built M2, a well-used and budget-priced M6 TTL would be an ideal find.

Of course there are many other models of old Leica M bodies, and given the right set of circumstances (price), I would consider any of them. Every Leica comes complete with both baggage and bonuses. But, based on a diverse and personal set of criteria, these were the four primary models I sought… and sought… and sought. Finally, after another 6 month period, a handsome and nicely priced M6 TTL appeared from out of the blue. After twice missing excellent sales opportunities the year before, I acted swiftly and decisively. The M6 TTL was mine.

That Old Black Magic

Before I ever purchased this camera, I had decided — 18 years after giving it up — that I would make my triumphant return to shooting and self-processing black & white film. It was a decision I didn’t arrive at lightly. It was predicated partly upon my recent positive experience with re-scanning my old black and white negatives. It was also based on the “less is more” approach I opted to take with this particular camera. And, finally, it sprang from a fundamental observation that I have recently made: that of the hundreds of photographs I most admire, 95% of them were shot on black and white film.

That last reason’s worth exploring a bit more: It’s not that old cameras are inherently better than new cameras. It’s not that black & white film is better than color film, and it’s certainly not that film is better than digital. Frankly, I believe it’s this: because cameras were manual mechanical devices — void of metering or any other exposure aids —photographers were simply better back then. This is likely to be a point of contention but, hey, it’s my blog. Analog photography, unlike digital, required actual work. Hard work. If you didn’t have the talent, you didn’t stick with it. Photographers developed their own unique styles in an effort to distinguish themselves from their peers, and this resulted in some truly extraordinary photos. Today, it’s the opposite — everyone copies everyone else’s style and a certain photographic homogeneity has become the norm. For me, the limitations of black and white film force me to more carefully conceive, compose, and craft my photographs — much the same as it did for my old photographic heroes.

So, with an M6 TTL in my hand, a brick of Tri-X in the fridge, and a half-dozen jugs of fresh chemical compounds under the bathroom sink, one journey had finally come to the end — and another was about to begin.

mmm-mmM6

If some of you think it’s odd that I’m reviewing a 12 year old camera, you obviously missed my review of the 52 year old Yashica Mat. But there’s a very valid reason for reviewing old film cameras — they still work. And they still pump out images every bit as good as they did when they rolled out of the factory. As I discussed in Part 1, film cameras are still relevant and will remain so for the foreseeable future. What isn’t relevant are the old, original reviews that accompanied these camera releases. We’re now living in a digital world, and any film camera review needs to address the camera’s use and features within the context of that digital world. That’s why so much of this review has focused on the tradeoffs between film and digital. There is, after all, an entire generation of photographers who have never shot a film camera, and who know nothing of film’s benefits, limitations, or workflow.

So, speaking of benefits and limitations, let’s dive into the ups, downs, and curiosities of the Leica M6 TTL, beginning with the positives:

An impeccable build quality insures this is a camera that will last a lifetime. This is, perhaps, a silly thing to mention in this review. It’s a little like reviewing a waterproof jacket and praising it for its ability to keep you dry. Quality is the very essence of the Leica M-series and, as such, you expect a build quality that exceeds all other 35mm cameras. This is a camera I am not afraid to use anywhere, any time, and in any environment — and its likelihood of survival will far exceed mine in particularly extreme conditions.

Maximum minimalism makes this camera your partner, not your master. Leica does not coddle their customers. They do not make cameras designed to hold their hand, or prevent the photographer from choosing settings that fly in the face of conventional photographic wisdom. After you select your film and load it into the camera, there are only three things a photographer ever need control: shutter speed, aperture opening, and focus. Every photo ever taken has been exposed using nothing more than these three parameters. And these are, indeed, the only parameters Leica presents to the photographer. There are no silly scene modes, no crazy auto-focus modes, and no annoying modes that prevent your shutter from releasing when you want it to. All the artificial intelligence that other camera manufacturers build into their modern cameras have a single goal: to set the camera’s shutter speed, aperture and focus so that you, the photographer, don’t have to. Personally, I want to be in control of the camera, not a computer program. Leica understands this, and the M6 adheres to the belief that the photographer knows what he or she is doing.

A magically soft shutter sound that doesn’t draw attention to the camera. You could argue that the totally silent electronic shutters populating modern point-and-shoot cameras make them even more ideal for surreptitious shooting than the Leica, but you’d be wrong. If we ignore all the zillion other reasons why point-and-shoots fail as effective street cameras, and concentrate solely on the shutter, we quickly see that point-and-shoot electronic shutters have a significant lag between the time you press the shutter, and the time it actually takes the photo. The M6 triggers the instant you ask it to — insuring that you don’t miss the desired moment. The whispered little “snick” sound passes unnoticed in all but the most quiet of environments.

Silky smooth film advance. Back in the film days, cameras featured all sorts of ways for the user to cock the shutter, and advance the film to the next frame: cranks, dials and, in the later days, noisy electric motors. With every film camera I’ve owned, I always had a sort of mild trepidation each time I advanced the film. Sometimes the film would jam. Sometimes it would slip the sprocket and fail to advance. Inevitably, in the heat of a frenzied moment of action, lesser cameras would lock up in the flurry of vigorous frame advances. Even my “new” Yashica Mat locks up occasionally, and I treat it as gently as a newborn bunny. The Leica M6? Effortless. Dependable. Confident. Assured. No matter how vigorously I thumb its frame advance lever, it’s never locked up nor complained. Again, the impeccable build quality permeates every corner of this camera.

Fast and easy film loading. Unlike some of the earlier M-series cameras (the M3 and the M2 come immediately to mind), the M6 loads effortlessly and dependably. Leica has always been known for the quirky way it loads film through the camera’s bottom, rather than by opening a door on the camera’s back. Leica claims this method results in a more rigid camera and, thus, a flatter film plane. Obviously, the flatter and more precise the film plane, the better the image quality. It’s true that I’m getting stellar images from this camera, but I have no idea how much the film loading method contributes to this quality. In any event, whether Leica’s claims are fact or fiction, there’s no denying that this is one solid camera that takes impeccable images, yet manages to load effortlessly. I don’t argue with success.

The built-in meter is pure bonus. Although I didn’t require that my M-model Leica have a built-in meter, its presence provides a definite benefit — particularly indoors, where my ability to judge light conditions is not as well honed as it is outside. Those who rely on modern matrix metering will likely think the M6 TTL’s rudimentary center-weighted meter is positively arcane. But, just like I prefer a camera that offers only shutter speed and aperture settings, I believe the simpler the meter the better. Unlike a matrix metering system, where I never know exactly what the meter’s actually metering, I know precisely what my M6 meter is telling me — the amount of light required to expose the middle 13% of the image to a Zone V average. I can then interpret those readings and mentally compensate for variations in the scene, then set my shutter speed and aperture accordingly. In other words, just like everything else on the M6 TTL, the meter doesn’t try to second guess the photographer. It doesn’t hold his hand or feign intelligence. Rather, it assumes the photographer is possessed with enough intelligence to correctly apply the information it provides. I conducted some controlled tests, and compared the M6 TTL’s meter with both incident and reflected readings from a Sekonic L-358 — and found the M6 TTL to be accurate and, thus, 100% usable.

Tri-X film rocks. OK, this has absolutely nothing to do with the Leica M6 TTL, but it has everything to do with the reason I now own this camera. Black & white negative film is far more forgiving of exposure errors than digital sensors, color positive film, or even color negative film. Its logarithmic response to light is a more accurate reflection of how human’s perceive it than the linear response of digital sensors, and it’s this logarithmic response that allows black and white negative film to capture more detail in both the highlights and shadows than digital cameras. Having a camera as fine as a Leica M6 TTL is pointless if it doesn’t offer some kind of advantage over modern cameras — and Tri-X film is, for me, a definite advantage.

Every product I’ve ever used, no matter how exemplary, has featured a few annoyances. In the case of the Leica M6 TTL, there are two things that irritate me:

Focus patch flare. This is a well documented M6 complaint, and its origins extend all the way back to the M4-2 in the late 1970’s. But until I got the M6 TTL, those complaints were just words on a page. Now these words have meaning. Flare is definitely a problem with the M6 TTL.

For those of you who aren’t familiar with rangefinders, I’ll provide a bit of background: When you look through a Leica’s viewfinder, you see some framelines and a center patch overlaying the scene you wish to photograph. A fresnel covered window on the camera’s front gathers ambient light that illuminates both the framelines and the center patch to insure they remain visible in even the dimmest lighting conditions. The center patch is particularly important, since you use this area to focus your camera. The patch displays a split image — two views of the same scene, side-by-side. By rotating the focus ring on your lens, you bring these two images into alignment. When aligned, the object shown within the patch is in focus. The problem, to put it succinctly, is that these illuminated areas within the M6 sometimes appear over-illuminated — to the point of becoming opaque white light. When the center focus patch in your M6 viewfinder turns all white, you can’t see to focus the camera. Needless to say, this kinda sucks.
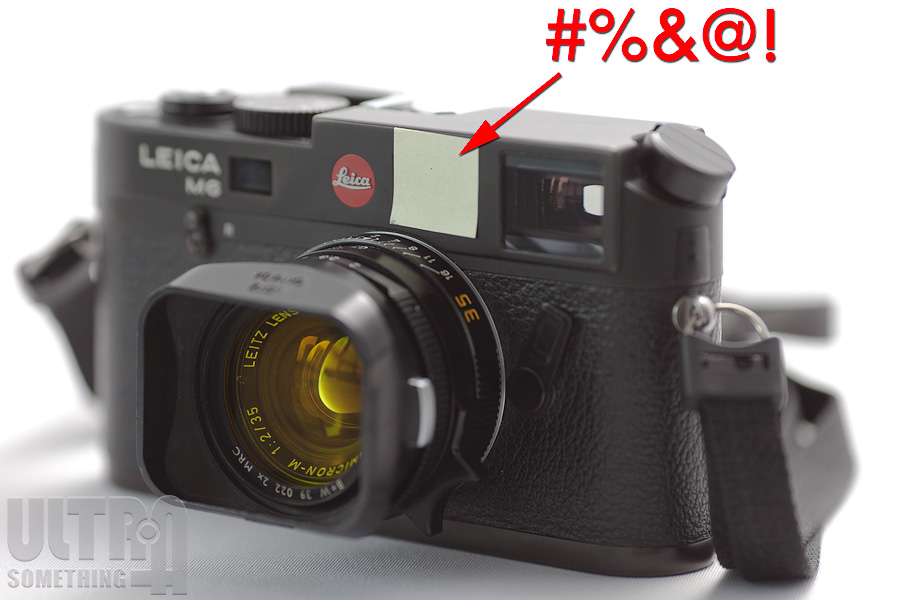
The situation occurs only when light hits the fresnel illumination window at certain angles. Unfortunately, I apparently have an uncanny knack of photographing subjects when the ambient light just happens to correspond to one of these problem angles. I found I could work-around the flare by tilting the camera a bit, focussing, then re-orienting the camera correctly. Ultimately, there was too much “work” in this work-around. So I applied a different solution — Post-It Notes™. Specifically, I cut out a little section of Post-It Note, and stuck it over the fresnel illumination window to cut down on the amount of light being transmitted to the focus patch. The solution works extremely well — I rarely experience lens flare and, in almost all cases, the window still gathers enough light to adequately illuminate the framelines and focus patch. I must admit, I find it somewhat disturbing that a precision piece of legendary machinery requires the application of a Post-It Note to perform properly. Fortunately, I recently discovered that Leciagoodies makes an aftermarket window covering that performs a similar function to my Post-It Note — a sort of polarized plastic that you stick over the illumination window, which reduces the amount of oblique light entering it. I’m still awaiting the arrival of this product so, for the time being, my M6 remains permanently adorned with a yellow Post-It Note.

Battery Life. I suspect the average gnat enjoys a lifespan longer than that of an M6 TTL meter battery. When I first purchased the camera, its light meter batteries were dead. I shot about a half roll of film before finally purchasing a pair of 1.5V Silver Oxide button cells to power it. I then finished that roll, and a second 36 exposure roll after that. Halfway into the third roll, the meter batteries died. Huh? How could these batteries die after only 2 rolls of film? Yes, I had personalized another of the more common M6 complaints — battery life.

Leica claims the batteries should allow for 8 hours of meter use. The camera activates the meter for about 10 seconds every time you press the shutter release. That means, theoretically, you should be able to push about 80 rolls of 36-exposure film through the camera before replacing the batteries. Obviously, in real-world usage, you’ll sometimes half-press the shutter release just to take a meter reading. Assuming you do this before every exposure, you’ll halve the life of the battery to 40 rolls of film. So why did I get only 2 rolls? I suspect the answer is two-fold. First, I used a pair of 1.5V Silver Oxide cells rather than a single, fat 3V Lithium Cell. Second, it’s quite easy to half-press the shutter release accidentally — either when you’re carrying the camera or, more likely, when it’s bouncing around in a camera bag. Back when I first fit my M8 with a soft-release, I had a similar problem — it was so easy to trigger the shutter that, when I put the camera in my bag and went for a walk, I’d pull it out and discover I’d taken 100 new photos of the inside of my bag. This forced me to learn a new trick with my digital Leicas — to turn them off every time I put them in a bag. In the case of the M6, I’m not using a soft release, but I suspect the shutter release is getting a fair amount of half-presses inside my camera bag. Ideally, I would just “turn off” the camera like I do with a digital M. But with the M6, it’s not so easy. Since the M6 is a mechanical camera, there’s really no such thing as an on/off switch. That said, Leica did provide a spot on the shutter speed dial that turns off the meter. Unfortunately, it’s quite time consuming to actually rotate this dial to the OFF position every time I put the camera away, and it’s not something that’s become part of my muscle memory. I’ve now installed a Lithium cell into the M6 and I sometimes remember to turn the shutter speed to “off” when I put the camera in my bag, so I’ll be monitoring real-world battery life under these new conditions. I suspect frequent battery depletion will be an ongoing issue with the M6, which will effectively convert it into an M4-P — a fine camera in its own right, but I bought an M6.

Some of the Leica M6’s features qualify as neither “good” nor “bad” — just “curious.” Here, then, are a few curiosities you might want to learn about before ordering your own M6 TTL:

The tipsy tripod socket location. Because Leica wanted these cameras to be as small as possible, the tripod mounting socket is located under the film advance spool. Locating it in the middle of the body, centered below the lens, would have necessitated a taller body, which is contrary to Leica philosophy. Fortunately, Leica users are notorious for rigidly forgoing tripods and, truth be told, I’m far more likely to need one with my SLR than with a rangefinder. Still, I always carry a little 6″ flexible tabletop tripod with my digital M’s — just in case I need to use a particularly long shutter speed. But the crazy positioning of the tripod socket on the M6 makes this particular tripod useless — the camera simply tips over, and rolls around the table laughing at the ridiculous little tripod.

The meter’s battery replacement is much more fiddly than it need be. You would never want to risk replacing the battery in the field because you’re guaranteed to drop both the battery, and the little round screw-out battery holder. If you drop them at home, no big deal. But if you’re on the streets and you drop them down a sewer, you’re hosed. With a different design, the battery compartment could easily have become a quick way to “turn off” the meter whenever you didn’t actually need it. But, as it is now, you would actually have to unscrew the holder, fiddle with removing the battery, put it in a pocket, then screw the little holder back into the camera — a process guaranteed to make certain you won’t ever bother to remove the battery, even if you won’t be needing it for the day.

The shutter speed dial selects only whole-stop values — I was expecting half-stop settings, like the digital Leicas. It’s not that Leica hid this fact — not at all. It’s just that I never even thought to check. It is possible to set the shutter dial between detents and, in fact, the camera will oblige with a shutter speed that’s somewhere between the two stops — unfortunately, this does not yield any sort of repeatable shutter speed, nor are you likely to know the value of the interim speed. Fortunately, you still have half-stop resolution via the aperture settings on the lenses, but it did take me a couple weeks to get comfortable with the loss of the interim shutter speeds. That said, I no longer miss them at all.

It’s All Relevant

I’ve met many people who claim to be passionate photographers, yet they turn up their nose at the idea of shooting film… or even rangefinders, for that matter. I wonder how someone can claim to be passionate, yet simultaneously dismissive of options and alternatives? In the 170 years since Louis Daguerre invented the daguerreotype, mankind has produced an impressive number of photographic processes, methods, and equipment options. All are at our disposal. Does the world really need another SLR-toting HDR specialist? If your passion is photography, then isn’t your passion to create, not to limit?

There’s never been a better time to buy quality film cameras at crazy low prices. No matter what you’re shooting now (and, for the majority of ‘passionate’ photographers, that means either Nikon or Canon), you can buy professional or prosumer film bodies that mount all your existing lenses. What’s more, if you’re currently shooting a cropped sensor, shooting film will give you a ‘full frame’ experience without having to shell out big bucks for a full frame digital.

Yes, film requires additional steps. It requires processing — a new skill should you wish to do it yourself, or an added expense if you wish to send it to a lab. It requires scanning — also a new skill should you wish to do it yourself, or an added expense if you wish to send it to a lab. And, with film, you can throw away that last decade you spent worrying about resolution — that’s digital’s forte. Film is all about tonality.

My photographic world now revolves around rangefinders, and my system of choice is the Leica. With the M6, I heeded my own advice, and bought a film camera to both back up and extend my M-series capabilities. I am absolutely better off for doing so, and the M6 will remain mine for life… unless some doofus unwittingly dumps an MP on the market at a ridiculously low price.


©2010 grEGORy simpson

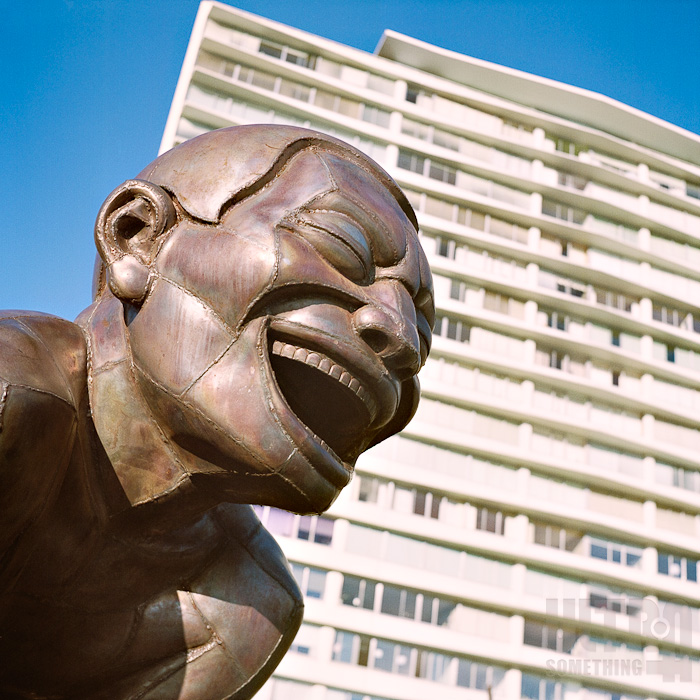
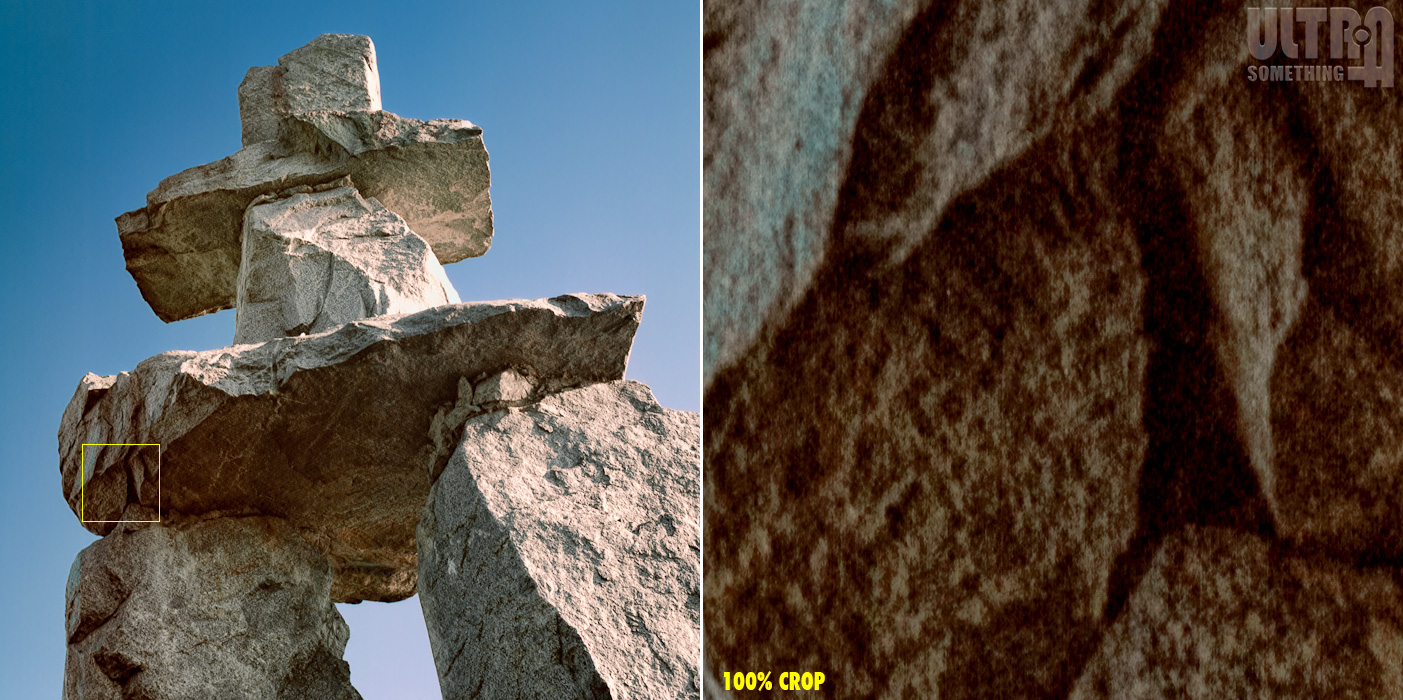
ABOUT THESE PHOTOS: “Fine Arts” and “The Wall ‘Twixt Fantasy and Fact” were shot with a Leica M6 TTL, using Tri-X film rated at ISO 1250 and developed in Diafine. “Habitable Art”, “Business Casual,” and the drug bust sequence were shot with a Leica M6 TTL, using Tri-X film rated at ISO 400 and developed in Ilfotec DD-X. The color shots of the Leica M6 TTL were shot with a Canon 5DmkII.

If you find these photos enjoyable or the articles beneficial, please consider making a DONATION to this site’s continuing evolution. As you’ve likely realized, ULTRAsomething is not an aggregator site — serious time and effort go into developing the original content contained within these virtual walls.

Categories : Photo Gear
Tags : Black & White, Film Photography, Leica M6 TTL, Rangefinder photography, Review, Street Photography
Posted by Egor 
· June 11, 2010 

The Eternal Leica M6 TTL (Part 1)

Craigslist is an alchemy machine, pure and simple. Shovel your old undesirable objects into one end, and out the other comes a shiny new object of desire. Most recently, I dumped an unwanted MIDI keyboard and a pair of unneeded amplified stage monitors into the Craigslist gozinta, and from its gozouta emerged a beautiful hand-made time machine.

I’m aware that Stephen Hawking claims it’s possible to travel only forward in time, not backward. But just because the guy has a computer for a voice doesn’t mean he’s always right. The time machine that emerged from my Craigslist Alchemizer does, indeed, allow me to travel back in time. It’s a Leica M6 TTL — a manual focus rangefinder camera that captures images on film through a fully mechanical shutter. When you take a photo with this camera, you take a trip 50 years into the historical glory days of photography — when men were men, women were women, and both could actually take photographs without aid of a computer.

Since I already own and use a digital Leica M, purchasing the M6 was a “no brainer.” Many will likely agree that anyone who purchases a film camera has “no brain,” but that’s not what I mean by “no brainer.” I knew, as long as I stayed away from the collectible Leicas, that my 13 cu ft of Craigslist gozintas would transform themselves into one fabulous little camera body. Assuming I stay alive, there’s no reason to believe I won’t be using this same camera 30 years from now — and it will be every bit as good then as it is now. You can’t keep a straight face and say that about your latest digital camera. But the fact that this camera’s functional life will exceed my own is of no relevance if film, itself, is of no relevance. And, thus, we reach the crux of this discussion.

I doubt anyone would deny that the Leica M6 TTL is a beautiful camera. Hand-built in Germany, and featuring a precision mechanical shutter and coupled rangefinder focusing, the all-metal Leica M6 is designed to “get the shot” no matter the impediments. It’s the very antithesis of most modern cameras, with their designed-in obsolescence and build quality to match. To many, a Leica is the equivalent of a fully-mechanical Swiss watch — a desirable object of quality and craftsmanship that, ultimately, is outperformed by inexpensive modern replacements. It’s a popular analogy, and one I’ve read many times. It’s also fundamentally flawed.

The flaw in the theory that equates Leica film cameras with mechanical watches is one of function. Specifically, watches tell time, and cameras take pictures. Time is not open to interpretation. Time is objective. Hence, a device designed to monitor time is either right or it’s wrong. There may be varying amounts of wrong — for example, one watch might be wrong by 1 second, and another by 3 minutes — but there is a single, absolute function that a watch must perform, and its quality can be measured and discussed in absolute terms.

Photographs, on the other hand, are open to interpretation. They’re subjective. Two people can look at the exact same scene, but perceive it differently. The eyes, brain, and psychological makeup of each individual all influence how they interpret the scene. There is no such thing as a right or wrong photograph, and every camera — even digital cameras — will record a scene with subtle visual differences. If there was only one correct way to render a 2-dimensional image of a 3-dimensional scene, digital cameras wouldn’t feature “picture styles,” like vivid, landscape, or portrait. There would be no Photoshop! Nor, in the days before digital, would there be different types of film, developing chemicals, or paper. Thus, the common wisdom that digital is “better” than film is a purely subjective opinion. The fact is, digital is not “better” — and neither is film. They’re just different, and each has inherent strengths and weaknesses.

So, obviously, the popular analogy that equates a mechanical Leica M-series film body with a mechanical Swiss watch is incorrect. It assumes there is such a thing as a “correct” photo, and that digital achieves this mythical result better than film. Even the Mythbusters guys (after first incinerating a few cameras for effect) would ultimately concur.

But just because we can’t dismiss film’s interpretation of an image as “worse” than digital, we still haven’t answered the original question: Is film relevant?

If you’re a working photographer (a breed that, one could argue, is becoming increasingly irrelevant itself), the answer is likely “no.” Time is money. Today’s highly competitive online media sites publish images within seconds of their capture. The days of waiting a week for a newsmagazine — or even a day for a newspaper — have passed. The demand for information is instantaneous, so photography must also be instantaneous. Today’s news photographers shoot an image and, in an instant, wirelessly upload it to a news organization’s server, where it’s published immediately on a website. This all happens in less time that it takes to rewind a roll of film back into a 35mm cartridge.

So is film irrelevant?

Absolutely not. Not every photographic endeavor demands “instant gratification.” If your photography isn’t time-sensitive — meaning your images aren’t out of date within minutes of capturing them — then the “look” of film may, in some cases, be more pleasing than that offered by your digital sensors. For my own purposes, I usually choose to load fast black & white negative film into my M6. I like its extended dynamic range, its forgiving nature with challenging exposures, the logarithmic (rather than linear) way it responds to light and, most importantly, its grain. I like the way I can process the film in my kitchen sink, and hand-select my chemicals and methods to insure I get the exact look I want. I like using a mechanical film camera because it requires no battery — meaning it’ll function in the rain, in the snow, and in frigid temperatures. I like the fact its negatives are real, tangible objects that will be fully viewable in 100 years (assuming, of course, I ever take a photo someone wants to see in 100 years). And I like the fact that, unlike digital captures, I can take advantage of future technological advances — re-scanning and re-processing old negatives to extract additional quality from them.

It’s this last consideration that provided the tipping point in my M6 purchase decision. I recently revisited some black & white photos I shot in the early 1990’s — many of which I scanned 18 years ago with an early version of the Nikon Coolscan, and processed with an equally early version of Photoshop. I dug out the original negatives, rescanned them with a modern scanner, and reprocessed them with the latest versions of Lightroom and Photoshop. The result? As expected the good shots looked much better. But what surprised me was that many of the shots I had previously deemed “unusable,” had now became very usable — and even good! I was able, in 2010, to extract details and tones from the negatives using technology that simply didn’t exist in 1993. For a laugh, I also revisited a few of my digital captures from the late 1990’s. Unlike the analog negatives, modern technology could do little to improve these images — blown highlights were still blown. Blocked shadows were still blocked. And excessive noise was still excessive noise. To see my old negatives gain new life — a full 18 years after their exposure — was the final purchase impetus.

And thus we return, yet again, to the original question: Is film relevant?

Yes — as a niche product to photographers who appreciate its unique look and character, and who don’t mind the extra time, care, and consideration that it necessitates.

The important consideration is that the issue is not — and should never have been — a film vs. digital debate. They both have merit. The instant gratification of digital is wonderful. So, too, is the amazing resolution provided by full frame sensors. I would never wish to relinquish digital for a 100% film-based workflow. But the tonal renderings of film, its character, and its non-linear response to light all insure it a rightful place amongst my photographic paraphernalia. For me, the choice to sometimes shoot film is no different than choosing a particular lens. Each lens gives a unique look or perspective, and it is precisely for this reason that photographers choose one lens for one subject, and another for a different subject. There’s absolutely no reason — other than fashion — why such a choice isn’t extended to body type. These days, you can often purchase quality film bodies for less than the cost of a mediocre lens, yet film choice is just as effective as lens choice at providing your photos with a different look.

Obviously, this has been less of a review of the Leica M6 TTL than a review of the rationale for owning one. But with that bit of unpleasantness out of the way, Part 2 will dive, head first, into the nuts and bolts of that mechanical marvel.


©2010 grEGORy simpson

ABOUT THESE PHOTOS: All photos that accompany this article were shot on a Leica M6 TTL, with Tri-X film rated and ISO 400 and developed in Ilfotec DD-X.

If you find these photos enjoyable or the articles beneficial, please consider making a DONATION to this site’s continuing evolution. As you’ve likely realized, ULTRAsomething is not an aggregator site — serious time and effort go into developing the original content contained within these virtual walls.

Categories : Photo Gear
Tags : Black & White, Film Photography, Leica M6 TTL, Rangefinder photography, Review, Street Photography
Posted by Egor 
· June 1, 2010 

Little Shop of Hurrahs

In the 18 months since I first slapped this blog up on the www, I’ve bull-doggedly concentrated my articles on both the philosophical and physical aspects of photography — specifically, either how to see the shot or how to get it. In my articles, I strive to emphasize both the creative aspects of photography as well as the technical peculiarities of cameras and lenses.

But the fact is, unless you’re a dyed-in-the-wool point-and-shooter, “taking” the photo only gets you halfway toward “having” a photo. Ansel Adams said the negative was the equivalent of a musical score, whereas the print was comparable to the performance. In other words, if you want your photos to come to life and be enjoyed by many, you need to roll up your sleeves and do a little processing.

In the old days, this meant choosing a developer, temperature, and time that would best optimize the latent image on your negative. It then meant selecting a good negative and pre-visualizing how to crop, dodge, and burn it into a suitable print — which you would then practice and eventually achieve under the dimly focussed light emanating from your darkroom enlarger.

In modern times, this basically means that you pop your CF or SD card into a computer, apply a few Photoshop actions and plugin presets to “punch up” the image, then upload it to Flickr.

Lately, I’ve been spending more of my time in the No Man’s Land that lies between these two methods. No Man’s Land is a little like one of those tourist trap “Mystery Spots,” where balls seem to roll up hill and shorter people somehow look bigger than taller ones. No Man’s Land, in photographic terms, is where photographers shoot and develop film but process and print their images digitally. I’ll be writing more about all this in the future but, for now, let me say just one thing: If you shoot film and scan it, go buy Photoshop CS5. Right now. You can finish reading this article later…

Photoshop CS5 has been on the market for only one month, but if you search Google for the phrase “Photoshop CS5 Review,” you’ll get 400,000 hits. Needless to say, I don’t see any compelling reason to add to that total.

What does actually compel me is the need to mention a tiny new CS5 feature called the “Content Aware Healing Brush.” It’s not one of the “gee whiz” features in Photoshop CS5 but, if you’re a photographer living in No Man’s Land, it’ll give you back many of the hours you would normally spend spotting and healing the dust and scratches on your scanned negatives.

The Healing Brush, itself, is nothing new. It made its debut with the release of Photoshop 7, way back in 2002. The Healing Brush was a revelation for two particular schools of photographers: portrait photographers who are forever zapping zits in High School Senior portraits, and film photographers who are forever cleaning up dust and scratches in their scanned negatives. Using the Healing Brush is a two-step operation. You must first option-click in an area that contains content similar to the area you wish to heal. This “loads” the brush with a desirable paint pattern. You then need to click the bad spot to “heal” it. It’s an extremely effective tool, but if you’re healing several hundred negatives — each with several hundred dust spots — you’re looking at a bad case of carpal tunnel syndrome and a deadly dose of repetitive stress disorder.

Adobe came to our aid in 2005, with the release of Photoshop CS2. It contained a new type of Healing Brush, called the SPOT Healing Brush. This is a one-step brush. Unlike the original Healing Brush, which you must first “load” with a desired hue and pattern, the Spot Healing Brush loads itself by automatically selecting content in close proximity to the spot you click. This, too, works very well — as long as you’re healing dust and scratches contained within homogenous areas (like skies, walls, and skin). In these areas, the Spot Healing Brush can be a major time saver, since you simply click once on a spot to remove it. After removing all the easy spots, you then switch back to the traditional two-step Healing Brush to fix spots and scratches in textured and patterned areas.

Now, in Photoshop CS5, Adobe has given us a new option for loading up the Spot Healing Brush — content aware healing. Previously, the Spot Healing Brush had only two sampling options — proximity match and create texture. The new content aware option allows us to use the Healing Brush in the very sort of patterned and textured areas that previously required the tedious two-step Healing Brush.

Let’s look at how these three Spot Healing Brushes work. The following crop is from a very old scan of a cathedral photograph. Notice the big dust spot right on an architectural edge:

If I try to eliminate it with the Spot Healing brush set to proximity match, Photoshop basically clones a small section from above the spot and uses it to paint over the dust spot. The result is that the dust gets replaced with a cloned architectural detail that does not actually belong there:

If I try to eliminate the dust with the Spot Healing Brush set to create texture, I end up with an even worse “fix.” Again, this brush option is designed to work best in areas of homogenous content (sky, wall, skin), and not in a patterned area, like this:

When I use the Spot Healing Brush set to the new content aware option, Shazam! I get results almost exactly the same as if I used the clone tool or the original two-step Healing Brush, but without the tedium:

The new Content Aware Spot Healing Brush is, for me, the single most important new feature in Photoshop CS5. If you need to spot heal scans, it’ll easily pay for itself in the amount of time you save. It won’t completely eliminate the need for the traditional two-step Healing Brush but, from my experience, this new brush takes care of 90% of the dust problems in an image. This is particularly important for black & white photographers, since “digital ICE” (the infrared process used to automatically remove dust and scratches from color scans) does not work on silver-based black & white film.

The only problem you’ll likely have with this nifty little Photoshop CS5 feature, is figuring out how to occupy all that extra free time. Me? I’ll use the time I save spotting negatives for something more constructive like, say, taking photos that actually have something to do with the blog I’m writing, rather than just grabbing some old freshly scanned and spotted dog show photos from February 1993.


©2010 grEGORy simpson

If you find these photos enjoyable or the articles beneficial, please consider making a DONATION to this site’s continuing evolution. As you’ve likely realized, ULTRAsomething is not an aggregator site — serious time and effort go into developing the original content contained within these virtual walls.

Categories : Photo Gear, Photo Techniques
Tags : Content Aware Healing Brush, Dog Show Photos, Dust, Film, Healing, Photoshop CS5, Scanning, Scratches, Spotting
Posted by Egor 
· May 11, 2010 

Clutterbucking

I abhor clutter.

That’s not to say I’m one of those austere minimalists who lives in a stark, white-walled condo — empty save for a single white chair. I have “stuff” and, like many people, have probably accumulated more of it than I actually need. Clutter is not a result of how much you have, but how you organize it. If you have only three or four books, but they’re scattered haphazardly around a room, you’ve got “clutter.” If, however, you have a thousand books, but they’re sorted and arranged on a series of purpose-built shelves, you’re clutter-free.

Since photography is a visual endeavor, my natural aversion to clutter follows me behind the camera. This fact, alone, doesn’t make me unique amongst photographers. Many of us — either by instinct or training — understand that a cluttered photograph is an unappealing photograph. Instead, what separates one photographer from another is how they choose to address the clutter.

The easiest and most common method to eliminate clutter is through subject isolation. There are many different ways that a photographer can isolate his subject. One popular technique is to place a single subject in front of a simple backdrop — perhaps a rusty bicycle leaning against a wall, or a beautiful model posed in front of a muslin backdrop. Another technique, currently in vogue (and illustrated in this photo of “Elvis,”) is to shoot wide open with a long, fast lens. This creates a photograph with very limited depth of field — the result of which is that your subject is in-focus, but everything else is obliterated by blur. This technique is so wildly popular that, in the past decade, photographers have invented a term to describe the out-of-focus area of a photo — “bokeh.” Internet forums are awash in arguments over which lenses produce the “smoothest” or “creamiest” bokeh, and software developers even create programs designed to create this look artificially.

Although these subject-isolating techniques are effective, they approach clutter reduction via “austere minimalism” rather than “organization.” Continuing with the example given earlier, these methods are comparable to eliminating a room’s book clutter by throwing out all the books, rather than by finding a way to organize them. But what if those books are needed within the context of the room? If the room is a library, you can’t very well reduce the clutter by tossing out the books. Similarly, in photographs, you can’t always throw away everything that’s not the primary subject. For example, if you’re vacationing with your wife and you take her photograph, she is the subject. But if the “context” of that subject is that you’re vacationing in Paris, do you really want to be isolating your wife from her surroundings? Are you going to take a picture of her in front of a blank wall instead of “cluttering up” your shot with the Eiffel Tower? Are you going to use a fast lens so the Arc de Triomphe, positioned a block behind your wife, disappears into the bokeh?

In these situations, photographers must learn to deal with clutter in another way — not by eliminating the secondary subjects, but by organizing and placing them within the frame. As an avid street photographer, I’ve always been very aware of composition. Successful street photography relies on placing your subjects within the context of their environment, not isolating them from it. Streets, by nature, are visually busy and highly cluttered photographic environments. Composition and geometry are essential to a photograph’s success — they provide a way to ‘organize’ the visual confusion of the streets.

No matter what subject I photograph, I am acutely aware of geometry and composition. It is the direct result of my clutter-loathing personality. By finding order in chaos, I can instinctually capture street photos that, while full of “stuff,” don’t feel overly cluttered…

… unless I shoot in color.

In my own photographs, color is the #1 source of visual clutter. When I’m shooting, I see geometry, composition, expression, and juxtaposition. But I see these elements as shapes, objects, and luminosity — not colors. The end result is that my photographs may be geometrically tidy, but they’re sometimes a tangled mess of competing hues. If my primary subject is wearing a navy blue shirt, but some insignificant geometric element happens to be bright red, the image falls apart — the viewer’s eye travels to the red object when it should be on the navy blue object. This is precisely the reason why I (and many other street photographers) prefer to work in black and white. We can direct a viewer’s eye with geometry, light, and shadow. Color has a tendency to clutter and confuse an image. Those of you who frequent this blog will remember that I addressed this issue specifically in an earlier post titled, “What Color is Happy?”

It’s now been twenty years since I was first infected by the photography “bug” and, in those early salad years, I did the same as most photographers from that era — I bought color negative film, and had it processed and printed at a local lab. I could count, on one hand, the number of compelling photographs I took those first years — and I could do it without extending a single finger on that hand. Eventually my inner cheapskate took over, and I began to work in black and white so I could easily (and inexpensively) perform my own processing and printing. Suddenly, I was producing a spate of captivating images. By eliminating color from my photographs, I was able to eliminate the clutter, which allowed my geometric and compositional skills to develop.

By the early-to-mid 1990’s I had pretty much replaced wet-printing with computer-based processing. I would scan negatives with a first generation Nikon Coolscan — a process so slow and cumbersome that it would take me hours to get a decent scan of a single exposure. Such tedium required that I select, very carefully, those photos I wished to scan. But, since I was no longer wet printing, I was no longer making contact prints of my negatives. This made it nearly impossible to decide which exposures were worthy of my scanning struggles. So I switched to shooting color slide film. Not only was it much easier to pick and choose the images I wanted to scan, but the Coolscan was much less persnickety with mounted slides than with film strips. Once again, I was shooting and printing in color. And, once again, my images became boring and pedestrian.

Over the years, and throughout my transition to a fully digital workflow, I became painfully aware of two conflicting forces working against my photographic success:

1) When I photograph, I “see” geometry and light, but do not instinctually “see” or respond to color. As a result, I am an infinitely better black and white photographer.

2) Very few people in this, the early 21st century, care to view black and white photographs. If I wanted to work, I had to give the public what they wanted — color photographs.

This dilemma continued for a decade: Should I shoot to my strengths, or should I shoot what the public wants? For years, I opted to shoot what the public wanted. We do, after all, live in a cash-based economy. But in 2008, a wonderful thing happened — the economy tanked. OK,’wonderful’ might not be the right word. But the resulting decrease in photography assignments meant I was free to explore my photographic strengths. And, for me, many of those strengths lay in black and white. As I began to re-explore the world in black and white, I became re-energized, re-engaged, and re-connected to my photographs. And now, 20 years after I first started down this path, I came to a startling conclusion:

“If you take the photographs you take best, you’ll take better photographs.”

It’s an incredibly obvious realization, which makes it all the crazier that it just occurred to me. Some people are fabulous color photographers. They see color everywhere, and they compose their photos around their natural instincts. These people see color the way I see geometry. So why do I ignore my own instinctual advantages and replace them with disadvantages? Obviously, if I know a photo will work better in color, I’ll take it. But, if a photo works better in black and white, why shouldn’t I render it that way? Isn’t it more to my advantage that a small group of people see an exemplary photo, than if a larger group sees a mediocre one?

And it’s not just photography. It’s everything. Wouldn’t the world be a better place if we all played to our strengths, rather than succumbing to the mediocrity of style and fashion?

Sometimes its not just our homes and our photographs that are cluttered — it’s our thinking.


©2010 grEGORy simpson

If you find these photos enjoyable or the articles beneficial, please consider making a DONATION to this site’s continuing evolution. As you’ve likely realized, ULTRAsomething is not an aggregator site — serious time and effort go into developing the original content contained within these virtual walls.

Categories : Photo Techniques
Tags : Black & White, Black and White Landscapes, Fast Lenses, Film, Photography, Subject Isolation
Posted by Egor 
· April 14, 2010 

The Most Dangerous Game

I was born into a family of sportsmen — bird hunters, fishermen and riflemen. Ten years before I was old enough to drive, my grandfather taught me how to prime, pack and crimp his shotgun shells. It would take even longer for me to learn that a perfectly executed fly cast was not a prerequisite to eating fish, and that trout was available at the local market. My family boasted several accomplished rifle champions, so get-togethers always involved a few spirited rounds of target practice.

Some sociologists insist we are shaped by heredity, while others opine that environment is what dictates our proclivities. There would be no such sociological arguments over me — I was, by both heredity and environment, destined to become a sportsman.

But destiny can be a trickster. From an early age, I despised hunting and its inevitable death. And my pronounced dislike for guns stood in vivid contrast to both my bloodline and upbringing. I was an anomaly; an aberration; a black sheep…

… or was I?

Henri Cartier-Bresson, the father of all ‘street’ photographers, considered Eugen Herrigel’s “Zen in the Art of Archery” an essential photographic text. Cartier-Bresson saw a distinct parallel between the mental conditioning and motor requirements of the archer, and those of the photographer.

And what should we make of common photographic jargon? Do we not ‘capture’ our subjects by ‘shooting’ them with our cameras? Sports photographers use motor drives so they can ‘spray’ their subjects with a ‘machine gun’ approach. And don’t many photographers, in an attempt to handhold long shutter speeds, ‘trigger’ their shutters while employing the same breathing techniques as riflemen?

Could it be that I didn’t actually escape my hereditary and environment? Have I simply replaced the gun — my ancestral tool of choice — with a camera? It’s a plausible postulation save for one fact — I don’t kill anything when I take its photo. In fact, I would be incapable of ever killing anything. Though it’s convenient to equate my passion and skill with a camera to my familial relationship with firearms, I am still obviously void of the hunting gene…

… or am I?

Many photographers capture landscapes, architecture, still-life, and abstracts. Even people, when photographed, are often posed for the benefit of the photographer. These subjects are, in many ways, analogous to the paper targets used by marksmen — static, stationary objects at which the photographer aims his camera and shoots.

But what of wildlife photographers? Are they not true sportsmen? Are they not hunters? The only difference between, say, an elk hunter and an elk photographer is the trophy on the wall — the hunter mounts its head, and the photographer mounts its photo.

So if photographing animals in the wild is akin to hunting, then what of my personal passion — street photography?

In 1924, Richard Connell wrote The Hounds of Zaroff, better known as “The Most Dangerous Game.” It told the story of General Zaroff, who had become so bored with hunting traditional prey that he turned to hunting the most cunning and clever prey of all—man.

Since early adulthood, when it became obvious I would never grow into the role of “sportsman,” I assumed I had somehow escaped my destiny. Though true, the fact remains that my destiny didn’t escape me. Rather, it simply mutated. I have come to realize that I am, indeed, a sportsman. My ‘prey’ is man, my ‘weapon’ is a camera, and my ‘trophy’ is their image on my wall.

For a photographer, man is truly the most dangerous game. Man, and only man, is aware of photography and, as such, he is the only subject who will alter his behavior in front of a camera. To capture man in his environment — unguarded and natural — requires patience, technique, practice, bravery, compassion and a healthy dose of respect for the subject. There is no subject so expressive, wondrous, curious, delightful, beautiful and entertaining as our fellow homo sapiens.

Destiny may not have escaped me, but I have transformed it. Hunting permeates my bloodline and upbringing, but hunting does not necessitate a gun. The final act of a successful hunt does not require death. Instead, by hunting with a camera, I have my choice of many different photographic outcomes — sympathy, longing, understanding, humor, knowledge and even love.

It is only now, in retrospect, that I see my passion for street photography for what it truly is — the only conceivable consequence of my lineage, and the natural progression of a passionate hunter, born and reared.


©2010 grEGORy simpson

If you find these photos enjoyable or the articles beneficial, please consider making a DONATION to this site’s continuing evolution. As you’ve likely realized, ULTRAsomething is not an aggregator site — serious time and effort go into developing the original content contained within these virtual walls.

Categories : Musings
Tags : Hunting, Photography, Street Photography
Posted by Egor 
· March 23, 2010 

The Contextual Lens

Life’s actions are not without consequence. Some are major. Most are minor. A few are simply curious. One of the more eccentric ramifications of the 20 years I spent designing music software, is that I now possess an unnatural obsession with terminology. Each new product design introduced a rash of innovative new features and new technologies — all of which, without benefit of precedent, required the invention of descriptively pithy names. The more succinctly and accurately I could name a feature, the easier it would be for a customer to comprehend its purpose. Therefore, the curious consequence of my product design career is that I became a compulsive neologist.

During a product’s development cycle, programmers and engineers would tender suggestions for naming many of the new features. Often, the suggested names would faithfully represent how a particular feature impacted the inner workings of the product. Yet, more times than not, the name didn’t convey how the feature should actually be used — only what it did. So I would strain, stress, and struggle to come up with nomenclature indicative of the feature’s effect, and not necessarily its function.

Because of this, I seem to have developed a mild form of Obsessive Compulsive Disorder. But instead of compulsively counting objects or arranging them, I strive to rename them. Everything I see becomes fodder for my moniker-manufacturing mind. No object is safe — not even those in my camera bag.

Let’s look, for example, at the wide angle lens. An engineer would argue that this is an aptly named device. After all, the most obvious attribute of a wide angle lens is that it captures a wider field of view in front of your camera. So why are novice landscape photographers often dissatisfied when they capture sweeping, scenic vistas with a wide angle lens? Because, 9 times out of 10, it’s the wrong lens to use.

Every year, a new generation of neophyte photographers are victimized by their literal interpretation of this lens’ name. Any reasonable person would logically conclude that the best use of a wide angle lens is to fit more “stuff” into the photo’s width. There’s just one problem: while you’re cramming more visually interesting “stuff” into that frame, you’re also cramming in a whole lot of visually uninteresting “stuff.” And, in spite of the name, you’re not just including more stuff in a horizontal arc — you’re also including more stuff in a vertical arc. In other words, your “wide angle” lens is also a “tall angle” lens.

The effect of this is that your subject of interest — usually something beautiful along the horizon — is dwarfed by an expansive sky and a cavernous foreground. If you’re lucky, the sky is particularly dramatic that day, and you can shift the horizon low in the frame. Of course, once you do that, the photo becomes more about the sky than the actual landscape. Foregrounds are even more problematic. Often, when rookie photographers capture scenic vistas, they’re actually standing in rather un-scenic spots. Human beings, when gazing upon beauty, are quite adept at ignoring the fact they’re standing in a parking lot. Your camera, unfortunately, is not. Since your wide angle lens is also a tall angle lens, your picture will come out looking like a photo of a parking lot, rather than a scenic vista. The problem is compounded when you consider that wide angle lenses exaggerate the spatial differences between objects that are close to the camera and objects that are further away. Specifically, the closer an object is to a wide angle lens, the more gigantic it will appear in comparison to the objects behind it.

None of this is actually bad. In fact, these are among the characteristics that make wide angle lenses so useful. But the way photographers actually use these lenses isn’t accurately represented by their name and, as such, “wide angle” lenses have confounded and mislead novice photographers for generations. At one point, I began to use the term “long angle lens,” rather than “wide angle lens.” My rationale was that, because wide angle lenses create photos with extensive depth of field, I used them when I wanted to render both foreground and background objects in focus. I didn’t use these lenses to fit more into the width or height of a frame. Rather, I used them to fit more stuff into the third dimension — the one that extended from just in front of the camera to infinity.

Ultimately, I was no more satisfied with this rebranding than with the original “wide angle” moniker. It still wasn’t descriptive of the lens’ use. So I asked myself some questions. Why did I consider the “long angle” attributes to be important? Why did I need the extended depth-of-field? Why did I want to place important objects in both the foreground and the background? How was I making actual photographic use of the lens’ characteristics?

Upon analyzing it, I realized I would usually choose this lens when I wanted to put subjects in some kind of context. Sometimes the primary subject is in the foreground, but I want the extended background to provide a frame of reference. Sometimes the primary subject is in the background, but I want to give it some kind of meaning, or context, by juxtaposing it with a foreground element.

On the streets, I’ll often use a wide angle lens. But it’s not because I’m capturing scenic cityscapes — it’s because I’m capturing people, up close and personal, and I want to provide some context as to where we are. To me, photographers who shoot “street” with a telephoto lens are not “street photographers” — they’re paparazzi. Telephotos have no place on the streets. Telephotos have the opposite effect of wide angle lenses — they isolate the subject from their environment, and they isolate the photographer, himself, from the scene. For me, good street photography makes the viewer an active participant in the scene, rather than a detached voyeur. Wide angle lenses let me get close to my subjects, and they let me place those subjects in some kind of context. When used in this manner, they are “contextual lenses.”

When I shoot landscapes, I tend to favor a mild telephoto lens for its ability to capture a slightly flattened perspective of a well-chosen slice of scenery. I will, however, use the wide angle lens when I find a foreground that lends suitable context to the overall scene. So, just as I do on the streets, I use wide angles in nature as “contextual lenses.”

Note that I’m not actually proposing that Zeiss, Canon, Leica, Nikon, Voigtlander or any other lens manufacturers rebrand their “wide angle” lenses as “contextual” lenses. That ship has sailed. I am, however, proposing that all those who develop new products give careful consideration to the naming of features or product attributes — that they consider how the item is used, not just what it does. If lens designers had adopted this philosophy, there would be a lot fewer parking lots immortalized in family vacation albums.


©2010 grEGORy simpson

If you find these photos enjoyable or the articles beneficial, please consider making a DONATION to this site’s continuing evolution. As you’ve likely realized, ULTRAsomething is not an aggregator site — serious time and effort go into developing the original content contained within these virtual walls.

Categories : Photo Gear
Tags : Photography, Photography Techniques, Street Photography, Wide Angle Lens
Posted by Egor 
· March 1, 2010 

That Golden Glow

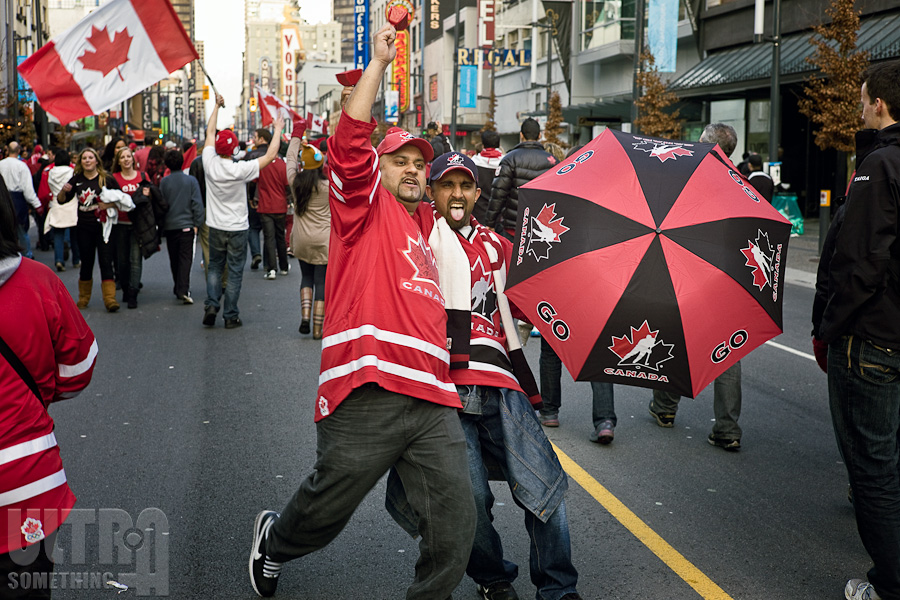
A curious sight greeted me this morning. There was vehicular traffic on all of Vancouver’s downtown streets. It hasn’t always been this way — certainly not for the past seventeen days, and definitely not a dozen hours ago. Olympic revellers laid claim to our streets last February 12th and, as long as the Olympic cauldron was burning, there would be no claiming them back. I’d witnessed crowds those first 16 days that were unlike anything I’d ever imagined. And just when I’d finally grown accustom to the daily insanity, mega-mania arrived on the 17th day.

On the afternoon of February 28th, in the final event of the Vancouver 2010 Olympics, the Canadian men’s hockey team beat the USA in a nail-biting, overtime gold medal game.

The city erupted. 35 millions Canadians, who had been holding their breath throughout the two week Olympic hockey tournament, exhaled simultaneously. For anyone who doesn’t live here, Canada’s obsession with hockey can be hard to fathom. If this country was a living organism, hockey would be its heart. It’s a home grown sport that touches everyone who lives here. Canada is a nation of immigrants, but hockey unites us all. It’s a passion that welcomes everyone and excludes nobody. It doesn’t discriminate by age, nationality, religion, race, nor political view. The United Nations can only dream about this kind of harmony. When this country grants you citizenship, you must swear to uphold the principles of democracy, freedom and compassion. And this you do — through hockey.

A restless and nervous energy permeated Vancouver on the final night before the gold medal game. Canada had set the record for most gold medals won by a single country in the Winter Olympics. In much of the world, this would be cause for euphoric celebration. Canada shrugged. Sure, it was proud of its athletes and their accomplishments. But, wired to the polygraph and feet to the fire, it would be a rare Canadian that wouldn’t trade every one its 13 previous gold medals for just one — hockey gold.

At 2:13 am, I looked out my window and down onto Granville Street. Ten hours before the big game, and the streets were buzzing with an anxious vibrancy. No one wanted to go home, much less go to sleep. Inspired by Josef Koudelka, I pulled out my iPhone (I don’t wear a wrist watch) to help document the moment.

Thirteen hours later, the population of Granville Street had increased fifty-fold. Canada had just won 14 gold medals. But the several hundred thousand people who had gathered on the streets of downtown Vancouver were celebrating only one.

It had been eight years since Canada’s last Olympic men’s hockey gold medal and, for the next 12 hours, those eight years of pent-up tensions flowed onto the streets of Vancouver — grannies high-fived skate punks; cops hugged stoners; alcohol-fueled atonal renditions of “O Canada” filled the air as the shrill squeal of air horns kept a tenuous beat. It was a glorious time.

In the early dawn hours of today, March 1 — the morning after the Vancouver 2010 Olympics came to a close — puffy eyed revellers shuffled aboard transit trains, busses, ferries, and automobiles. They returned to their cubicles, offices, and stations — a touch hungover, but still full of that golden glow of Olympic victory. The previous day’s elation has carried forward, but it’s now tempered with something faint, yet onerous — a worrisome realization that it’s only four more years until Sochi Russia hosts the 2014 Winter Olympics, and we’ve got a hockey gold medal to defend.


©2010 grEGORy simpson 

If you find these photos enjoyable or the articles beneficial, please consider making a DONATION to this site’s continuing evolution. As you’ve likely realized, ULTRAsomething is not an aggregator site — serious time and effort go into developing the original content contained within these virtual walls.

Categories : Musings
Tags : Canada, Celebration, Gold Medal, Hockey, Olympics, Photography, Street Photography, Vancouver 2010
Posted by Egor 
· February 17, 2010 

“Winter” Olympics

Last December, with the winter chill descending rapidly upon Vancouver, I typed a new entry into my To Do list: “Buy photo gloves.” My fingers — aching from exposure to the cold, and from contact with the Leica’s metal body — were a gating factor in how long, and how comfortably, I could photograph on wintry streets. I reckoned that a pair of lightweight photography gloves were an essential purchase for the Vancouver 2010 Winter Olympics in February. But before I had a chance to buy them, December’s promise of a bitter winter faded, and January entered the record books as the warmest in the history of Vancouver.

With precipitation levels low and the temperatures high, Vancouver’s cherry trees welcomed February with a display of delicate pink blossoms that, in years past, remained hidden until April. In marked contrast to most of the Northern Hemisphere, winter never fully arrived here, and spring has already sprung. It’s a glorious time to be in Vancouver, save for one nagging little fact — we’re hosting the winter Olympics.

The tragedy and travails of these Olympics are already legendary, and we haven’t even reached the mid-way point. But if you ever want to see the disparity between journalistic sensationalism and reality, you need only come to Vancouver. There is joy, happiness, and enthusiasm all around me. Each day, tens of thousands of people converge upon Vancouver’s many Olympic party venues — bathing in the sun’s unseasonable warmth and the camaraderie of others. Vancouver, at this moment, is the happiest place on earth. Sorry, Mr. Disney.

The discrepancy between this reality and the vitriolic reports filed by the ever-acrimonious British press would be laughable, were it not so costly. When a community invests $6 billion dollars to host the Olympics, they don’t want to read headlines such as, “Vancouver Games Continue Downhill Slide from Disaster to Calamity.” Such exaggerated dogma is, of course, a fabrication of a British press desperate for the success of London’s 2012 Olympics. By filing such scathing articles now, the Brits create a “baseline” upon which to compare London’s games when their own inevitable glitches and bumps manifest. For proof of pre-meditation, one needs only to look at another headline from the UK’s Guardian paper: “Vancouver Olympics Head for Disaster.” How does that headline prove pre-meditation? Because it was written two weeks prior to the start of the Olympics! At the Olympics, there are many more games played than just those that award gold medals. It will be interesting to watch, over the next couple of years, the extent to which such negative press damages Vancouver’s stellar image in the international arena.

When it comes to photography (which, should you have forgotten, is the Raison d’être of this particular blog), truth has no meaning. Photography makes its own truth. Thumb through any issue of Vogue magazine, and just try to find a photograph in which “truth” has not been fabricated. For generations, photographers have found images of joy in a sea of misery, and images of misery in an outpouring of joy. Robert Capa and David “Chim” Seymour, when photographing the same war, could create two entirely different realities — where Capa found death, Chim found humanity. Life is full of nuances, to which we each respond differently. If everyone reacted to every moment and every story in the same way, the dullness would be insufferable.

Street Stories

As a photographer, I’m probably more emotionally wired with Chim’s view of the world, but it’s Robert Capa’s statement that “if your pictures aren’t good enough, you’re not close enough” that is my mantra. On the streets, my proximity to my subjects is much the same as if we were to engage in conversation. I’m close — earshot close. Which means I overhear some rather interesting discussions.

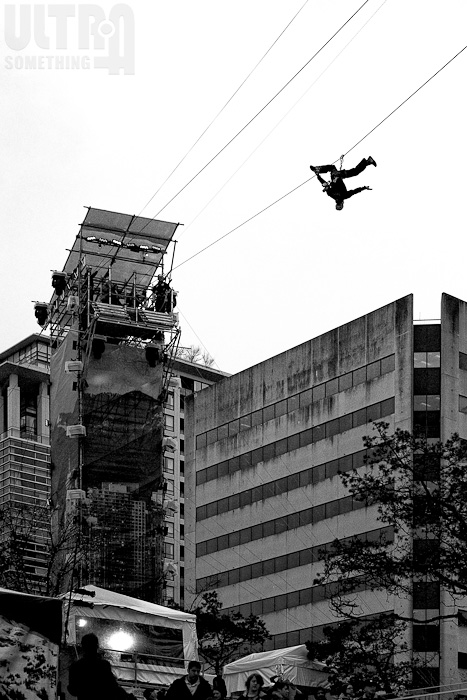
Case in point is a conversation I heard in the middle of Robson Square, site of British Columbia’s Olympic pavilion. The square, as always, was teeming with excitement. Bands played on two separate stages. People watched live coverage of sporting events on a giant outdoor screen. Daredevils, suspended by pulley from a wire high above the square, would zip from one tower to another. Skaters packed the ice rink and street performers were wowing audiences with all manner of spectacular feats. A pair of women, standing next to me, were engaged in conversation.

“This is the most exciting pavilion I’ve ever seen! I’m having so much fun.”

Her friend, nodding in agreement, said, “I hear British Columbia has a pavilion in some place called Robson Square.”

“British Columbia has a pavilion?” asked the first woman, wrinkling her nose, “That must really suck.”

On Monday, I was standing on some steps in a crowded plaza — hanging around in case an interesting shot materialized. I looked around me and noticed a couple of news crews. I fiddled with some settings on my camera, then looked up again — another couple of news crews had arrived. Like the birds in Bodega Bay, news crews kept flocking to where I stood. Cops began to converge, all conversing with unseen voices on their radios. Soon, I noticed undercover security personnel looking about and talking into their sleeves. More continued to come and, as they did, helicopters began to circle overhead. “Must be someone really big,” I thought to myself as the crowd continued to thicken.

A passerby, shuffling past, asked the news cameraman beside me, “Who’s coming? The Prime Minister?”

“No,” replied the cameraman, “Bilodeau!”

“Oh!” exclaimed the passerby, stopping on a dime, “Now THAT’S worth waiting for!”

Alexandre Bilodeau was a man who, 18 hours earlier, could have walked through this same plaza in a pink tutu and no one would have payed him any attention. That day, as the first Canadian to win a gold medal on home soil, he was a national hero. Fame is a curious thing.

My favorite conversational snippet occurred in one of the crowds, last Friday, as I waited for the Olympic torch to pass. I had my Leica at chin height, poised and ready to shoot. Beside me were two women — one holding up a small mauve-colored point-and-shoot camera; the other with a cell phone camera. The woman with the mauve camera nudged the woman to her left and, nodding her head in my direction, said “look at the crappy camera that guy has.” It made my day.

Perception and reality really are two different things… and that’s the moral of this story.


©2010 grEGORy simpson

If you find these photos enjoyable or the articles beneficial, please consider making a DONATION to this site’s continuing evolution. As you’ve likely realized, ULTRAsomething is not an aggregator site — serious time and effort go into developing the original content contained within these virtual walls.

Categories : Musings
Tags : Olympics, Photography, Street Photography, Vancouver 2010
Posted by Egor 
· February 15, 2010 

Flame Frenzy

With fewer than 24 hours remaining before the opening ceremonies, the Olympic torch finally arrived on the shores of downtown Vancouver. I spent the better part of Friday following the torch around the city — sometimes entering the swarm, and sometimes hovering on its periphery. The shot, above, shows a typical scene on a typical street corner in downtown Vancouver. Anyone who’s ever played “Where’s Waldo?” might want to ply their spotting skills, and hunt for the Olympic flame in this photo. It’s there. Really.

Shooting the Olympic flame from within the crowd is somewhat like being in a mosh pit, but without the crappy music. Moments before the runner arrives, and within 1 meter of your own body, 200 cameras attached to 400 arms all rise into the air — swinging wildly to and fro in an attempt to find a shot line between the other 199 cameras in their immediate vicinity. In an instant, and not unlike the experience of photographing a Formula One race from trackside — the flame zooms past and is gone — disappearing into the next meter’s sea of 200 cameras and 400 arms. I grab whatever shot I can get. In the case of the photo, below, it’s Michael Buble carrying the torch into the Live City Yaletown facility. For a brief moment, I ponder the wisdom of living in downtown Vancouver where, at 34,000 people per square mile, we have one of the world’s highest urban density centers. As I cogitate on this statistic, the crowd has carried me like a leaf in a white water stream, 2-blocks down the street. I managed to grab a lamp post to keep myself from getting swept further into the frothing human rapids.

And so it went for an entire day. As the torch zigged through the city, I zagged — staying one step ahead of the flame but never, for a moment, escaping the enthusiastic masses crowding the downtown streets. By mid-afternoon, I realized my best chance to get an unobstructed shot of the flame would occur on the shores of False Creek, which the torch was scheduled to cross by canoe.

On Saturday and Sunday, I succumbed to the desire to be a tourist in my own town — visiting as many Olympic venues as possible, and soaking up the culture and excitement of the games. Today, Monday, I will regain my professional composure and, joyful indiscretions behind me, begin to photograph these games with the sort of “street” eye that I, and my readers, expect.


DONATION to this site’s continuing evolution. As you’ve likely realized, ULTRAsomething is not an aggregator site — serious time and effort go into developing the original content contained within these virtual walls.
Categories : Musings
Tags : Olympic flame, Olympic torch, Olympics, Vancouver 2010
Posted by Egor 
· February 8, 2010 

This is Going to be Fun

Its inevitability has, for a decade now, been forced into my consciousness and my subconsciousness. It’s become a part of my Id, my Ego, and my Super-Ego. Its costs, benefits, politics and promise have permeated local news outlets since I first moved to Vancouver at the dawn of the 21st century. “It” is the XXI Olympic Winter Games and, in four days, “it” finally arrives in my downtown neighbourhood — on the very streets that I traverse each and every day.

There is a flurry of activity unlike anything I’ve seen before. Last minute construction projects seemingly exist on every corner and, if I didn’t know better, I’d swear that “construction worker chic” is this year’s haute couture — anyone not sporting a hardhat and tool belt is so “last year.”

Although the Olympic Games don’t open until this Friday, the tourism influx has begun en masse. Many streets are now closed to traffic — their sidewalks no longer able to contain the exuberant throngs of revellers.

Last year, in an article entitled ‘Tween the ‘Weens, I postulated that there was no greater day for a street photographer than Halloween. So sweet the ignorance of youth. For, in reality, Halloween is but a flickering candle compared to the magnificent luminosity of the Olympic torch. Look left, look right, look up or down — photo opportunities abound in every direction.

Perhaps, like the image above, a photo opportunity might appear within life’s simple moments — a glimpse of a gentleman struggling to contort himself into a snowboarding pose.

Or on a more global scale, as shown below, it might be Taiwanese First Lady, Chow Mei-ching and her entourage, touring the Lantern Forest and Sculpture Garden on Granville Street. Some of the sculptures are a bit avant-garde — a fact that, perhaps, should have been communicated in advance.

Maybe, as seen here, the photo opportunities will appear metaphorically. Fame, riches, and an early retirement await official Olympic mascots Quatchi, Miga, and Sumi. But for those mascots who, for one reason or another, failed to attract the attention of the International Olympic Committee, 2010 promises to be another tough year.

I’ve got my cameras. I’ve got my lenses. And I’ve got comfortable shoes. Let the games begin!


©2010 grEGORy simpson

If you find these photos enjoyable or the articles beneficial, please consider making a DONATION to this site’s continuing evolution. As you’ve likely realized, ULTRAsomething is not an aggregator site — serious time and effort go into developing the original content contained within these virtual walls.

Categories : Musings
Tags : Olympics, Photography, Street Photography, Vancouver 2010
Posted by Egor 
· January 28, 2010 

DagNAMMit

There’s an old riddle that asks, “Where does an 800 lb. gorilla sit?” The answer is, of course, “anywhere it wants to.” Ostensibly, this article is about photographing the NAMM show in Anaheim, California. But it’s also about photography’s own 800 lb. gorilla — the modern state of photojournalism.

I’ve spent the bulk of my adult life designing, documenting, and using high-tech musical instruments and recording gear. Like lemmings, those of us involved with this profession embark, each January, on an annual pilgrimage to the NAMM show in Anaheim, California. For all intents and purposes, NAMM is an industry trade show — matching folks who develop and manufacture musical products with those who buy them. To the man on the street, NAMM — like any industry trade show — is about as significant as your brother’s second wife’s cousin’s first husband’s sister-in-law.

But there’s something a little ‘different’ about NAMM, starting with its name. NAMM is an acronym for the “International Music Products Association.” If you think that’s absurd, you’re in for a treat. NAMM is a daft and enormous human interest story. It’s a cornucopia of stars, wannabes, has-beens, and never-wases. It’s a sea of burned out salesmen and bubble-bottomed booth babes. It’s fashion faux-pas-a-go-go — a dense and delicious parade of hairspray, costumes, cheese, hype, and hyperbole. It’s a cultural clash in which french horn aficionados, software nerds, and guitar shredders all converge and breathe the same air for a 4-day period. It’s the bars, the parties, and the frantic midnight design tweaks. It’s the endless walking, talking, and negotiating. NAMM is its own civilization. It’s an event that, I believe, would pique the interest of the general public were they to actually learn of its existence.

NAMM is not without press coverage. But like most industry shows, it attracts only industry press. In this case, that means publications and web sites that cater to the musical products industry. To the industry press, NAMM’s circus atmosphere is simply something to be endured. Deftly dodging mohawks and miniskirts, reporters flitter from booth to booth to bring their readers news of the latest supergadgets. Absent from the proceedings are the “real” press. I find this omission curious, because NAMM possesses enough attributes to garner a modicum of general appeal. After all, doesn’t everyone like celebrities? And who doesn’t enjoy the odd cultural train wreck? So, unlike the last 25 years in which I attended NAMM to gear-gawk, this year I turned my eye and camera away from the gizmos and contraptions, and toward the attendees themselves.

Fundamentally, photographing trade shows is quite similar to my favorite photographic discipline — street photography. However, from a technical standpoint, there are a few key differences. First, there’s the light… or lack thereof. Trade shows are dimly lit, and the color spectrum is bizarre (at best) and punishing (at worst). The thick crowds can hamper a photographer’s mobility and positioning, and the miles of aisles make it essential that your equipment is as portable as possible.

I chose a fairly simple and flexible kit: Around my neck was a Leica M8 with a 28mm f/2 Summicron lens. Slung across my shoulder and dangling, upside-down on a BlackRapid R-Strap, was a Canon 5DmkII with an 85mm f/1.8 lens. The Leica’s mission was to shoot ambience, fleeting moments, and anything necessitating a “wider” field of view. The Canon’s mission was to shoot closeups and anything I felt would benefit from its lower ISO noise. The Leica, as always, was my “run and gun,” go-to camera. I kept it set at ISO 1250, 1/125s, and f/2.8. In an ideal world, I would prefer to have used ISO 640, but I couldn’t risk the motion blur that would result if I dropped the shutter speed a stop. Nor could I gamble on f/2 and its narrower depth-of-field. I was zone-focussing so I could respond to NAMM’s frequently ephemeral moments — a technique that rarely enables one to achieve critical focus. Hence, I needed the extended depth-of-field to mask the inevitable “focus errors” guaranteed by this approach. Whenever I had more than a couple of seconds to frame and capture a photo, I’d sling the 5DmkII up to my eye. Under these lighting conditions, I knew the 5DmkII would give me a higher-fidelity photo, while the Leica would insure I’d capture those momentary opportunities that would elude the SLR.

The combination worked well and allowed me to be quick, mobile, and agile. The 5DmkII, which I don’t normally subject to crowds, nestled comfortably into the small of my back, and its 85mm lens (which I chose mostly for its lightness and diminutive dimensions) did not protrude from my body. Nor did it, in any way, create an impediment for my mobility in the crowds.

In today’s world, shooting a story is the easy half of the equation. Selling a story is something entirely different. Selling requires you to shake hands with that 800 lb. gorilla. And, frankly, I haven’t found this particular primate to be overly affable. Of course, photojournalists have been bemoaning the ‘inevitable’ demise of the profession since the 1960’s but, in reality, the vocation hasn’t so much declined as changed.

Television, for example, did not eliminate photojournalism. Instead, it gave us a new form of photojournalism based around moving pictures, rather than stills. Television did not entirely replace print. Newspapers and newsmagazines remained valid and profitable sources of information, and these print sources relied heavily on “iconic images” — photographs that would summarize a story and invoke emotion and reaction in ways that words never could. Television, recognizing the need to succinctly encapsulate an entire story in the same way as an iconic image, developed its own version — the “sound bite.”

Things remained relatively stable until the early days of the world wide web, when some dim bulb of a businessman decided that newspapers and newsmagazines should offer all their online content for free. Fast forward fifteen years, and we have only a smattering of newspapers remaining. Those that remain have all fired their photography departments — choosing, instead, to invite readers to email their cellphone photos to the newspaper. The result? A photographic literalness that is as obvious as it is boring.

I come from the “iconic image” school. It’s not an actual school, but a way of seeing things and thinking about the world. On a personal level, I am touched more by powerful photographs than by words, video, or sound. I remember history by its iconic images. When I look for photographs in my own life, I look for metaphors, symbols, and allegory. For me, a story isn’t so much about the actual event; it’s about how that event affects someone or something. I find, with each passing year, a dwindling number of people who feel as I do; who understand that photography does not need to be literal and is, in fact, more powerful through metaphor. The 800 lb. gorilla does not appreciate photography nor its ability to tell a story. The 800 lb. gorilla does not seek subtlety, context, or meaning.

Photojournalism is changing… but into what? No one knows exactly. As “news” websites continue to fill their pages with blatantly obvious and freely obtained cellphone photos, is there still a paying market for photography? If there is such a market, where is it developing, and in what format? While pacing the carpeted blue aisles of the 2010 NAMM show, these questions rattled around my head. Who, today, would actually pay for photos from NAMM? Assuming such a publication even exists, what sort of images do they want? Is the iconic image dead? Should I shoot quantity rather than quality? What do I need to do in order to sell these photos?

First, I stifled my own aesthetic urges and capitulated to the deafening demand for color. Second, I succumbed to my theory that modern readers quickly grow bored with a few ruminative images and, instead, prefer the constant stimulation of many. Third, I bowed to my belief that these same mythical and modern readers aren’t even readers at all, but “watchers.” This meant I would need to present my text and images in a colourful, quick-cut, video-like format, rather than a traditional text and photo spread. The result appears on the linked page, below:

ULTRAsomething Report: NAMM 2010 – Culture, Chaos and Cacophony

Am I cynical? Maybe… probably… OK, definitely. I don’t necessarily fear for an end to photojournalism, but I do fear for an end to poignancy — an end to what Cornell Capa called “concerned photography.” I, and others like me, will bend and mold and persevere. I have audio and music skills, writing skills, photography skills, and video editing skills. In short, I have all the “tools” to be a journalist in the coming iPad-driven “convergence” age of media. If media outlets one day become profitable and willing to pay for content, I can provide it. But I worry that the iconic, thoughtful, and solitary image will be pushed aside and lost amongst the hoopla, noise, and frenzy of all that motion, sound, and graphics. Will photojournalism still be about the story, or will it become media for media’s sake?

My fear is tempered by optimism. Magnum Photos is attempting to show us that the iconic images shot by their (and the world’s) greatest photographers can still pack a wallop in the modern world;  that multimedia can actually enhance, rather than detract from, the images. To test their theory, I viewed Magnum Photos’ multimedia presentation of Josef Koudelka’s photographs of the 1968 invasion of Prague. I believe Josef Koudelka is one of the greatest photographers to have ever walked the earth. Magnum’s presentation of this story shows us that great images can transcend their print origins and, if treated with respect and understanding, thrive in this digital age of convergence.

Oh, and that silly little multimedia NAMM story that I crafted specifically for a modern audience? Turns out there was no need to worry. There are actually plenty of content-hungry websites that are more than happy to publish it… for free. Welcome to photojournalism in the year 2010.


©2010 grEGORy simpson

If you find these photos enjoyable or the articles beneficial, please consider making a DONATION to this site’s continuing evolution. As you’ve likely realized, ULTRAsomething is not an aggregator site — serious time and effort go into developing the original content contained within these virtual walls.

Categories : Musings, Photo Techniques
Tags : mohawk, musicians, NAMM, Photography, Photojournalism
Posted by Egor 
· January 3, 2010 

The Megapixel Thief (Part 2)

I watched my friend light the wick on a small alcohol burner and place it under a glass container filled with fresh water. As heat from the single flame increased the water’s temperature, it began to steam. The pressure of the steam forced the water to rise from the lower glass container, through a tube, and into another glass container above it. The freshly ground coffee within the upper vessel began to dance violently within the turbulent, churning water. When the last drops of water had been forced into the upper chamber, my friend extinguished the flame and the resulting vacuum drew the rich brown liquid through a filter and back into the bottom container. He decanted it into a large cup, and I took my first sip — heavenly.

This method for brewing coffee, invented in the 1830’s, has long since been replaced by the faster, easier, and cleaner drip machine. In this hurry-up world that values convenience over quality, the vacuum technique has been nearly forgotten. What a shame. Because there’s absolutely nothing that will rival the quality of a cup of coffee prepared in this manner.

As I sat nursing that luxurious beverage, I pulled my ‘new’ late-1950’s Yashica Mat Twin Lens Reflex from my camera bag. I fondled its beautiful dials, popped open its viewfinder, and gazed down onto the ground glass focusing screen. There, on the screen, I saw the image of my friend disassembling and cleaning his vacuum coffee apparatus. “Such a lot of trouble,” I said to myself, “but so worth it.”

The statement applied to the coffee maker, but it might just as well have applied to the camera. Like the vacuum coffee method, the Twin Lens Reflex (TLR) is a mechanical marvel — born of another time, forgotten in the haste of our convenience-centric world, but without peer for those whose passions force them to look beyond the ordinary.

In Part One, I outlined the rationale behind my decision to purchase a TLR. In actuality, I had always wanted a Rolleiflex. Their utilitarian beauty and the genteel manner in which one must bow when taking a photograph appealed to my aesthetic nature. The photographer in me liked the big 6×6 negative, the fabulous lens, and the fact that it could deliver impeccable images — as demonstrated so aptly by such greats as Richard Avedon and Helmut Newton. The rush to digital has seen many a photographer abandon his old medium format equipment in exchange for the latest plastic Wunderkamera. This means we’re now living in a buyer’s market. And a buyer’s market means bargains. And bargains mean that even a photographer of meager means can own a Rolleiflex.

Unfortunately, my means aren’t quite highfalutin’ enough to be classified as “meager.” Rolleiflex cameras have ‘collector appeal,’ which means many people buy them for the prestige of owning them, rather than the fun of using them. My desire to own a Rolleiflex had everything to do with “use” and nothing to do with “prestige.” Since I wasn’t 100% certain I’d enjoy photographing with a TLR, I wasn’t quite ready to experiment with the process at Rolleiflex prices. So, instead, I purchased a Yashica Mat — a 1950’s Japanese camera that faithfully and painstakingly stole nearly every design element from the German Rolleiflex. Yashica Mats have no collector value and no commensurate mark-up. At last, I had my TLR.

Ancient History 101

For the edification of those who are unfamiliar with Twin Lens Reflex cameras, I’ll provide a brief overview. These cameras have — as you can tell by both nomenclature and appearance — two lenses, not one. Both lenses are of equal focal length. The top lens, called “the viewing lens” has no shutter or adjustable aperture. It is forever and for always watching the world pass before it, and projecting a view of that passing world onto a large ground-glass screen, which the photographer uses to frame and focus the image. The viewing lens is never used to take the photo — only to provide the photographer with a ‘preview’ image. The bottom lens, cleverly called the “taking lens,” is the one with the adjustable aperture and shutter, and is used to actually expose the film and take the picture.

The twin lens system provides numerous advantages over the more well-known single lens (SLR) method. All SLRs have a mirror that sits between the film plane and the lens, which is what allows you to look through the lens to frame and focus your shot. TLRs have no such mirror, since you view the world through one lens and capture it with another. The problem with the SLR is that, when you press the shutter release, the mirror needs to swing up and out of the way. This is a source of several frustrations. First, when the mirror swings up, you can no longer look through the lens. This means your viewfinder ‘blacks out’ precisely at the most important moment — the moment of exposure. Prior to the days of digital cameras with rear-panel LCDs, this moment of blindness meant photographers never really knew whether or not they had captured the ‘decisive moment.’ Second, the physical force required to rapidly flip a mirror out of the lens path creates a lot of vibration. Vibration results in camera movement, which reduces image sharpness and, in particular, forces photographers to use faster shutter speeds than they would ordinarily wish to use. Third, the noises emitted by an SLR’s slapping mirror and focal plane shutter are quite loud in comparison to the nearly silent leaf shutters used by TLR’s. This makes the TLR far stealthier than the SLR.

Of course, for every argument one can proffer for the TLR, SLR aficionados can offer a counter-argument. For example, because you look through a different lens than you photograph with, TLRs are prone to parallax error. So, too, is it impossible to preview a photograph’s depth-of-field with a TLR. I’ll leave it up to you, the reader, to determine which system’s advantages speak to your needs.

View From the Streets

In the 1950’s, the TLR was highly touted for its discretion. The main reason for this reputation is that, because you peer down into the camera rather than raising it to your eye, it’s much less obvious when you’re taking a photograph. And, when you do take a photograph, its leaf shutter emits almost no noise at all. Here in 2010, a TLR is no longer a discreet photographic tool. When was the last time you saw someone walking around with a TLR dangling from their neck? In the 1950’s this would have been a fairly common sight, so a photographer could easily fire off waste-level shots without the subject’s knowledge. Today, the very act of carrying a TLR in public is somewhat akin to walking down the street with a live lobster on your head. People will notice you. Everyone will notice you. This single fact, alone, is worth the $95 I spent on the Yashica Mat, because the looks I get from total strangers are priceless. It’s amazing how many different ways people can contort their faces, yet still convey that the phrase, “what a moron!” is echoing through their head.

Sadly, its ability to attract both attention and derision limit the Yashica Mat’s use for documentary-style street photography, though I haven’t totally given up the idea. I imagine that large crowds will dilute the ‘lobster hat’ effect of the Yashica Mat, and it might yet prove its worth as a capable camera for reportage. One of the more interesting scenarios, which I have yet to try, is to hold the camera upside-down, high above my head. I will then be able to gaze straight up onto the focus screen and photograph a viewpoint available only to professional basketball players and people with articulating LCDs. I plan to give the Yashica Mat a thorough ‘street’ workout come February, when the 2010 Winter Olympics descend upon my Vancouver home.

Getting to Know the Yashica Mat

As you might gather, photographing with the Yashica Mat requires deliberate and thoughtful action. Modern, digital photographic conveniences that I’d long ago taken for granted were instantly flushed away, and I was forced to reconnect a neural network that hadn’t been powered on in over a decade. Not only would there be additional complexities related to scanning the film, processing the film, and exposing the film — but even the very act of choosing the film has a certain gravitas. With digital cameras, you can choose your ISO speed on a shot-by-shot basis, but when you load a roll of 120 film, you commit to shooting at a single ISO speed for the next 12 images. How long will it take me to expose the next 12 shots? Will I shoot mostly indoors or outdoors? Under bright sun or cloudy conditions? If I guess wrong, my images will suffer. All that pressure and I haven’t even loaded the camera yet!

Fortunately, it was quite sunny on the day my Yashica Mat arrived, and I knew I’d be shooting a full roll in order to get a feel for the camera. So I felt comfortable with my decision to unwrap a package of 100 speed film. As I threaded the film onto the upper spool and began to rotate the camera’s crank, I heard a little voice mutter, “you must be crazy.” I looked around the room, but saw I was alone. I closed the camera back, and continued to crank the film advance handle. “You’re totally crazy,” said the little, disembodied voice.

“Look,” I shouted to no one in particular, “not only is the camera beautiful, but it only cost $95!” The voice said nothing. What could it say? It knew I was right. I slung the Yashica Mat over my shoulder and headed outside.

After surviving the stress of deciding which film to load, I knew the next problem I’d encounter would be setting exposure. This particular model Yashica Mat doesn’t have a built-in meter. Although I’m fairly adept at assessing and applying the numerous variants of the “Sunny 16″ rule, I wasn’t sure exactly how accurate this camera’s aperture or shutter speed might be. So, to be on the safe side, I also brought along my Sekonic L-358 light meter.

I quickly realized my choice of film speed was even savvier than expected. I wanted to test the performance of the f/3.5 lens at its wider settings, but the Yashica Mat has a maximum shutter speed of only 1/500s. I’d grown so accustom to the 1/8000s speed offered by my digital cameras, that I’d failed to take this factor into consideration when selecting which film to load. Had I chosen to load the camera with 400 speed film, the combination of that 2-stop penalty, coupled with the 4-stop shutter speed penalty, would have required me to shoot at f/8 or higher. It’s amazing how mentally soft I’ve gotten in the digital age.

Having now selected the proper film, and circumnavigated any exposure issues, it was time to face the third barrier standing between myself and my first photograph — framing. I popped open the top of the TLR and gazed down upon its focusing screen. Greeting me was a big 2 1/4” square view of the world in front in front of me. I turned my body to the right, so as to compose a better shot — the camera responded by moving the image in the opposite direction. “Crap,” I thought, “I completely forgot that the viewfinders on these cameras show a mirror image of the scene.” If you’re looking at the focus screen and think you need to move the camera a little to the right, you really need to move it a little to the left. It’s as annoying now as it was way back in the day. Fortunately, photography and bicycle riding have a lot in common and, by the end of my first roll of 120, I was once again accustom to, if not thoroughly comfortable with the inverted image.

With the image now properly framed, I was ready to focus. I again gazed down at the focus screen. The image looked a bit soft, so I turned the focus knob. The image looked even softer. I turned the knob in the opposite direction. Still soft. I suddenly realized that my presbyopic eyesight was causing a problem similar to that which plagues my ability to use the rear LCD on a modern digital camera — I simply can’t focus on near objects without donning my reading glasses. Although the viewfinder on the TLR is far enough from my eye to provide a reasonably clear view for framing, it’s still too close for me to make critical focus decisions. Fortunately, those clever TLR designers thought of this, and provide a solution — a pop out magnifying glass! A spring-loaded magnifying loupe is attached permanently to one of the viewfinder shades. A quick push to the shade flips out the glass, which sits directly over the centre of the viewfinder. With this, I was able to achieve critical focus without having to fumble and bumble about with reading glasses.

Finally! The camera was loaded with the correct film, the exposure was set, and the image was framed and focused. I pushed the shutter release — nothing. Oh, that’s right. I’ve got to flip out the handle, crank the film into position, and cock the shutter. Duh! I cranked the crank, re-framed the image, checked the focus and… pszt! The soft-spoken whisper of the leaf shutter was like music to my ears.

Immediately, I was flooded with a desire to look at the image! Did the camera’s aperture and shutter deliver the correct exposure? Did I jerk the camera? Is there a signature look to the taking lens? Does it flare? Never could I imagine how much I — a man so derisive of the modern photographer’s obsessive need to chimp images on his LCD — would wish for a chimp screen of my own. In that instant, a whole host of additional memories returned. I remembered how I would sometimes take an exciting photo near the beginning of a roll, then have to wait days (or even weeks) before I would finish the roll and process the film. In that time, my excitement about that photo would only grow, and my expectations for it would magnify with each passing day. Waiting to see one’s pictures conjures up many of the same emotions as a child feels waiting for Christmas day. It’s a rather pleasant feeling and, more importantly, it teaches us the art of patience — a trait that much of mankind began to relinquish right around the time we let drip coffee makers into our homes.

Digital Integration

After paying the $5 processing fee to my local lab, I held the exposed strip of film up to the light — Hurray! There were images contained within every frame. My 50 year old camera works! I rushed home, cut the film into 4 strips of 3 exposures each, and loaded the first strip into my Epson V600 scanner. I had learned long ago to avoid a scanner’s bundled software and have, instead, been using Hamrick’s VueScan for the past decade. I launched VueScan and spent the next hour experimenting with different scan settings, resolutions, and bit depths. Ultimately, I’ve chosen to scan my 120 negatives with some fairly simplistic parameters — 3200 dpi; 24-bits; single pass.

Although my scanner has an optical resolution of 6400 dpi, I could see little (if any) difference between a negative scanned at 6400 dpi and one scanned at 3200 dpi and up-sampled. A 6400 dpi scan creates a 200 megapixel image — a file so large that even the most rudimentary post-processing operations make darkroom printing seem like a snappy, fast-paced activity. Neither did I see any demonstrable evidence that increasing the number of scanning passes resulted in a higher fidelity file. While I could see subtle differences between an image scanned in one pass versus the same image scanned in three, I was hard-pressed to pronounce that one was actually “better” than the other — just different. So, single-pass scans work fine for me. I did make one concession to a slower workflow — I’m performing an infrared pass to assist with the process of cleaning any dust or scratches from the negative. Careful analysis revealed no detrimental effects from the process, and the time saved manually removing some of these dust specs more than offsets the time required by the extra scanning pass.

The end result is a 50 megapixel square image that contains copious amounts of detail coupled with scads of forgiving analog dynamic range. I may be a Leica lover and a fan of the 3:2 negative, but my favorite aspect ratio has always been the humble square. Unlike the rectangular formats, the 1:1 ratio uses the majority of the image circle projected by the object lens. Rectangular images pre-crop your photos by discarding a large percentage of usable image. The square format, in contrast, captures everything and lets you decide, later, how best to crop the photo.

The 50 megapixel files fit nicely into my digital workflow. They’re stored on a hard drive, and catalogued in Adobe Lightroom, right along side the digital captures — ready, willing, and able to handle any extreme post-processing demands I wish to make on them.

Conclusions

Shooting with the Yashica Mat is more than just a blast from the past — it’s a blast. Period. Its photos have a certain ‘classic’ look that’s decidedly analog yet, by scanning the negatives, you can work with its images exactly as you do with those captured by your digital gear.

There are, obviously, more steps to take and more considerations to make when you shoot film. You can’t change ISO in mid-roll; you can’t check your images in the field; you can’t get the images into Photoshop without first processing and scanning the film. But, unless you’re too young to have had any experience with film, these are all things you knew before diving into the deep end.

I’m certainly not new to film, but I am new to the experience of shooting with a Twin Lens Reflex. My love for rangefinders had convinced me that, likely, I would also enjoy the TLR process. Like a rangefinder, one frames and focuses a TLR by looking through a viewfinder that’s in proximity to the taking lens — rather than looking through the lens itself. My prediction proved accurate, and I took to the Yashica Mat quite quickly. Any time you get a new camera — even one that’s over 50 years old — it forces you to break some old habits and see the world in a slightly different way. Even knowing this, I wasn’t quite prepared for the liberating new way I see the world with the TLR. As much as taking a photo with a modern point-and-shoot feels ‘wrong,’ taking a photo with a TLR feels “right.”

There are quirks and curiosities to be sure. Once, the film advance mechanism locked up, and I was forced to reset the film counter — a process that apparently caused me to waste 3 shots in the middle of a 120 roll. On another occasion, I removed the camera from my bag, only to notice that the back plate’s locking mechanism had somehow failed — causing the back to crack open and fog one of the frames. Finally, after a decade of being able to shoot as many photos as I wanted “for free,” it’s a little hard to return to the frugal shooting tactics that film demands. Originally, I’d planned to offset the film processing costs by shooting black & white, which I can develop at home for about 1/4 the price. In reality, I probably won’t shoot enough with the TLR to justify the extra trouble. Besides, digital black & white conversion gives me much more control over the final image. Also weighing heavily in favor of color film is the fact that silver-based films (meaning “black and white”) do not work with a scanner’s dust-busting infrared scanning technique.

The Yashica Mat will never be my ‘go to’ camera. The inherent restrictions of 120 roll film, the deliberate nature with which one must expose, focus and frame, plus the tedium of scanning — all combine to make photographing with a Yashica Mat a labor of love. There is, of course, nothing wrong with this. Even though I photograph professionally, that doesn’t mean I have to use every camera in a professional situation. Any photographer, worthy of his trade, got started because of a love for photography; and shooting with a Yashica Mat has a way of rekindling that love.


©2010 grEGORy simpson 

If you find these photos enjoyable or the articles beneficial, please consider making a DONATION to this site’s continuing evolution. As you’ve likely realized, ULTRAsomething is not an aggregator site — serious time and effort go into developing the original content contained within these virtual walls.

Categories : Photo Gear
Tags : Camera, Photography, Review, TLR, Twin Lens Reflex, Yashica Mat
← Previous Page
Next Page →

CATEGORIES

SEARCH SITE

SUBSCRIBE

Receive new post announcements via Email

LATEST POSTS

Something Pleasant

Tell Us How We Did Today

Book Report

EXORCISM 08

Dredging the Tide Pools

Drift

© 2025 ULTRAsomething
Articles | About | Privacy Policy | Donate | Contact
Manage Cookie Consent
ULTRAsomething uses plugins (which use cookies) to organize and optimize the site. It's kinda how blogs work.
Functional Always active
The technical storage or access is strictly necessary for the legitimate purpose of enabling the use of a specific service explicitly requested by the subscriber or user, or for the sole purpose of carrying out the transmission of a communication over an electronic communications network.
Preferences
The technical storage or access is necessary for the legitimate purpose of storing preferences that are not requested by the subscriber or user.
Statistics
The technical storage or access that is used exclusively for statistical purposes. The technical storage or access that is used exclusively for anonymous statistical purposes. Without a subpoena, voluntary compliance on the part of your Internet Service Provider, or additional records from a third party, information stored or retrieved for this purpose alone cannot usually be used to identify you.
Marketing
The technical storage or access is required to create user profiles to send advertising, or to track the user on a website or across several websites for similar marketing purposes.
Manage options Manage services Manage {vendor_count} vendors Read more about these purposes
Preferences
{title} {title} {title}