• Home
  • Blog
  • Gallery
  • Music
  • STORE
  • About
  • Contact
Posted by Egor 
· February 5, 2011 

Don’t Feed the Ostrich

Short of taking photographs, few things excite a photographer more than planning their next major camera purchase. Conversely, short of a trip to the dentist, few things excite a photographer less than contemplating a backup camera strategy. After all, money spent on a backup camera is money you won’t have available for that next primary camera body; or that fast prime lens; or that slick new flash; or that dream photo excursion.

Surprisingly (or maybe not), I actually know several working photographers who do the unthinkable — they go on assignment without any backup camera. Their logic, such as it is, seems to be based on the legendary ostrich tactic — if they don’t think about the worst case scenario, then they won’t experience the worst case scenario. But all it takes is a single camera failure to nullify the years of hard work you spent building your reputation. Clients don’t want to hear “Sorry, my camera broke.” They’re not paying for excuses — they’re paying for images. And the day you fail to deliver those images is the day you’ll say “I wish I had thought about a backup strategy.”

But here’s the thing — backup cameras don’t have to be boring. In fact, choosing the right backup camera may actually unlock a world of previously untapped photographic possibilities, while simultaneously helping you avoid the potential pitfalls of the single camera gamble.

So how can you put the “up” into your backup camera? What are some of the possible backup strategies, and what are the pros and cons of each? So glad you asked…

Strategy 1: The Clone

The most literal backup solution is also the most obvious — a second, identical model of your primary camera.

UPSIDE: Simplicity factors heavily into the clone strategy. Owning two identical bodies means you’ll cope with only one learning curve; it means you don’t have to rethink your techniques when switching to the backup camera; and it means any photographs shot with the backup will be indistinguishable from those shot with the primary camera. Identical bodies share accessories, so you don’t have to carry a different type of battery, a different type of quick release bracket, additional lenses, or an additional pocket manual. It also helps the photographer transition easily into a “two body shooter.” If you’re a zoom user, a 24-70mm on body #1 and a 70-200mm on body #2 will pretty much insure you get any shot you need. And, should one body go down, you can keep shooting without missing a beat.

DOWNSIDE: Many working pros choose a camera with a full-frame 35mm sensor as their primary body. Adding a second Nikon D3x, Canon 1Ds, or Leica M9 can be quite cost prohibitive. And if you’re shooting digital medium format, you’re probably still paying off a camera loan. So, chances are, you’re not overly receptive to the idea of going still further into debt. Even if you’re fortunate enough that cost isn’t an issue, there’s still another downside to the clone strategy — flexibility. No one camera system is perfect, no matter how expensive it is. You may have spent a fortune on a Phase One, but adding a second isn’t going to make you any more capable of shooting in low light. Your second D3x isn’t going to be any more “stealthy” than your first, and that second Leica M9 still won’t double as a wildlife camera.

Strategy 2: The Crop-a-Doodle-Do

The second backup strategy is to purchase a smaller “prosumer” version of your primary camera. For example, a full-frame Canon user might choose a cropped sensor Rebel or xxD model to serve as backup. A full-frame Leica M9 shooter might consider an old M8 or Epson R-D1 as a cropped sensor backup.

UPSIDE: As with the cloning strategy, the “crop sensor” solution helps to limit the amount of additional backup gear you need to carry. Since you’ve chosen a cropped version of your primary camera, it will (in most instances) mount all the same lenses as your primary camera. If the backup camera is made by the same manufacturer as your primary camera, there is probably enough similarity between operating systems that you can move from primary to backup without too much discombobulation. In almost every instance, choosing a prosumer camera to backup your pro model will greatly diminish the cost of owning a backup, which means you’re more likely to actually do it. And there’s another advantage over the clone strategy — flexibility. Although a cropped sensor body will take the same lenses as your full-frame primary camera, those lenses will behave “differently” on the backup body. Specifically, the crop body will act as both a free tele-converter and depth-of-field extender for each lens. This gives you options should you wish to employ both bodies on assignment. In some instances, it may even allow you to carry fewer lenses. For example, if you’re a full-frame Canon shooter and you add an old 50D as a backup body, the 50D’s 1.6x crop factor will change the field of view of any lens you mount on it. A 35mm mildly wide lens on your 5DmkII becomes a 56mm mildly telephoto lens on a 50D. Similarly, an 85mm lens on your 5DmkII becomes a 136mm lens on your crop camera. So, with only two lenses in your bag, you have access to four different focal lengths: 35, 50, 85, and 135. In addition, that crop camera will have extended depth-of-field, which allows you to pick-and-choose the camera body based on the shooting scenario.

DOWNSIDE: Obviously, a different body may require different accessories, such as quick release brackets and batteries. So you need to factor in the additional cost (and weight) associated with having duplicate sets of batteries, chargers, and the like. You also need to consider that, should your primary camera die, your widest lens might not be wide enough on a crop body. This may necessitate that you carry an additional extra-wide lens to cover any worst-case scenario.

This is exactly the strategy I employed when I worked as a photographer for BC Parks. I would often drive a couple of hours to a particular location, then spend another couple hours hiking up some mountain. The last thing I wanted was for my camera to fail once I reached my final destination. So I carried a 40D as backup to my 5D — using it as both “backup” and “teleconverter” (to reduce the number of lenses I needed to lug around in my backpack).

Strategy 3: The Pocket Porty

If Vogue, National Geographic, or even the bride’s CEO daddy aren’t footing the photography bill, it may be difficult to justify the added expense of a second system body — regardless of whether it’s a clone or a crop of your primary camera. But a small photography budget does not excuse you from your responsibilities. You still have a client that expects his money’s worth, and you still have a professional reputation to uphold.

One of the most popular solutions to this dilemma is the humble “enthusiast” camera. In general, these enthusiast cameras have built-in, non-interchangeable zoom lenses, and are similar to their pocket-friendly consumer-oriented camera cousins. But, unlike their cousins, the enthusiast models include additional features required by working photographers — features such as manual exposure, a hotshoe (which can be used to trigger external flash), and RAW file support. Canon’s G-series (currently up to the G12) and Panasonic’s LX series (now at LX5) are both very popular and capable examples of enthusiast cameras.

UPSIDE: The Pocket Porty is likely to be both your least expensive backup option and your most portable (though it will necessitate carrying an extra type of battery and charger). Its diminutive dimensions might just entice you to slip it into a pocket and, once there, you’ll probably discover all sorts of scenarios (like candids) that benefit from its non-threatening appearance. Because it uses its own built-in lens, rather than your system lenses, you’re not tied into one particular brand or form factor — it can back up any primary camera you currently own.

DOWNSIDE: Image quality, ergonomics, and responsiveness are the biggest prices you’ll pay for all that portability and frugality. Images from a small sensor simply won’t hold up to those taken with a full-frame or APS-C sized sensor. If your client’s demands don’t extend beyond web publishing, that’s probably OK. But if your images are destined for print, neither you nor your client may be satisfied with the results. Similarly, the hostile combination of tiny buttons and labyrinthian menus make these cameras much harder to control than a larger system camera. And their contrast detect focusing and general lack of a quality viewfinder make it difficult to both frame your shots and time them decisively. Then there’s the matter of your own image — should your system camera fail and your enthusiast compact be forced into action, the client may wonder why he’s paying pro rates for “point and shoot” photography.

Recently, photographers have started to see a new breed of enthusiast cameras that feature larger, APS-C size sensors. These cameras directly address one of the two major complaints about the previous decade’s enthusiast cameras — image quality. Cameras like the Sigma DP series, the Leica X1, and the upcoming Fuji FinePix X100 all use larger sensors, while retaining the “pocketability” requirement of their smaller sensor siblings. All three of these cameras stick to the concept of non-interchangeable lenses but, curiously, dispense with the zoom lenses employed by their forefathers. Instead, each sports a high-quality prime lens — generally in the 35-40mm range. While I’m exactly the sort of photographer who will always choose a prime lens over a zoom, this limitation may ultimately make these large-sensor compacts less appealing for “backup” duty. After all, the idea behind the backup camera is that, in a pinch, it can substitute for your big system camera and bag full of lenses. But without a zoom, your backup becomes limited to photos of a single focal length. What if that 35mm focal length isn’t the length your client needs? While this new breed of enthusiast camera is, indeed, a more exciting photographic tool than the G12/LX5 ilk, the jury (me) is still out on whether it’ll make a suitable backup camera.

Strategy 4: The Geezer

Throughout the entirety of the 20th century, talented photographers created beautiful images on film — photographs with the power to inspire us, touch us, teach us, or delight us. The advent of digital technology does not suddenly negate a photographer’s ability to create beautiful photographs on film. Yet many modern photographers seem to think that film is somehow beneath their talent and vision — as if shooting film will somehow make their photographs less valuable. Hogwash. Many of today’s top digital camera systems have their origins in the days of film — Yesterday’s Mamiya, Pentax, Canon, Hasselblad, Nikon, and Leica lenses will still perform on today’s digital bodies and, conversely, today’s lenses will often still perform on older film-based bodies. Why not back up that expensive full-frame digital body with a top-of-the-line film-based equivalent?

UPSIDE: Although your backup camera is film, it’s still from the same system as your primary digital camera — meaning it shares many of the same lenses and peripheral items. Although modern “wisdom” says “digital is better than film,” it’s really all about how you define “better.” Camera manufactures have spent a decade hammering home the idea that “better” means “sharper images and more resolution” — two characteristics that, not coincidentally, are indicative of what digital does best. But what if “better” means “greater dynamic range, a more natural and pleasing response to both shadow and highlight regions, and better tonality?” These are the merits of film — attributes that have been downplayed by camera marketing departments in the rush to digital. The fact is, neither film nor digital is better — they’re just different. And, as such, having the ability to shoot both can be a real boon to your photography. Here in rainy Vancouver, I’ve found another upside to shooting film — my mechanical film bodies have no electrical components, making them much more conducive to shooting in inclement weather. Another upside to film is that, thanks to the successful marketing campaigns of camera manufacturers, you can purchase some wonderful professional bodies for less than you’d pay for that Pocket Porty enthusiast camera — and with increased handling ability, flexibility in lens choice, greater durability, and drastically improved image quality.

DOWNSIDE: Film has a recurring cost that digital “lacks.” In reality, professional digital cameras are rendered ‘obsolete’ every couple of years, while professional grade film cameras can last decades. So the ongoing cost of film and processing is really more about perception than reality. But the fact is, should your primary camera break and your film camera be forced into action, you will incur additional film/processing costs for the photos you take. Also, a film-based workflow is slower — after 36 photos you need to stop, rewind, and reload. Similarly, film lacks digital’s ‘instant gratification’ factor since it needs to be developed, dried, and scanned before the client can see it. And film also lacks digital’s convenient ability to change ISO at any time — once you load a roll of film, you’re stuck with that ISO for the next 36 shots. Finally, some misguided clients — driven to delusion by years of successful digital camera marketing efforts — now demand that photographers deliver files that exceed a certain number of megapixels. This number often exceeds the file size delivered by all but the most expensive drum scanners, making post-processing even more tedious and expensive.

The choice of whether or not to use film as a backup to digital rests more on the expectations of your client than on any other factor. Today, many commercial clients expect to sit beside the photographer and instantly review each photo, as it’s taken, on a tethered computer monitor. News organizations expect photographers, while still in the field, to wirelessly upload images to a central server for immediate publication. But if a photographer is blessed with less-controlling clients, he (and the client) might both just discover that film’s upsides may actually negate its perceived downsides. In the past year, I have rethought my own backup strategy, and am no longer backing up my Leica M9 with a cropped-sensor M8. Instead, I’ve opted for two backup solutions: film is one (compliments of an M6 TTL and an M2). The other is discussed next…

Strategy 5: The Transformer

These cameras, like their toy- and movie-industry namesake, allow a photographer to transform his entire photography system from one type into another. The current spate of so-called “mirrorless” cameras are a classic example of how you can achieve this magical transformation. Many mirrorless system cameras, like Micro Four Thirds or Sony NEX, are capable of mounting lenses from other camera systems via an adapter and, as such, can function as backup cameras.

UPSIDE: With the right adapter, these cameras can mount all sorts of different lenses from all sorts of different camera systems. This means, in a pinch, that they can be coerced into “backup” camera duty. Their real beauty, however, lies in their transformative properties. Look, for example, at the case of my Panasonic DMC-GH2, which sometimes serves as backup and “second shooter” to my Leica M9. With a Novoflex adapter, my GH2 can mount all my Leica M lenses. The GH2 has a 2x crop factor, meaning a 21mm lens becomes a 42mm lens, a 50 becomes a 100, and so on. Since the M9 is not well-suited for telephoto use, the GH2 opens a world of new possibilities — converting that bag full of M-mount lenses into useful telephotos. In addition, one focuses the GH2 by looking THROUGH the lens (like an SLR), rather than looking through a separate viewfinder (like the M9). This also increases the capability of the M-mount system, since the GH2 transforms the M-system rangefinder lenses into an SLR-type system. With the addition of a GH2 body, those M-mount lenses become video lenses. Live view becomes a reality. The articulating LCD lets you put the camera in all kinds of odd locations, and depth-of-field can be previewed right on the screen.

DOWNSIDE: That same tele-converter function, which makes the GH2 so useful as a “second shooter,” can be somewhat detrimental should my M9 actually fail. While I can carry on shooting with the GH2, I would lose the ability to shoot wide angle. For this reason, carrying the GH2 as “backup” necessitates that I carry an extra lens or two — perhaps something like a Voigtlander 15mm, or one of the wider Micro Four Thirds system lenses. This, of course, adds a bit of weight to the travel kit. Also adding weight to the kit is the additional batteries and charger required by the GH2. Image quality will also suffer should your GH2 be forced into “backup” duty. Its smaller sensor simply can’t deliver the same dynamic range, resolution, or noise characteristics as a full-frame camera. And, since the sensors contained within these cameras have not been optimized for M-mount lenses, images shot with adapted Leica lenses tend to get a bit soft in the corners. Ultimately, the image quality tradeoffs are something you’ll need to weigh against your client’s needs and your own aesthetics.

Conclusion

Many pros consider backup cameras to be a necessary evil but, in reality, they’re a necessary “good.” When you stop thinking of your backup as “only” a backup, and start thinking of it as your “second shooter,” you bring a host of additional possibilities and options to your photography. As I wrote earlier, no single camera is “perfect.” Adding a backup camera can negate many of your primary camera’s imperfections, while doubling as a career-saving insurance policy. Just because your camera hasn’t yet failed doesn’t mean it won’t. Don’t let complacency be your downfall. Don’t feed the ostrich.


©2011 grEGORy simpson 

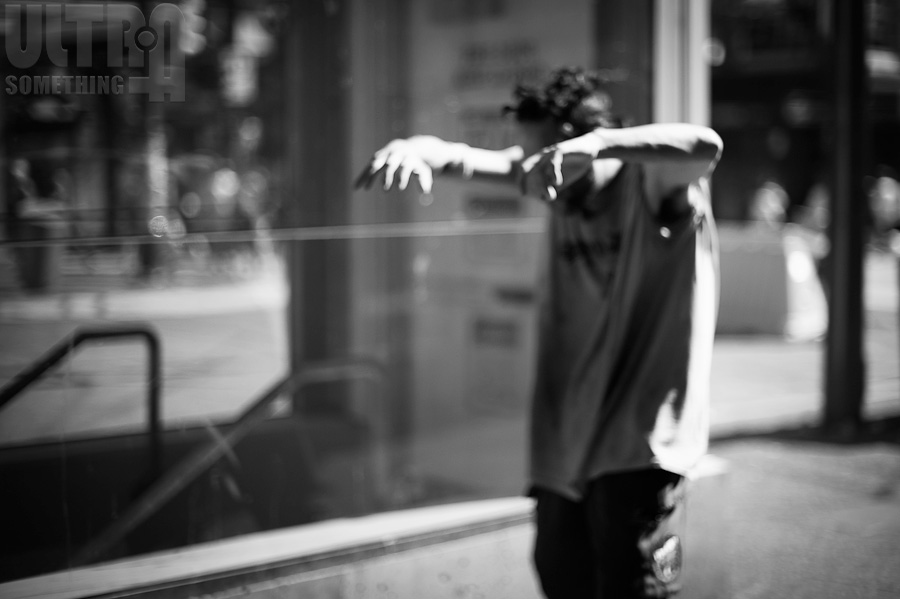
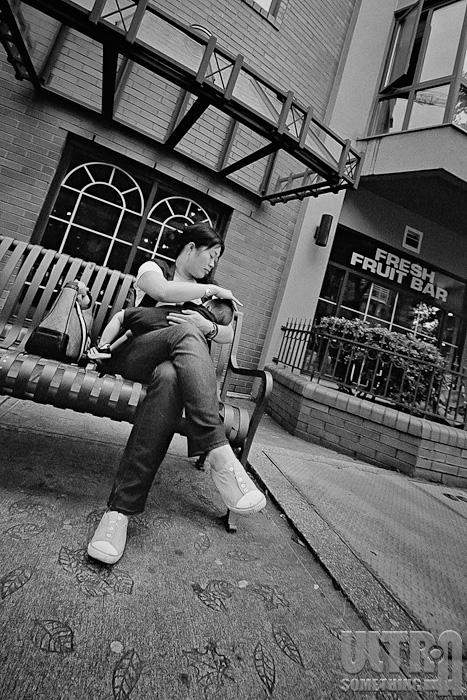
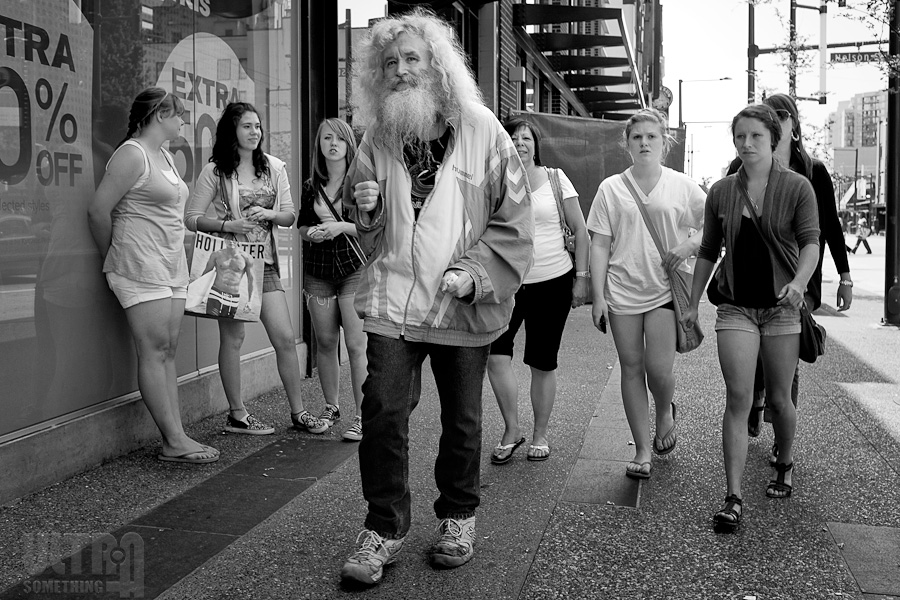
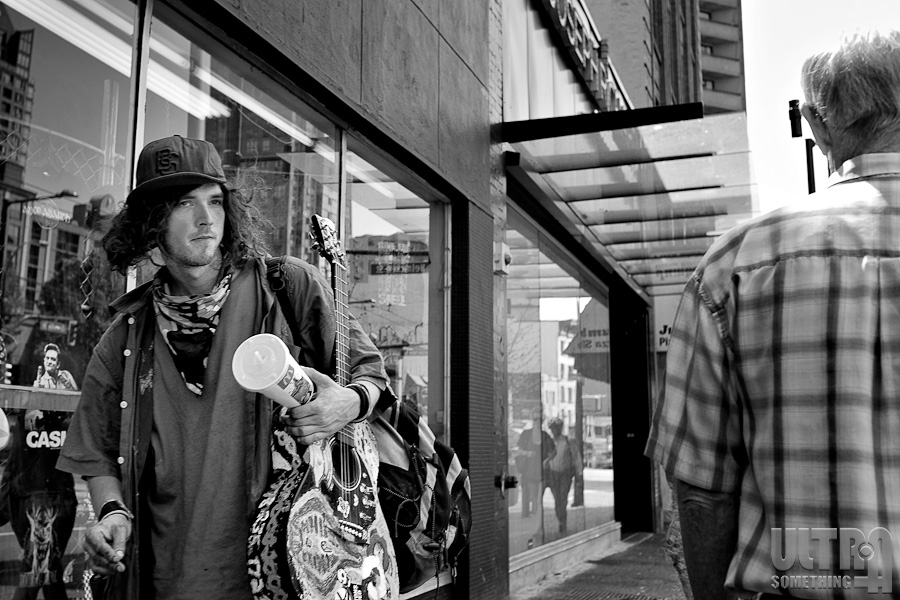
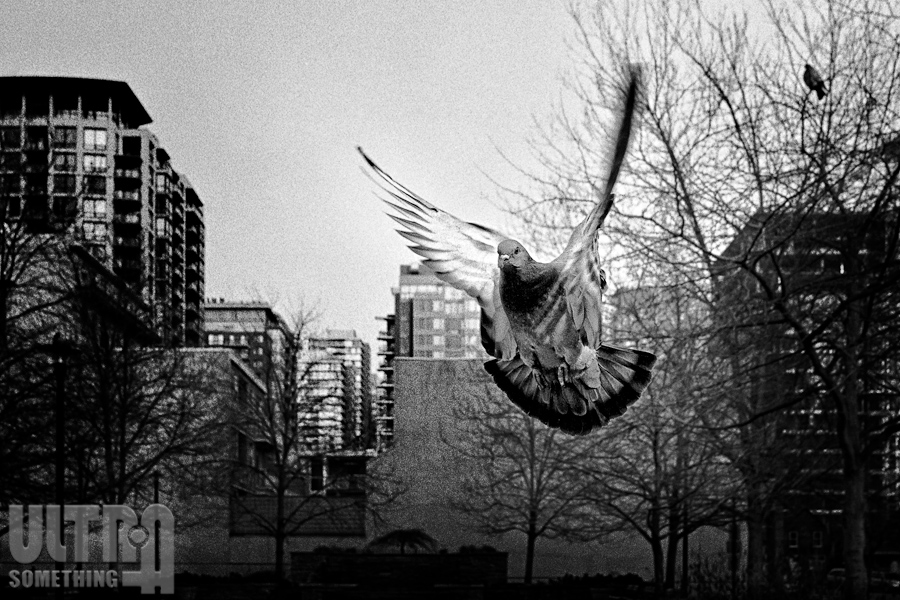
ABOUT THESE PHOTOS: “A Curious Pigeon” and “Ménage à Pod” were both shot using a Leica M2 with a Leica 28mm f/2 Summicron lens and Tri-X 400 developed in Ilfotec DD-X. “Alone, Under a Tree” was shot with a Leica M2, 21mm f/2.8 Elmarit pre-ASPH lens, and Tri-X 400 developed in Ilfotec DD-X. “Generation Skip” was shot using a Panasonic DMC-GH2 with a Leica 90mm f/2.8 Elmarit-M lens.

If you find these photos enjoyable or the articles beneficial, please consider making a DONATION to this site’s continuing evolution. As you’ve likely realized, ULTRAsomething is not an aggregator site — serious time and effort go into developing the original content contained within these virtual walls.

Categories : Photo Gear, Photo Techniques
Tags : Backup Camera, Black & White Photography, Film Photography, Leica M2, Leica M6, Leica M9, Panasonic DMC-GH2
Posted by Egor 
· January 12, 2011 

Saving Souls

Do you remember where you were in the autumn of 2008 when, drunk with greed, all the bankers in the world stripped naked, strapped on barrels lined with our life savings and plummeted over Niagara Falls?

I do. I had just completed a successful stint as the official photographer for BC Parks and was negotiating a long-term contract renewal. Anticipating the contract’s acceptance, I pre-ordered a Canon 5D Mark II camera and was well into researching my 37th backpack purchase — confident that a magic pack existed, which would render weightless all those tripods, ball heads, camera bodies and lenses that I insisted upon schlepping up every mountain.

If all went according to plan, I would soon sign up to travel around British Columbia and photograph its nearly 1,000 provincial parks — many of which were inaccessible except by helicopter and, thus, rarely seen by human eyes.

Alas, everything did not go according to plan. The worldwide cost of rescuing all those drunken naked bankers caused the provincial government to tighten their budget significantly and the photo project I’d been crafting for so long came to an abrupt end.

I could have moaned. I could have whined. I could have drowned my sorrows in a bottomless pint of Guinness and lamented the lost opportunity to become the most important landscape photographer in British Columbia history. Instead, I rejoiced.

Wired to the polygraph, I might admit that the celebration didn’t begin the very minute I learned of my impending unemployment. In fact, it took several months to gain the perspective necessary to begin the revelry. And it took something else, too — a Leica M8.

Don’t misunderstand. Leica did nothing to recoup the lost revenue potential of my BC Parks assignment — quite the opposite actually. Rather, the Leica M8 allowed me to recoup something far more important — my soul.

For twenty years I had put all my photographic energy into satisfying the visual sensibilities of others. No trend escaped me. No technical advance slipped beneath my radar. I lived on the bleeding edge of current and my photos dripped with the blood of the here and now. This, I reckoned, made me the consummate professional. After all, I’m being paid to satisfy someone else’s vision, not my own.

Only now I was no longer receiving any pay. As every out-of-work photographer knows, this means it’s time to rework the portfolio. With no definitive clients in mind, I chose to assemble a fairly generic collection — one that showcased my abilities in a number of different genres. The more I worked on this generic portfolio, the more obvious it became just how generic my photography had become. In my dogged quest to take photographs that satisfied others, I’d neglected to take any photographs that satisfied myself.

Nowhere in my portfolio were there any photographs that I personally admired. So I set out to rectify this and designated that fancy new 5D Mk II “channeler of my inner Winogrand.” But numerous SLR-related ergonomic factors rendered the experiment an abject failure. Next, I thought I could use high-end enthusiast cameras to release my inner Frank, but the cameras could not keep pace with the instantaneous demands I placed upon them.

Inner-Frank and Inner-Winogrand had plenty of company — Erwitt, Friedlander, Moriyama, Koudelka, Smith, Burri, HCB and hundreds more were collectively attempting to find photographic egress through my shutter. But none of my shutters would cooperate.

So I bit the bullet, purchased a Leica M8 and my world and everything in it suddenly became a photo opportunity.

If I passed a girl on the street smoking two cigarettes, the Leica let me photograph her. A dSLR would have been too obvious, and the enthusiast cameras would have been too slow to respond to the shutter click.

If a man stands and quickly checks his watch beneath a towering clock, it’s the Leica that lets me shoot him.

These are shot opportunities that exist all around me — opportunities that I’ve always seen, but could never capture until I turned to the rangefinder. So successful was my transition to the M8, that I gave it an M9 to keep it company. Then, in order to give them both a bit of schoolin’ in the old ways, I added an M6 TTL to watch over them.

And now, for the first time ever, I have a photographic portfolio that I’m proud of — one that, in all likelihood, will secure me far fewer jobs and more than an ounce of scorn — but it doesn’t matter. It doesn’t matter because, regardless of what anyone else says, I’m happy with my photos because they’re true — true to myself, true to my vision, true to my aesthetics, and true to my instinct. In fact, they’re so true to my instinct, that I chose Instinct as the title for my new photography book — the maquette of which is now available here on blurb.com.

So thanks Leica — I may never get a commercial assignment again, but you saved my photographic soul. That and a $4000 winning lottery ticket might just buy me a 50mm Summilux.


©2011 grEGORy simpson 

ABOUT THESE PHOTOS: The copyrights to “Alice Lake, British Columbia” and “Mt. Seymour, British Columbia” are owned by BC Parks, and were shot by grEGORy simpson using a Canon 5D.  “Fresh” was shot with a Leica M8 and a 28mm f/2 Summicron lens. “One of Those Days” was shot with a Leica M9 and a v4 35mm f/2 Summicron lens. “Ob(li)vious” was shot with a Leica M9 and a 28mm f/2 Summicron lens.

This article (along with many of its associated comments) first appeared Jan 12, 2011 in my f/Egor column for the Leica Camera Blog.

If you find these photos enjoyable or the articles beneficial, please consider making a DONATION to this site’s continuing evolution. As you’ve likely realized, ULTRAsomething is not an aggregator site — serious time and effort go into developing the original content contained within these virtual walls.

Categories : f/Egor (Leica Blog)
Tags : Alice Lake, Black & White Photography, British Columbia Provincial Parks, Leica, Leica M8, Leica M9, Mt. Seymour, Street Photography
Posted by Egor 
· January 5, 2011 

The Accidental Blogger

Assume you’re a photographer (which, since you’re reading this article, is likely a safe assumption). Assume you maintain some sort of photo blog (which, if you’re struggling to compete in today’s net-centric world, had better be a safe assumption). Assume further that you have a, umm, slightly unnatural love for Leica M-System rangefinders (a single, nearly imperceptible nod of the head will suffice for those of you too ashamed to admit this readily). Assume Leica contacts you, compliments your photography blog and asks you to write a tips column for them. You jump on it like a shark at an all-you-can-eat sushi bar. Right?

Assume, too, that you’re more sensible than I am — because I said “no” to Leica.

It’s not that I wasn’t flattered. I was. It’s not that I didn’t want to write for Leica. I did. It’s just that I abhor tips columns. They always launch with the highest of intentions, but soon, after the author exhausts all his grade A material, the column begins a rapid descent into the banal. In the blink of an eye, that once-helpful column starts serving up advice like, “for greater depth of field, use a narrow aperture” or “ten new ways to take adorable cat photos.”

Perhaps I was being too pessimistic. Maybe this wouldn’t happen to me. I needed to be certain. Fresh out of crystal balls, I gazed into the biggest hunk of M-mount glass I own, a Voigtlander 50mm f/1.1 Nokton lens. Too poor to afford the luxuriously prescient view through Leica’s own 50mm f/0.95 Noctilux, I knew the Voigtlander’s limited three-month glimpse into the future would have to suffice.

Staring into the front optical element, I was astonished to see myself wearing a new shirt. Normally, I’m loath to spend money on anything that doesn’t have a direct impact on my ability to take photographs. I did notice a certain unkempt, Howard Hughes-ish quality to my hair — perhaps reflective of my decision to purchase the shirt. Having sated my narcissistic tendencies, I stared deeper into the lens and saw that I was typing out something on the iPad. It was my new tips column for Leica. I focused the Nokton on the iPad’s screen. To my horror, I saw myself blogging about the M9?s snapshot profile feature. In my desperation to fulfill my tips obligation, I had resorted to plundering the owner’s manual for rarely used functions, which I was now extracting and presenting as tips. Beside me sat a Pulitzer Prize — earned just two months previously for my tip outlining how to achieve financial security through photography. It served as a cruel and ironic reminder of how far and how quickly I had fallen.

My suspicions thus confirmed, I contacted Leica and politely declined to be their tipster. Sure, the idea of winning a Pulitzer was tempting, but not at the expense of writing an article about the joys of snapshot mode. “If I’m going to blog for Leica,” I wrote, “I must have complete editorial freedom to write about whatever topic I choose.” And thus, as quickly as the opportunity presented itself, it disappeared…

… Except it didn’t. Leica actually agreed to these terms. Why they did, I do not know. I have a theory that involves Google and some curiously misinterpreted English-to-German web translation. But, whatever the cause, I was on the hook and there was no getting off. I am now committed to writing a column for the Leica Blog.

I have absolutely no idea where this column will lead. I have no notion of what I’ll be writing about and article frequency is a complete unknown. There are, at this time, only two things of which I am absolutely certain: 1) Every article will, in some way, directly or indirectly, tangentially or perpendicularly, relate to Leica, and 2) someone, somewhere is going to get very upset about something I write. So keep reading — it might just be you!


©2011 grEGORy simpson

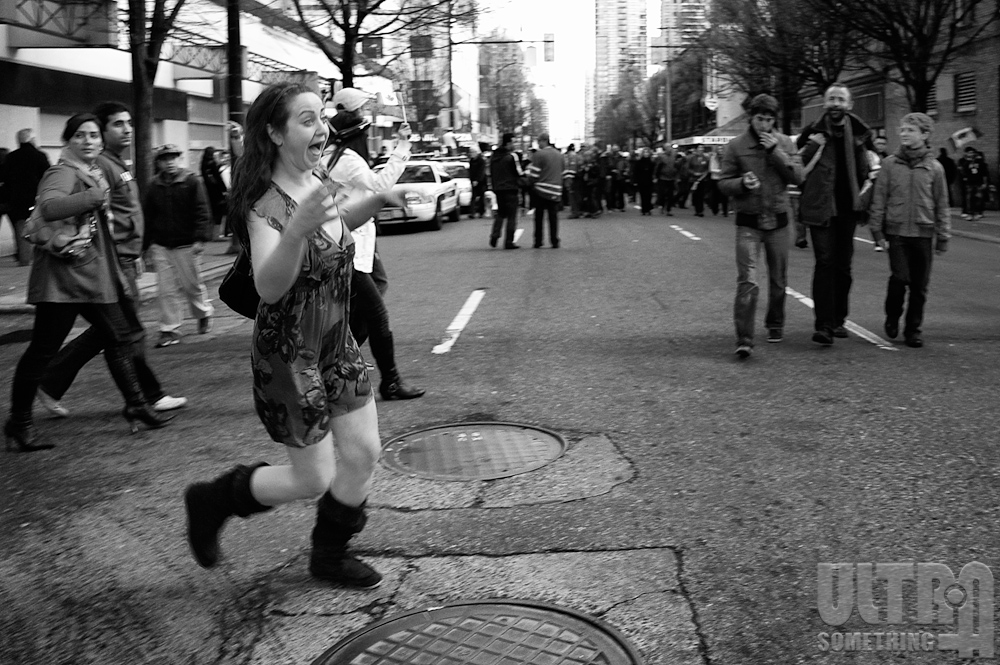
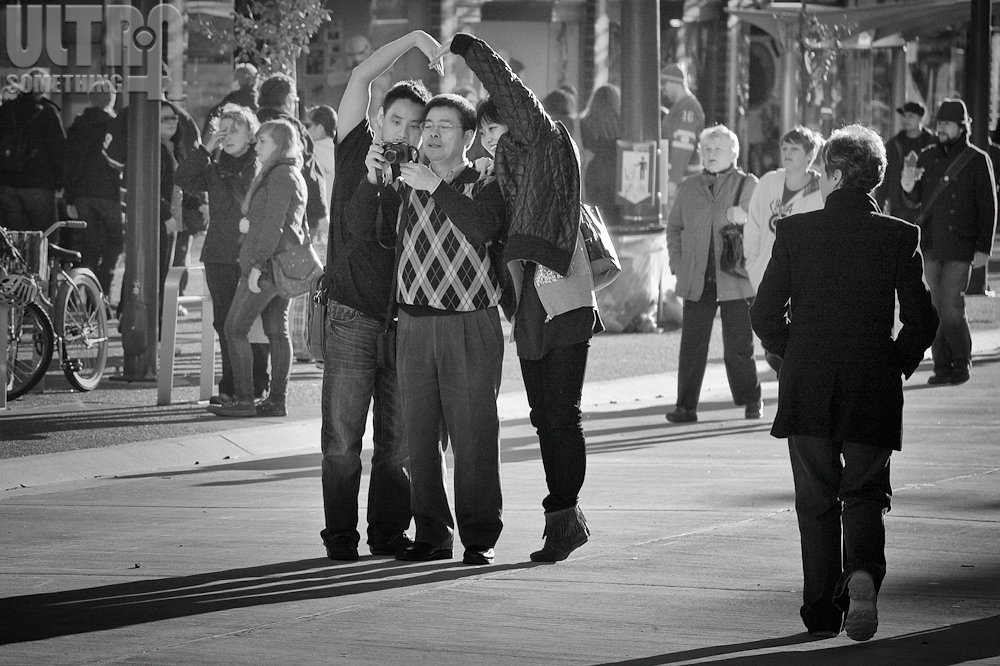
ABOUT THESE PHOTOS: “Canada Hockey Gold Celebration” was shot with a Leica M9 and a Voigtlander 15mm f/4.5 Super Wide Heliar lens. “Canada Day Festivities” was shot with a Leica M9 and a 28mm f/2 Summicron lens. “An Awkward Merging of the Arts” was shot with a Leica M9 and v5 50mm f/2 Summicron Lens. “Busking Pay Dirt” was shot with a Leica M9 and a 90mm f/2.8 Elmarit lens.

This article (along with many of its associated comments) first appeared Jan 5, 2011 in my f/Egor column for the Leica Camera Blog.

If you find these photos enjoyable or the articles beneficial, please consider making a DONATION to this site’s continuing evolution. As you’ve likely realized, ULTRAsomething is not an aggregator site — serious time and effort go into developing the original content contained within these virtual walls.

Categories : f/Egor (Leica Blog)
Tags : Black & White Photography, Leica, Leica M9, Street Photography
Posted by Egor 
· December 15, 2010 

The Soft Grey Line

When is a photograph no longer a photograph? At what point is an image so “pimped out” that it leaves the realm of photography, and enters the province of illustration? If you clone a crumpled beer can from of a landscape shot, is it still a photograph? If you merge multiple shots into a single image, can you call it a photograph? If you heal all the pimples on your model’s face, is it still their photograph?

Where is the soft grey line between photography and illustration, and when do we cross it?

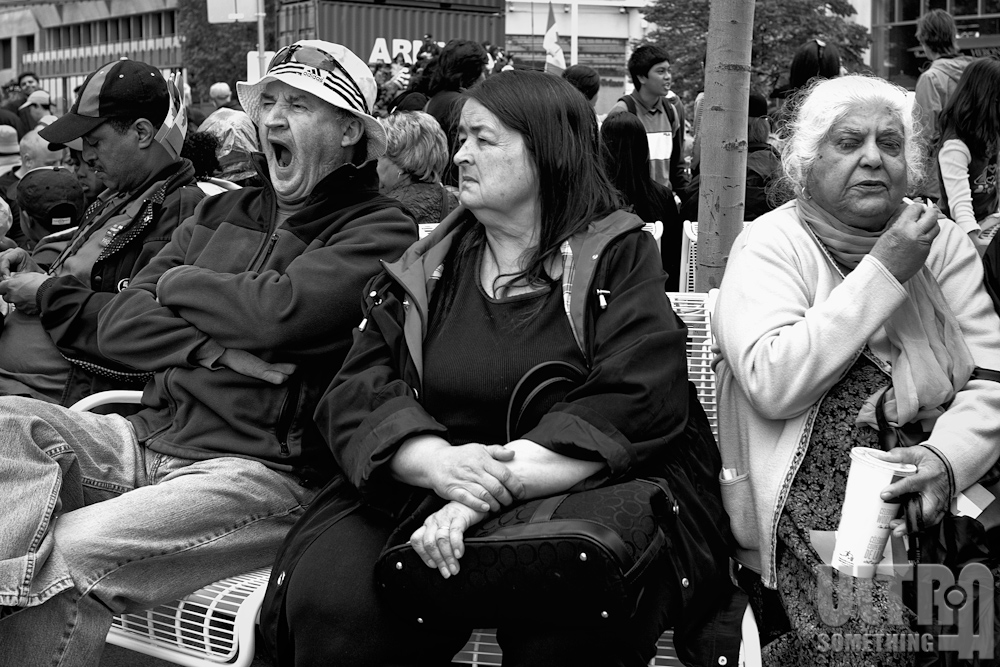
I suspect most people would say that the “line” is crossed once a photographer does something to alter the reality of a scene. But where is the reality line? The moment a photographer chooses to point the lens in one direction and not another, reality is altered. The direction in which a photographer points the camera introduces bias (at best) or outright fabrication (at worst). I shot the following photo, from my book INSTINCT, at Vancouver’s Canada Day celebration on July 1. There were thousands of happy people at that event, but I was a bit bored — so, to amuse myself, I sought and photographed only those people who appeared as bored as I.

On the left, the man’s yawn is real. The woman on the right was indeed, just as it appears, carefully scrutinizing a french fry. And the woman in the center was really and truly staring off into space. The scene, as shown in this photograph, is completely unaltered. Nothing’s been cloned out. Nothing’s been pasted in. No one’ s had any wrinkles removed or blemishes tamed. And yet, the photo is an out-and-out lie. So does that mean it’s not a photograph? After all, I crossed the “line” by altering the reality of a scene — I photographed a joyful event and made it appear boring.

Many of you will probably say, “No, it’s still a photograph because you didn’t alter what was captured within the frame.”

Didn’t I?

I shot this image in RAW format, using a Leica M9 camera. That means I captured millions of bits of data onto a computer chip — data that is completely and utterly unintelligible without some type of computer program to interpolate and apply meaning to it. In the case of this photo, I used a software algorithm within Adobe Lightroom to artificially create an image from the digital data collected by the M9. Lightroom’s proprietary algorithms interpret that data in a way that’s unique to Lightroom. If I used a different RAW converter, like Capture One, DxO or Aperture, then the images they create would each look somewhat different.

I could just have easily taken that same M9 data file and run it through a program like Metasynth. Had I done that, I wouldn’t have an image at all — I’d have a sound. That’s because Metasynth is a program that maps data from image files to various sonic attributes, which it then uses to create audio. So, if I ran this M9 capture through Metasynth, my computer would play a sound, rather than display an image. And that sound would sound nothing like what I heard when I released the shutter on the M9. So is a straight RAW capture really a photograph when, in reality, it’s simply data that any software application can interpret in any way it wants?

Many of you will probably say, “Yes, it’s still a photograph because the people who program photographic RAW conversion algorithms are striving for photographic realism.”

But the image you see above is in black & white, while the RAW data collected by the M9 contains a significant amount of color information. In fact, couldn’t one argue that most humans see color, so black & white images are unrealistic and therefore cross the line between photography and illustration?

If I had shot this same image on black and white negative film, no one would suggest I crossed the line between photography and illustration. Yet many seem to think that a digital black & white image does cross that line — mostly because the sensor itself has captured color data, so removing it from the photo seems fraudulent. But, if you accept the fact that RAW camera data is simply data that can be interpreted in any way, who’s to say that you can’t interpret color data as luminosity? Black and white film photographers do exactly this when they put color filters on their camera lenses. If a black and white film photographer wants a landscape photo to display a darker sky, they might shoot the scene with a yellow filter. The yellow filter decreases the luminosity of blue objects — meaning the black and white film photographer is using color as a luminosity control. Black & white film photographers sometimes take portraits with red filters on their lenses, since this tends to reduce tonal variations in the skin, and makes people “pop” out of the scene a bit better. The only difference between a black and white photo shot on black and white film, and a black and white photo shot on a color digital sensor is when the color filtration takes place. The film photographer makes his color filtration choices before taking the photo. The digital photographer makes his color filtration choices after taking the photo. Why does it matter when the actual color filtration and desaturation process occurs? If the photos yield identical results, why would the black and white film shot be a “photograph” and the black and white digital shot be an “illustration?” To me, this line is so soft and so light grey that it’s actually invisible.

Where are you going? Don’t leave yet. I’m just getting warmed up.

If I dodge and burn a photograph, is it still a photograph? Does it make any difference if I do the dodging and burning under an enlarger or if I do it digitally in Photoshop? Since the earliest days of photography, photographers have selectively lightened and darkened various areas of a photograph to help draw a viewer’s eyes to the most important elements. If the elements themselves are not altered, is there anything inherently wrong with subtly altering the lightness and darkness of an image?

Again, most photographers would probably think this is perfectly acceptable, and that a dodged and burned photograph does not cross the line into illustration. But is there a limit to how much dodging and burning one can do before crossing that line? Look, for example, at some of Sebastiao Salgado’s photographs. Or W. Eugene Smith’s. Or Ansel Adams’. Dodging and burning increases the tonal variation within their images to such a point that they no longer represent how a human eye would perceive the scene. These photographers are masters at “amplifying” tonal differences — they take a slight shadow and burn it into a deep abyss. They take a highlight and dodge it into a luminous halo. Ansel Adams said, “dodging and burning are steps to take care of mistakes that God made in establishing tonal relationships.” Eugene Smith’s later Life Magazine photos would look nothing like the photos that would appear if you or I stuck that same negative under the enlarger. Gene’s images were dodged, burned, and bleached into perfection. Were they still photos? Or were they illustrations?

The line grows softer when you compare these images to today’s digital manipulations. In many ways, images like Ansel Adams’ and Eugene Smith’s were progenitors of the HDR “look.” I put the word “look” in quotes because many of the images people associate with HDR are not, in fact, HDR images — rather they’re simply tone mapped single images with freakishly pumped local contrast and copious quantities of high pass filtering. Although these images are wildly popular, no self-respecting news magazine would ever publish one because they don’t look “realistic,” and we all know that news photos need to be “realistic.” Yet these images aren’t really doing anything that our buddy Gene didn’t do with his dodging and his burning and his chemical compounds. Maybe it’s simply a matter of “taste.” To produce this look in the analog days required great skill and dedication, so it was always applied with purpose. To produce this look with software takes a few seconds, and is usually applied liberally and without consideration. Maybe this is why I find Smith’s and Salgado’s images riveting and inspirational, while I find faux-HDR images repulsive.

Let’s take another step further in our search for the soft grey line. What if the dodging and burning isn’t used to amplify, but to obscure? What happens, for example, if you burn some part of an image to solid black, thus obscuring any detail in that part of the photo? Is it still a photo? Photographers have long used this technique to eliminate clutter from an image — burning (or dodging) insignificant background or foreground areas so as not to distract from the important parts of an image. Look, for example, at the photo I recently posted of Cannon Beach, Oregon:

In the lower left corner of the image is a hillside. The nearest point of that hillside contains a rather unsightly wooden fence — a portion of which was visible in the extreme foreground of this photograph. Because the fence was an insignificant distraction to the scene at hand, I simply burned that part of the image so severely that all details — fence, gravel, and grass — disappeared into shadow. Did I cross the line? Did the photograph become an illustration?

I suspect most photographers would say that I did not cross the line, because this has been an accepted photographic process since the early days of film. I’m not altering the reality of a scene — I’m just darkening it to such a point that no actual reality exists.

But what if, instead of darkening that area, I simply cloned out the fence by painting over it with some of the neighbouring grass and gravel? Would that cross the line?

The majority of photographers would probably think this crossed a line, if not the line. Specifically, most photojournalists would think it crossed the line of journalistic integrity, since the photograph would imply a reality that is, in fact, a lie. But many fine arts or commercial photographers would think it did not cross the line because reality is not the point of this particular picture. The line is thus as soft, grey, and arbitrary as can be.

What if a photographer retouches a single acne blemish on a model? Is the resulting image an illustration or a photo? “Photo!” I hear you shout. What if the photographer retouches 300 acne blemishes on a model? Now is the resulting image an illustration or a photo?

What if a photographer uses a computer algorithm to remove noise from a photo? Has it become an illustration? “No,” say the masses. What if a photographer uses a computer algorithm to add noise to a photo (artificial film grain, for example)? Now has it become an illustration? The chorus no longer replies in a unanimous voice. But why? With both operations, you’re essentially just painting new pixels onto the image. In the case of de-noising you’re painting with computer-generated pixels that have less pixel-to-pixel tonal variance than the ones you’re replacing. In the case of artificial film grain, you’re painting with computer-generated pixels that have more pixel-to-pixel tonal variance than the ones you’re replacing. So why is painting over an image with a “smooth” wash of color considered to be “OK,” while painting over an image with a speckled wash of color is not?

What happens when you take a photo using a lens that exhibits barrel distortion? Is it all right to remove the distortion with software, or have you crossed the line? On one hand, the act of correcting barrel distortion will effectively modify every single pixel in your image — which certainly sounds like “illustration” to me. But on the other hand, such distortion did not actually exist in the scene you photographed — so you’re actually helping to “right” the “wrong” created by your lens. And, if we say it’s not all right to correct lens distortion via software, does that mean we can’t use a camera that corrects optical flaws internally and stores this data as part of the RAW file? If that’s so, then neither my Leica M9 nor my Panasonic GH2 take actual photographs, since both have built-in software to correct for lens aberrations.

And what about software perspective correction? Is that crossing the line? Anyone who’s ever tilted their camera upward to take a picture of a tall building knows this will make parallel lines appear to converge. To avoid this optical phenomenon, photographers have historically employed a mechanism that shifts their lenses vertically or horizontally in relation to the film/sensor. Most large format cameras have this capability, while medium- and small-format photographers can purchase special tilt/shift lenses for this very purpose. I’ve taken many architectural shots with a tilt/shift lens and, in the analog days, it was the only way to avoid converging lines when photographing architectural elements. No one ever suggested that using a shift lens lead to an “illustration” rather than a “photograph” — quite the opposite, since such lenses render a more ‘realistic’ interpretation of the scene. What about today? With software, we have the ability to correct converging lines in programs like Photoshop and Lightroom. Just like the barrel distortion correction algorithms, these software tools alter nearly every pixel in an image — completely transforming it geometrically from the image that was actually shot. Is this crossing the line? We’re simply correcting an optical aberration in software. Is that any different than correcting the same optical aberration in hardware? And, if so, why?

What’s the difference between illustration and photography? Where is the line? Truth is, it seems to shift every year. Originally, it was thought that if a digital modification had no analog parallel, then it crossed the line. For example, people dodged and burned in the old days, so dodging and burning were allowed. People diffused photos under their enlargers, so software-based diffusion was allowed. But this is far too simplistic a division. Our buddy Gene Smith could, with a single drop of white paint, make it appear as if someone’s eyes were looking in a direction they weren’t. Gene certainly lived in the analog days, and his trickery then was not only accepted but revered. Yet, if someone today used Photoshop to do this, the photo would instantly be labelled a fraud.

So where is that line? And how thick is it? And how fuzzy? When is a photograph no longer a photograph?

This blog would be rather pointless if I only posed questions, but didn’t answer them. So here we go: In my opinion, the line isn’t soft. The line isn’t fuzzy. The line isn’t even grey. Everything dealing with photography is a manipulation — some of which I believe enhance a photo’s appeal, and some of which detract from it. Any photo will automatically and irrevocably alter the very thing it purports to show. It is, by design, an abstraction of a moment — an illustration. Therefore, I can confidently say that each of us crosses that line the very instant we touch our cameras.

So grab your camera, and get out there and take some illustrations.


©2010 grEGORy simpson

ABOUT THESE PHOTOS: “Post Processing – Street Incarnation,” “Bean,” and “Parallel Lines” were all shot using a Panasonic DMC-GH2 with a Voigtlander 15mm f/4.5 M-mount lens. “Canada Day Festivities,” and “Cannon Beach from Ecola State Park” were both published previously, and were both shot using a Leica M9 with a v4 Leica 35mm f/2 Summicron lens.

If you find these photos enjoyable or the articles beneficial, please consider making a DONATION to this site’s continuing evolution. As you’ve likely realized, ULTRAsomething is not an aggregator site — serious time and effort go into developing the original content contained within these virtual walls.
Categories : Musings
Tags : Burning, Dodging, Ethics, Illustration, Photography, Photoshop, Post Processing, RAW processing, Software Photo Correction
Posted by Egor 
· November 20, 2010 

instinct

Instinct is traditionally abstract and intangible. Some people have a natural inclination to trust theirs. Others must cultivate the relationship. Many, instead, opt to borrow it from friends, family or colleagues. But Instinct now comes in a convenient and palpable new physical form — a book.

Instinct is my new photography monograph — a collection of 70 “street” photographs, culled from a two-year, pavement-pounding, photographic examination of humans simply being. Each image is a small part of a greater whole, forming a photographic sequence that suggests numerous compelling stories. The viewer writes the words.

Instinct, in its current form, is a maquette. It’s a prototype in search of a publisher — one who grasps the concept, appreciates the content, and realizes that reproduction quality is a key ingredient in the success of the monograph.

Instinct, the maquette, is self-published via Blurb. Blurb’s CMYK-based, on-demand printing methodology is not optimized to produce strikingly crisp and vibrant black & white images. Instead, it produces slightly murky, grey images with a decided color cast. In spite of these shortcomings, I have decided to allow my readers to purchase their own copies of the Instinct maquette.

Instinct, the intangible abstract, will force you to question why you should purchase a maquette when a commercial publication will deliver higher quality reproductions at a reduced price. I can think of two reasons:

1. Instinct may never get picked up by a commercial publisher. This maquette may be your only chance to own this collection of images presented in this form. In this scenario, Instinct is a pleasure purchase.

2. Instinct may actually entice a commercial publisher. If this happens, I will pull the maquette off the market — instantly transforming any existing maquette into a rare and potentially valuable possession. In this scenario, Instinct is an investment.

Instinct, the maquette, is available for sale RIGHT HERE on blurb.com:

Instinct, yours, is hopefully telling you to go ahead and order it. Check out the following ‘teaser’ ad, if you need a little extra nudge:


©2010 grEGORy simpson

ABOUT THESE PHOTOS: The Untitled cover photograph on “Instinct” was shot using a Leica M9 with a v4 35mm f/2 Summicron lens. The video presentation was prepared in Final Cut Pro, and the music was composed and performed specifically for this video by grEGORy simpson, using Ableton Live and numerous software instruments.

If you find these photos enjoyable or the articles beneficial, please consider making a DONATION to this site’s continuing evolution. As you’ve likely realized, ULTRAsomething is not an aggregator site — serious time and effort go into developing the original content contained within these virtual walls.

Categories : ULTRA news
Tags : Black & White Photography, Instinct Monograph, Leica Photography, Monograph, Street Photography
Posted by Egor 
· October 29, 2010 

Vacate Shun

I’ve never been very good at sightseeing. “Abysmal” is the actual word that springs to mind. When I see a sign pointing toward a tourist destination, my tendency is to turn and head the opposite direction. Traveling to Tokyo, I’ll more likely seek out the seediest back alley in Shinjuku, than visit the Imperial Palace. If you hear I’m in London, don’t look for me at the Tower — I’ll be throwing back a pint in a Soho pub. It’s not that I have anything against tourist sites, scenic vistas, or must-see destinations — it’s just that, for me, tourism is about the people and the culture, and not so much about ‘things.’

Mind you, I’m not impervious to the charms of a spectacular landscape — quite the contrary. In fact, British Columbia’s magnificent scenery weighed heavily in my decision to immigrate to Canada. In the ten years I’ve lived in Vancouver, I haven’t once become the slightest bit blasé about its topography. Not a day passes when I don’t stand at my condo window and gaze in admiration at my view of English Bay, The Strait of Georgia, and the rugged mountains along the North Shore, Sunshine Coast, and Vancouver Island. I am invigorated by natural beauty, and am in awe of pounding surf, snow-capped mountains, and the violent ramifications of earth’s ongoing upheavals.

Given the fact that I love photography, and that I’ve just written an unabashed declaration of love to the beauty of landscapes, you would rationally conclude that I also love landscape photography — after all, if A = B and B = C then, by the transitive property of geometry, A must equal C, right?

Wrong.

The truth of the matter is that landscape photographs bore me silly. I’m not talking about just my landscape photographs — I’m talking about all landscape photographs. This statement is probably even more shocking if you knew that, before the latest economic collapse, I was happily employed by the Ministry of Environment as the photographer for BC Parks — a job that required traveling around British Columbia photographing all this beauty. Frankly, it was the best job I ever had.

So how can such a dichotomy exist? Before all you passionate landscape photographers click this site’s contact link to send me nasty emails, let me attempt an explanation:

In nature, a beautiful landscape is immobile. It may contain some kind of dynamic element — like a waterfall or a shifting pattern of light and shadow — but the overall scene is not going anywhere anytime soon. You are free to stand and admire it for as long as you like. You can hear the wind rustle through the leaves, or the chatter of a stream as it rushes past. You can smell the air — sweet with the fragrance of flowers, or tangy like the salty sea. Your face feels the heat of the sun or the spray of the surf. A beautiful landscape engages all the senses, and reveals itself completely to anyone who chooses to stand and experience it for long enough. A photograph of that same landscape, by contrast, engages only one of the senses. This is why landscape photographers use the highest calibre equipment — in order to engender a sense of awe that’s even vaguely commensurate with the scene itself, they must extract every drop of visible information possible. But, ultimately, a landscape photograph is always less appealing than experiencing a landscape in person.

This is one of the reasons why, in general, I choose to photograph ‘small’ things; ‘simple’ things; ‘people’ things. I’m drawn to the little slices of life that surround us, and the photographers who document them. Unlike a scenic vista, which reaches out, grabs us, and demands our attention, life’s passing parade often goes unnoticed — except by photographers like Frank, Winogrand, Erwitt, Moriyama, and others. When you look at simple ‘street’ photos, you see more in the photo than you saw in real life, not less. My last post, “How to Ignore How-To Guides,” contains a couple of prime photographic examples — On the streets, you might never notice the man who stands beneath a giant clock, yet feels the need to check his watch for the time. You might not see the woman standing in a doorway smoking two cigarettes at once. To me, these tiny flashes of life are every bit as beautiful as a Yosemite landscape, but it’s a beauty that can only be truly absorbed and appreciated through photography.

This is why I say that “landscape photographs bore me.” At best, they might compel me to visit a place and witness the view for myself. Or they might have some sort of technical merit that intrigues me as a photographer. But, in general, landscape photos neither demand nor benefit from repeat viewing. Everything is spelled out. ‘Street’ photography, on the other hand, is open ended — it appears to tell a story but, in reality, it’s the viewer who writes the tale. ‘Street’ shooting invites interpretation. It asks questions. It creates multiple moods and conflicting emotional responses. Landscape photography doesn’t do this.

Which brings me back (hopefully) to the topic at hand: my trouble with vacation photography.

I’m no etymologist, but personal experience would suggest that the word “vacation” derives from two sources — the words “vacate” and “shun.” Vacate means to leave, or to give up a place or position. Shun means to avoid or ignore something. For me, “vacation” means “to ignore my usual photographic inclinations, and to give up taking the kind of pictures I like to take — resorting to generic landscapes and banal ‘I was here’ photos.”

For the last couple weeks, I’ve been on one of those “vacate shuns” — driving up and down the Oregon coast. For my money, the Oregon coast is endowed with the most beautiful scenery in the continental United States. It’s the type of trip where you drive from scenic overlook to scenic overlook — each offering a magnificent view and another chance to heal your wounded spirit. But, as a photographer, it’s also the type of trip that triggers the panic alarm — because, at each destination, I’m compelled to take a photo. And not just any photo — but a landscape photo. Even worse, the scene I photograph at each stop is the exact same scene that’s been photographed a hundred million times by a hundred million travellers before me. What’s the point in this? The panic alarm rings louder.

Prior to leaving Vancouver, I meekly suggested that my wife pack her little Canon point-and-shoot so she could take all the ‘pretty’ pictures. It didn’t matter that image quality would be lousy — one week after returning, no one ever looks at their vacation photos again. My motive, of course, was to give myself the freedom to photograph any of those delicious “slice of life” moments — the type I’d likely miss whilst fiddling with postcard shots.

No dice. The lady’s too smart — she gently reminded me that I was the photographer in the family and, by having me take the photos, she’d be free to feel the sea mist, smell the marine air, and watch the wildlife with her 10x Pentax binoculars. I flashed, briefly but enviously, on Robert Frank — and how, in his travels through America in the 1950’s, he stopped at places like the Grand Canyon, yet never bothered to expose even a single frame at such magnificent sites. Instead, he photographed jukeboxes, flags, and the disconnect between America’s self-image and its actual self. Lucky son of a gun.

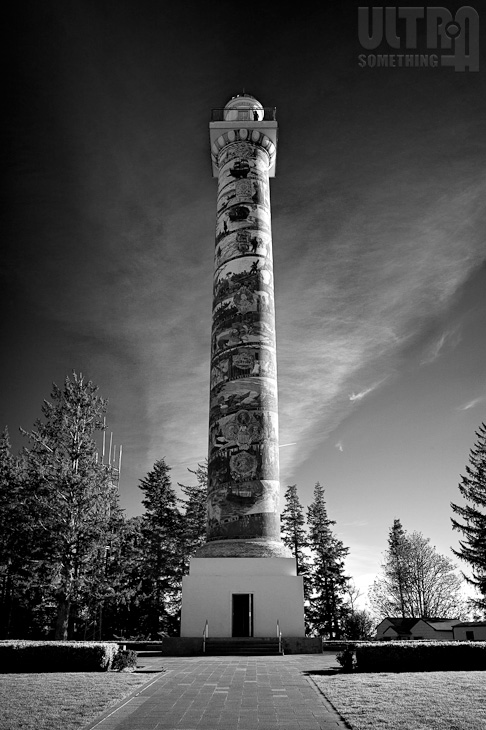
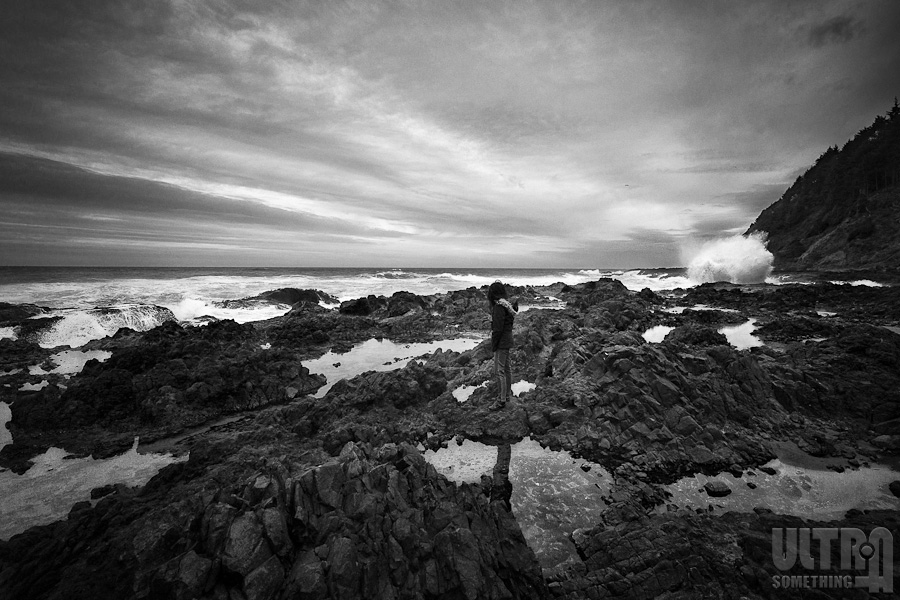
In reality, it wouldn’t have mattered if my wife had taken the tourist shots — late October on the Oregon coast is well past the summer tourism season. We had 363 miles of scenic coastline all to ourselves. To help dampen my photographic panic alarm, I chose black & white for all the ‘pretty’ shots — deciding to work with my strengths, rather than against them. I also took the “I was here” shots by surrounding my wife with her environment, rather than having her pose in front of it. Hence (as shown earlier), I’ve shot her waving from the top of the Astoria Column, and exploring tide pools at Devil’s Churn.

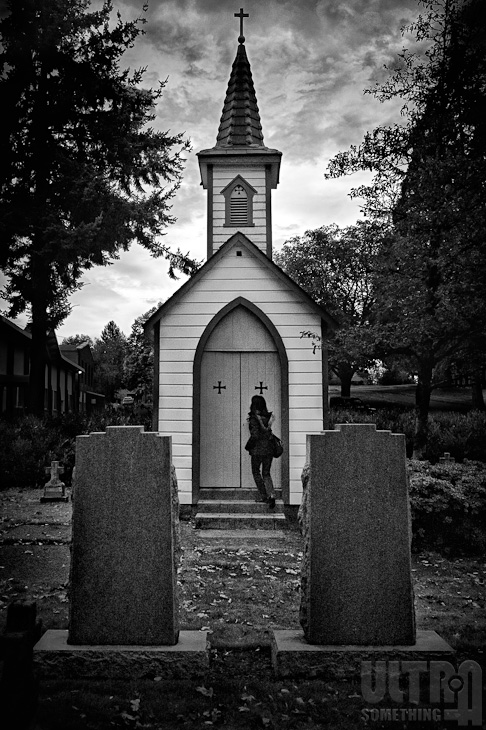
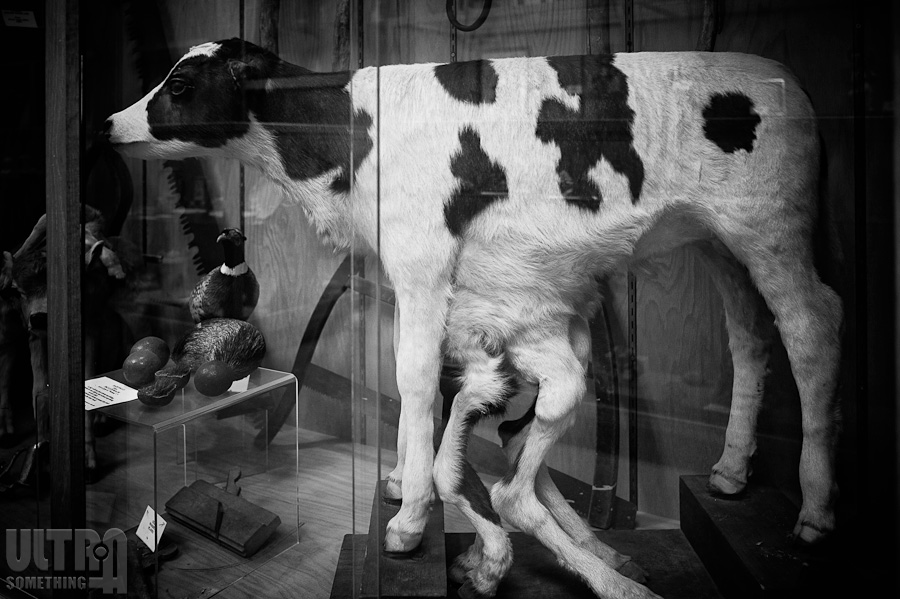
Fortunately, my wife’s proclivities tend toward the offbeat, and she is every bit as adept at finding tourism spots as I am at avoiding them — so any vacation we take is bound to lead us to a few curious destinations that are far-removed from the beaten path. On this trip, besides finding a remote covered bridge some 10 miles off the highway, and paying homage to some of the world’s largest hairballs (from a pig’s stomach), she also managed to navigate us to a monk’s cemetery (shown above) and a taxidermy museum that featured, amongst other oddities, an 8-legged calf.

I did try, on occasion, to sneak a few candid shots of other travellers. But, as I mentioned, human beings were few and far between. At Hug Point (the second photo in this post), I saw a family off in the distance — insignificant, yet harmonious with the tranquil sea, paisley-esque sky, sunlit mountains, sea caves, and hidden waterfalls. While walking the sand at Cannon Beach, a few silhouetted figures crossed my path. But they, too, seemed one with their surroundings. On this vacation, incongruity did not exist and irony was nothing more than a word in a dictionary. My usual photo modus operandi was rendered null and void.

And now, just like every traveller since the dawn of photography, I’ve returned home with a bunch of dull photos that I was compelled to take, but will probably never look at again. Yet, inexplicably, like a billion travellers before me, I also feel compelled to bore others with these photos. And so, I present a few of them here. I suppose, if I can’t photograph human nature, I might as well exhibit a bit of it myself.


©2010 grEGORy simpson

ABOUT THESE PHOTOS: “Cannon Beach from Ecola State Park,” “Rush Hour at Hug Point” and “Haystack Rock, Cannon Beach” were shot with a Leica M9 digital and a v4 35mm f/2 Summicron lens. “The Obligatory Wave From the Top of the Tower Shot,” “Premature Entry” and “Eight Legs, One Calf” were photographed with a Leica M9 digital and a 28mm f/2 Summicron lens. “Tide Pool Exploration at Devil’s Churn” was shot with a Leica M9 digital and a Voigtländer 15mm f/4.5 Super Wide Heliar lens.

If you find these photos enjoyable or the articles beneficial, please consider making a DONATION to this site’s continuing evolution. As you’ve likely realized, ULTRAsomething is not an aggregator site — serious time and effort go into developing the original content contained within these virtual walls.

Categories : Musings
Tags : Black & White Photography, Cannon Beach, Devil's Churn, Hug Point, Landscape Photography, Leica M9, Leica Photography, Mt. Angel Abbey, Oregon Coast, Vacation Photography
Posted by Egor 
· October 4, 2010 

How To Ignore “How-To” Guides

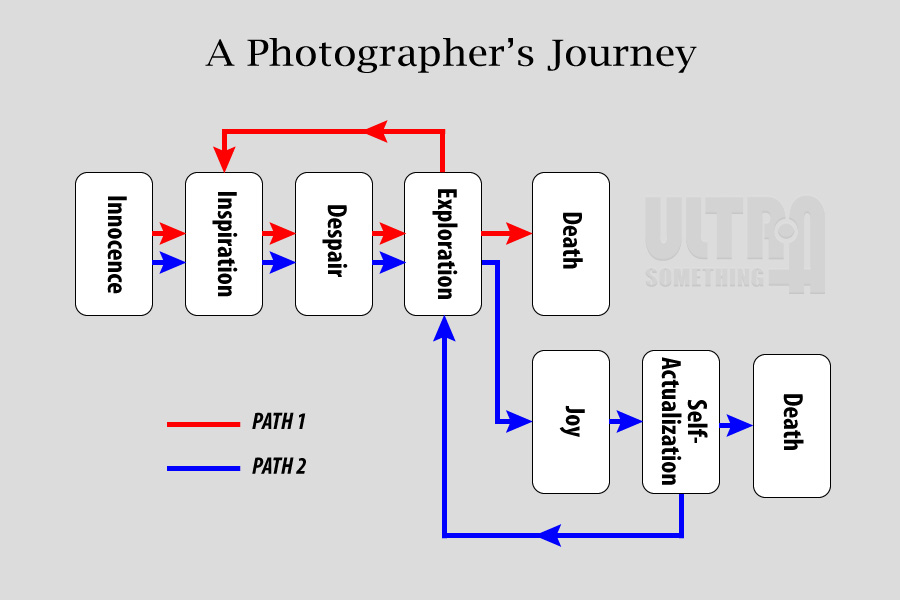
I’m cognizant of the irony that drips from this article’s title, and I’m fully aware of the reality that — without typing a single supporting word — I’ve already written myself into a literary corner. As I see it, my chance of securing your attention beyond this opening paragraph relies on one of two basic human instincts: perversion or curiosity. Specifically, those with a perverse desire to see another man flail about in a self-made paradox are sure to read on, while those with an innate curiosity will likely become so intrigued by the following graphic that they’ll forget all about the title’s inherent self-contradiction:

Few photographers, after examining this flowchart, would opt for anything other than Path 2. Not only does it clearly delay death, but it insures joy and self-actualization to all who choose it. Intriguing, isn’t it? Read on…

Innocence

Amongst those of at least modest financial means, a significant percentage have access to a camera. It might be a cell phone. It might be a simple point-and-shoot. It might be an SLR borrowed from a friend, or even a cardboard disposable purchased for an important occasion. The urge to document a special event, person, or place is a natural tendency that touches all mankind — regardless of one’s political, religious, or social beliefs. For most people, photographs are nothing more than a tangible (though important) realization of a pleasant memory. These are photography’s happy innocents — people who have not tried to make photography into something more than it need be.

Inspiration

Fortunately or unfortunately, some of us choose to leave this utopian garden of innocence. The number of paths leading out are numerous, but they all entice with a common temptation — the desire to take “better” photographs. For some, the inspiration to relinquish innocence is awakened by the arrival of a new love — the birth of a baby, or the addition of a kitten or puppy. For others, it’s precipitated by a once-in-a-lifetime vacation to an exotic locale, or the realization that your child is an athletic prodigy. Perhaps it’s a desire to replace the generic art that hangs from your wall with something of your own creation. For many, it might simply be a case of wanderlust — the seduction of better photographic equipment has tempted many from the garden. Whatever the inspiration, each of us — each on our own separate path — finds a few fleeting moments of newfound photographic happiness along the inspiration trail.

Despair

Inevitably, the trail we each chose to follow — the one that inspired us to leave the garden of innocence — ends suddenly in a thicket of thorny shrubberies at the edge of a precipitous cliff. This is the point at which you have completed your journey of photographic inspiration. You stand alone — expensive camera in hand — with no idea what to photograph next. In a rare moment of self-reflection, each photographer realizes that the path that led here, though inspiring, did not deliver him to his ultimate goal — better photos. You may have taken more photos. You may have taken cleaner, crisper, and sharper photos, but deep down you know that they still aren’t much better than those you took in the garden of innocence.

Exploration

It’s here — facing despair at the end of the inspiration trail — that every photographer ceases to become a traveler and becomes, instead, an explorer. The path that brought you here has ended short of the desired destination and, in order to carry on, you must now forge your own trail. Until now, the journey has been self-guided — but it’s here that photographers must explore the teachings of others if they want to progress. Such guidance may come from many sources: books, forums, friends, or even blogs like this one. The source of the guidance is not nearly as important as its content.

If you study the graphic that begins this article, you’ll see that the exploration stage is critical to every photographer’s journey — the proverbial “fork in the road,” if you will. If you’ve ever wandered through the photography section in a major urban bookstore, you’ve seen photographers who are at this stage of the journey. You’ll find them gathered around the “How-To” section — Lowepro bags, holsters, and backpacks dangling from their shoulders as they thumb through the myriad instructional guides spilling from the shelves. If you’re anything like me, this sight triggers two concurrent thoughts: 1) Maybe I should buy stock in Lowepro, and 2) why aren’t any of these people thumbing through REAL photography books?

Watch carefully, and you’ll see photographers reach over, under, and around each other to extract titles from the shelf: “How to Shoot Landscapes,” “How to Shoot Portraits,” “How to Shoot Macros,” “How to Shoot Black & White,” and the ever-popular “How to Shoot Nudes.” Meanwhile, in an adjacent section of the store — unnoticed and unloved — sit hundreds of books with exquisitely realized depictions of those very same landscapes, portraits, macros, and nudes.

For the benefit of those merely skim-reading, I should warn you that I’ve finally reached the nucleus of this article: My supposition that the path to photographic enlightenment is not paved with “How-To” books — it’s paved with photo collections and photographer monographs.

Seeking guidance in “How-To” books does not enable you, the photographer, to forge your own trail. “How-To” books may inspire you. And they may teach you about something, but they don’t teach you about the most important photographic tool in your bag — yourself. If you don’t know yourself and, in particular, your own soul, how can you hope to become a better photographer?

I would suggest that photographers who seek guidance in their local book seller’s “How-To” section take a few steps further down the aisle — to that unpopulated area labelled “Photography Collections” or “Photographer Monographs” — and just start looking. Even better, pay a visit to your local library. They’re often stocked with thousands of expensive, rare, and out of print photography books — just waiting for perusal.

Photography is not difficult. In fact, it’s one of the simplest things a person can do. Taking a good photograph doesn’t require an extensive amount of technical know-how, complex equipment, or handholding — all it takes is the ability to see. A “How-To” book can not teach you how to see — it can only teach you how to create an image that someone else saw. But photography collections and artist monographs can teach you how to see — because they can show you how someone else chose to photograph the very same things that inspire you.

In spite of my advice, many photographers will still search for direction in “How-To” guides and, as the graphic illustrates, they will remain in Path 1’s infinite loop — unsatisfied, joyless, and seeking inspiration from external sources, rather than from the passion within. The good news is, no matter how many times a photographer repeats the “How-To” cycle, each passage through “despair” yields another chance to escape onto Path 2.

Joy

Studying the works of other photographers helps us to unlock our own inner visual sense. The world is full of many things to see — big, small, chaotic, and quiet. Every person who looks out at this world sees it, feels it, and experiences it differently. The problem, for each of us, is to figure out how to craft a photograph that expresses exactly what it is that we see, feel, or experience. When you explore the work of other photographers, you’ll eventually discover photos that convey objects, thoughts, and emotions that match your own experiences. It’s a moment of liberation that’s nothing short of “joyful.”

Any photographer who’s ever escaped from Path 1’s infinite loop of despair has had at least one such epiphanic moment. Henri Cartier-Bresson frequently credited Martin Munkacsi’s photograph of three boys running toward the breaking surf of Lake Tanganyika as his inspiration for becoming a photographer. In turn, Elliot Erwitt has credited Henri Cartier-Bresson’s 1932 photo of Saint-Bernard Wharf for showing him that photography isn’t about artifice, but about simple observation. It doesn’t matter which photographer or photos inspire you. It doesn’t matter if your inspirational photos are completely different from mine or anyone else’s. It matters only that you find them.

Self-Actualization

In his theory on the Hierarchy of Needs, Abraham Maslow placed self-actualization at the pinnacle — the point at which we humans are the most satisfied. For a photographer, the road to self-actualization begins with a trip into the eye of another. When we see how another photographer has wrestled a shared vision into a compelling photo, it unlocks our creativity and opens our own dormant photographic eye.

Because I have unlimited access to myself, I’ll use me as an example. I have always been a fervent people watcher — keenly aware of body language, appearances, emotions, and circumstance. In my younger days, I often enjoyed nothing more than spending a leisurely afternoon at a busy sidewalk cafe, watching the passing throngs engage in the mere act of being. It was an endless source of fascination yet, even though I was a photographer, it never occurred to me that actual photographs could stem from this most curious “hobby.” It was the work of photographers like Elliott Erwitt, Robert Frank, and Garry Winogrand that opened my eyes. They were the ones who showed me that a photograph didn’t have to be “pretty” to be interesting. They were the ones who showed me that there was actual photographic potential in my favorite pastime. Through them, I realized that photography was a way to show the rest of the world what, exactly, I found so fascinating about the seemingly mundane actions of everyday people.

Without discovering the work of these photographers, I might never have achieved the ultimate photographic desire — “better” pictures. In the process, I learned an equally important lesson — that by satisfying myself, it no longer mattered if others believed that my photographs were “better.” All that mattered was that I knew they were, and that I had satisfied the goal that long-ago pulled me from the garden of innocence.

Death

If a photographer is lucky, he won’t die before he discovers that “How-To” books are not the road to self-actualization. If a photographer is very lucky, he’ll have multiple opportunities to engage in Path 2’s own inherent feedback loop. Photographers are only people. And people, by nature, are never totally satisfied. Each of us knows, no matter how much our photographs improve, that we’ll never be fully content. We know there is always a better photo to be taken, and we’re driven to take it. Prior to death, there is no point in a photographer’s journey where he can’t re-evaluate his direction. Our interests are layered, interwoven, and complex. Sometimes you need to peel away one vision before you have the capacity to explore a deeper one.

As transformative as the aforementioned works of Robert Frank or Garry Winogrand were to my own photography, I did not immediately bond with either of them. It was probably a decade between the time I first looked through Robert Frank’s “The Americans,” and the moment it actually clicked. But when it did finally click, it was more like a lightning bolt than a tap on the shoulder.

There’s never a point where a photographer can’t and shouldn’t return to the exploration stage. New life experiences uncover new passions that, in turn, offer new trails for photographers to forge. Exploration is something that we — not just as photographers, but as people — should never stop doing.

Conclusion

I suspect all those who hoped to witness my struggle with this article’s self-inflicted conundrum have long-ago stopped reading, and are now purchasing the latest “How to Shoot HDR” book. In contrast, those of you whom I’ve successfully distracted with a fancy flowchart and some fuzzy logic might, instead, have embraced the article’s irony and are now searching for new photographic mentors in your local library’s Photographer Monograph section. The only loose end is that, by making this supposition, I’ve made it rather difficult to justify writing my own “How-To” book — too bad, ’cause those babies can be a lucrative source of income!


©2010 grEGORy simpson

ABOUT THESE PHOTOS: “Ob(li)vious” was shot with a Leica M9 digital and a 28mm f/2 Summicron-M lens. “One of Those Days” was photographed with a Leica M9 digital and a v4 35mm f/2 Summicron-M lens. Surely the technical details surrounding the other two images are of no concern.

If you find these photos enjoyable or the articles beneficial, please consider making a DONATION to this site’s continuing evolution. As you’ve likely realized, ULTRAsomething is not an aggregator site — serious time and effort go into developing the original content contained within these virtual walls.

Categories : Musings
Tags : Leica Photography, Photographer Monographs, Photographic Philosophy, Photography, Street Photography
Posted by Egor 
· September 22, 2010 

Rock ‘n’ Roll(ei)

Michael Ricken from Bochum Germany, I have your camera. I’m ignorant of the circumstances surrounding your decision to dispose of it, and of the amount of time that’s passed since you last cradled it in your palm, but I owe you a note of thanks — two of them actually. First, I thank you for having the good sense to take such wonderful care of this camera. And second, I thank you for having the horrible sense to carve your initials into it. That conflation of seemingly disparate decisions resulted in an immaculate and functionally flawless camera endowed with absolutely no collectible value. And so it was for this reason — in the autumn of 2010 and for about the same price I’d pay for a decent restaurant meal — that I came to possess your old Rollei 35 T.

Unless one’s soul is carved from stone, the Rollei 35 is the sort of camera that will infect both photographers and non-photographers with a powerful case of gear lust. I first saw this marvellous mini in the late 1970’s — before I had even the slightest hint of an interest in photography — and I remember thinking “now that’s the camera I’d have if I had a camera!” In the last 20 years, since some invisible demon cursed me with a terminal case of photographyitis, my Rollei 35 lust has resurfaced on several occasions. But there always seemed to be some sort of impediment standing between me and ownership… until now.

Why Purchase a 35mm Compact Film Camera in the Digital Era?

For the majority of my photographic life, I was the typical two-system camera user. In the film days, I owned a big 35mm SLR, which I would usually employ in the studio or on important assignments. For casual or travel needs, I’d carry the latest trendy 35mm compact. Obviously, the compact camera was far less flexible than the SLR,  but I never felt as though image quality was being compromised — just shooting options. After all, a compact 35mm camera uses 35mm film — just like a 35mm SLR — so as long as it was fitted with a high-caliber lens, fidelity was never an issue.

When I moved to digital, I employed the same 20th century ritual — a big dSLR for the “important” stuff, and a compact digital camera for the casual shots. Unfortunately, unlike the film days, shooting with a compact digital resulted in a significant reduction in both image quality and handling. The tiny sensor meant limited dynamic range. It meant high shadow noise. It meant slow focusing. It meant hostile ergonomics. It meant unmanageable shutter lag. It meant I needed to carry the big dSLR a lot more than I ever carried the film SLR.

A couple years ago, I converted to Leica M-series rangefinders. The Leica’s image quality and handling relegated the dSLR to part-time duty as a “long lens” specialist camera, while its portability eliminated my need for a compact “enthusiast” camera. I began to carry the Leica everywhere and, essentially, I became a one-system camera user. Although a near-perfect arrangement, I do occasionally feel a little self-conscious slinging a Leica M9 over my shoulder just to make a milk-run to the neighborhood grocery store. But there’s no way I’m going to miss a photo op just because I don’t have a camera on me. I did try — ever so briefly — to adapt the iPhone as my “just in case” camera. It failed. Miserably. The iPhone ended up filling more needs than I could ever have imagined (it’s even my darkroom timer!), but “portable camera for candid people photography” is not one of them.

Recently, I began to think about getting a camera that I would just leave in the glove compartment of my car. Briefly, I entertained the idea of getting a new digital compact for this purpose. I even tried out a couple of the latest offerings — and was immediately reminded of the image problems, ergonomic deficiencies, and handling woes that these cameras carry with them. None of the offerings were compelling enough to make me comfortable with the idea of leaving the Leica at home. And then, suddenly, it hit me: “Why not a compact film camera? They worked for me in the 1990’s. Why not now?” Seeking solutions in the past was exactly what I’d proposed in my Click Clique article. Perhaps I should follow my own advice?

Earlier this year, I purchased a Leica M6 TTL film camera to supplement my digital images. The experiment was a resounding success, and I’ve been happily shooting a tandem of film and digital for the past 6 months. Developing film and scanning negatives is now a regular part of my photographic routine. If I purchased a 35mm compact film camera, I’d be shooting with a high fidelity “sensor” (35mm film) that’s over 30 times larger than the tiny sensors built in to modern digital compacts. If I purchased a 35mm compact film camera, I’d have real controls and responsive handling — and for far less money than even the most humdrum of digital compacts. In short, if I purchased a 35mm compact film camera, I’d be able to leave the Leica behind on those quick trips to the gas pump, bakery, or lunch spot.

But another thought soon crossed my mind — batteries. You know that flashlight you keep in your car’s glove box? The one whose batteries are always dead when you actually need to use it? I realized the same fate would befall whatever camera I kept in the car — unless it was a fully mechanical camera. A vision of the Rollei 35 popped into my head! Not only is the Rollei a compact 35mm film camera with a stellar lens, but it features a fully mechanical shutter and film advance. I could put this camera in my car, drive it to the Arctic, park it there all winter, and I could return in the spring and the Rollei would be ready to take photos. As I began to research the Rollei, I realized something else about it — my shooting style and its minimalist functions were in perfect alignment. Since switching to rangefinders, I’d become a fully “manual” photographer, and the Rollei 35 is as manual as a man could want.

Which Rollei 35?

Once I realized that the act of satisfying a 35 year old case of gear lust was both a fiscally and fundamentally sound decision, I needed to decide which of the various Rollei 35 models to purchase. On paper, the Rollei 35 S with its 40mm f/2.8 lens is slightly more desirable than the Rollei 35 T, which is 6/10th of a stop slower at f/3.5. But, in reality, it pays to remember that the Rollei 35 is a scale focused camera — there is no way to focus the camera other than guessing (or measuring) the distance between camera and subject, and setting that distance on the lens ring. I’ve become rather adept at scale focusing, so I knew that an f/2.8 lens had the potential to tax my distance guestimating abilities. At f/2.8 and a distance of 1.5m, I’d have a depth of field only about 24cm (9″) deep. Given a few seconds to analyze the situation, I’d likely guess a distance that falls within this margin of error. However, since I tend to take photographs that must be focused, exposed, framed, and shot in the blink of an eye, I knew there would be few instances when I’d choose to use the camera at f/2.8. The slower lens on the 35 T would give me a focusing “slop factor” of about 30cm (12″) for close subjects — a range I’m more likely to hit when focusing by “instinct” rather than careful consideration. Further cementing my decision to choose the “T” over the “S,” was the collectibility of S-model Rolleis — they simply command higher prices than the T’s.

Having firmly decided on a T-model Rollei, I next needed to choose between the older 35 T and the newer 35 TE. One factor that weighed in favor of the TE was the location and type of battery used to power its built-in light meter. The older T-model uses a now-outlawed mercury cell, and encases it within the film chamber — meaning that, should the battery die, I’d have to finish shooting a roll of film before I could open the case and replace the battery. The TE-model uses a non-mercury battery and gives me access from outside the camera — meaning I can replace the battery without removing the film from the camera. At first blush, this might point to a slam-dunk decision to choose the TE over the T — but for every yin, there’s always a yang. And the yang factor working against the TE is the actual location of its light meter. On the 35 T, the light meter is on top of the camera. On the 35 TE, it’s in the viewfinder. Again, those prone to early blushing might surmise this is simply another reason to choose the TE over the T… but it’s not. The Rollei 35 was designed to be configured while the photographer looks down at the camera, rather than through it. The shutter speed, aperture, and focus distance dials are all positioned to be set with the camera held at waist level. Because of this, the top plate location of the light meter on the 35 T is an ergonomic delight. You need only hold the camera at your waist, and you can clearly see the light meter, along with the shutter and aperture settings. This allows the photographer to set exposure faster than with any camera I’ve ever used. In contrast, by placing the meter in the viewfinder, the 35 TE makes the camera much slower to operate — the camera needs to be brought to the eye to check the light, then dropped to the waist to see and set the shutter and aperture selections. My “gut feel” was that the 35 T’s top-plate location would work far better with my “run and gun” style of photography than the viewfinder meter of the TE. There was still the mercury battery issue, but I knew I could substitute a modern 675 zinc-air hearing aid battery to power the meter. The downside of zinc air batteries is their short lifespan. But I also knew I could purchase a C.R.I.S. MR-9 mercury battery adapter, which would let me use modern, long-lasting silver oxide batteries to power the meter.

So the decision was reached. My camera of choice was the Rollei 35 T. All I needed to do now was decide between black and chrome — an easy decision since it mirrors the one I make with the Leicas. Chrome bodies look nice in a display case, but black bodies draw fewer glances and less attention on the streets. I shoot with my cameras, rather than display them. So black it was.

Anyone who’s ever purchased old, discontinued equipment knows that the act of deciding what to purchase only takes you half way toward ownership. You then face the struggle of actually finding the right model on sale at the right price. After a couple months of monitoring Ebay, I found my Rollei 35 T at Trudhild in Germany — priced ridiculously cheap due to the aforementioned carving of the initials “MR” directly below the thumb on the camera’s back. After an uncharacteristically quick handoff between Germany’s postal system and Canada’s, the Rollei 35 T was in my hands.

Using the Rollei 35 T

When I purchased the Rollei, I expected to receive a “serviceable” camera that looked great, delivered quality images, but was somewhat clunky to operate. One need only look at the Rollei photos that begin this article to see a plethora of curious design quirks uncommon to any other camera. But, instead of slowing me down, these quirks all coalesce to form a new photographic paradigm that, in reality, make shooting this camera one of the most joyful photographic experiences ever. The Rollei 35 T is a surreptitious shooter’s delight. It’s easily cupped in the hand, which allows it to snake around heads, shoulders, or other barriers to find the most intimate of shots. The shutter releases with a barely audible click.

Proponents of the tinier digital compacts might argue that their cameras are just as capable, but I would argue not. The photographer pre-focuses the Rollei and doesn’t rely on autofocus to find the subject. Likewise, one manually sets the Rollei’s exposure for a particular scene, meaning it won’t be tricked by the changing reflectivity of objects within that scene. The Rollei will fire off a shot the instant I ask it to, not a half-second later. And the Rollei, when loaded with black & white film, possesses enough dynamic range that I can extract useful data from both the highlights and the shadows.

As cumbersome as the Rollei might appear, it’s the fastest functioning camera I’ve ever worked with. The vertically mounted, low profile shutter and aperture dials are even quicker to set than those on the Leicas, and are infinitely faster than the menu-driven systems of most digital cameras. The collapsible lens is human-powered, rather than battery-powered — meaning you can tug the lens into its extended shooting position far faster than any motor-driven lens system I’ve used. The distance scale on this particular lens is demarcated in both meters and feet, which is an important consideration since some photographers estimate distances in metric units, and others in imperial. The optical viewfinder is brighter and larger than any compact camera I’ve ever used — particularly any digital compact camera. And film loading is absolutely idiot proof.

All these benefits would, of course, be meaningless if the Rollei 35 T took lousy photos, but that’s happily not the case. The Tessar lens is sharp, flare resistant, and has just enough contrast to make a nice, clean, scannable negative. The meter is accurate and matches the recommendations that my bigger, more expensive Sekonic meter suggests.

At the time of this writing, I’ve run only a few rolls of Tri-X through the camera — experimenting with a wealth of different subjects in a number of different lighting and usage scenarios. I have found only one issue: Photos taken with a shutter speed of 1/60s suffered from camera shake. Normally, I would have no trouble handholding 1/60s with a 40mm lens but, on the Rollei, two things work against me: First, the shutter release button is surrounded by a protective wall, necessitating a rather direct finger plunge to engage it. Second, the camera is so small that it’s essentially held in a single hand — making it a bit more difficult to hold as steady as a larger camera. Fortunately, I noticed this problem after the first roll, so I borrowed one of my Leica’s soft release buttons, and threaded it onto the Rollei’s shutter release. Problem solved! I no longer notice any such camera shake at 1/60s.

Astute readers may have already noticed a couple of additional quirks that I have yet to address. One is that the film travels from right-to-left in the Rollei 35, meaning the film advance is under the left thumb rather than the right. Prior to purchasing this camera, I thought this might prove irksome, but I grew accustom to it by the third shot of the first roll and have never given it another thought. The backward film path does, however, dictate that I modify the way I file Rollei negatives and insert them into the scanner, since the shots are upside down compared to those from the Leica M6 TTL.

Another curiosity is the hotshoe on the bottom of the camera. Obviously, if you were to mount a flash here and let it dangle upside-down from the bottom of the camera, your shots would all resemble Boris Karloff publicity photos. So a simple solution to using flash on the Rollei 35 T is to turn the camera upside down when taking a flash photo. Personally, I haven’t mounted a strobe on a camera since the internet was something only university students used. Instead, on those rare occasions when I use flash, I mount a Pocket Wizard on the camera and trigger remote flashes via radio signal. I’m happy to report that the Pocket Wizards work perfectly with the Rollei and that the Plus II Transceiver unit, when dangling from the bottom of the camera, makes a dynamite handle that actually helps steady the little Rollei!

Conclusion

The Rollei 35 T is, perhaps, more “fun” to shoot than any camera I’ve ever used. Nestled in your palm it practically begs you to take more photos, and to stick it in places you might not normally think to stick that upscale Leica or dSLR kit. I’m normally a bit conservative with my exposures when shooting film, but I find myself shooting “digital” quantities with this camera. Rarely have I left the house with the Rollei, and not returned with a fully exposed roll.

The camera’s fit and finish are superb. The rigid metal body instills confidence, and the 40mm f/3.5 Tessar lens delivers everything I ask of it. The Rollei 35 is a camera that gets out of my way, and lets me take the photos that I want to take the way I want to take them. This is all I ever ask for from a camera. Alas, as simple a requirement as this is, it’s one rarely realized by modern camera designers. If I were developing a modern digital compact camera, I would definitely choose to model it on the Rollei 35. In fact, I’d go so far as to say that a Rollei 35 with an APS-C sensor and a flip up rear-panel LCD (so you could frame your shot with the camera still at your waist) would be the most ideal digital compact camera I could ask for. Sadly, such a camera doesn’t exist. But for anyone willing to shoot film, the Rollei 35 is the next best thing.

My only problem now is that I’m so enamoured with the Rollei, that I ‘m reluctant to relegate it to my automobile’s glove compartment. I suspect I may soon be surfing eBay for another Rollei 35 deal. If any of you readers have one with your initials carved into it, you know who to contact.


©2010 grEGORy simpson 

ABOUT THESE PHOTOS: “Sunset, English Bay”, “Grass Not Greener”, “Marquee Attractions”, “21st Century Pedestrian Crosswalk”, “21st Century Social Gathering”, “An Inaudible Calm”, and “Billboard, Nelson Street” were all shot within a one week period using a Rollei 35 T camera loaded with Tri-X film, rated at ISO 400 and developed in Ilfotec DD-X. The two photographs of the Rollei, itself, were shot with a Leica M9 and a 28mm f/2 Summicron lens.

If you find these photos enjoyable or the articles beneficial, please consider making a DONATION to this site’s continuing evolution. As you’ve likely realized, ULTRAsomething is not an aggregator site — serious time and effort go into developing the original content contained within these virtual walls.

Categories : Photo Gear
Tags : Black & White, Candid Photography, Compact Cameras, Film Photography, Leica, Rollei 35 Review, Rollei 35 T, Street Photography
Posted by Egor 
· August 30, 2010 

Ruminations on a 50mm f/1.1 Nokton

Half our lives are spent in darkness. To some, it’s an inviting friend. To others, a frightening foe. To a photographer, it’s a technical and creative challenge.

For early photographers, the limitation of narrow- or fixed-aperture lenses coupled with glacially slow emulsions dictated an obvious solution — long shutter speeds. But for anyone who photographs people in a candid or documentary style, lengthy exposure times are not always a viable solution to the nighttime conundrum.

Weegee and his ilk solved the puzzle by popping giant bulbs into shiny metal reflectors, and flashing the smithereens out of their subjects. A little of Weegee’s DNA resides in all of today’s strobist-school shooters, who see darkness as a blank canvas and their flash guns as artist’s brushes. Strands of Weegee’s DNA also inhabit the bodies of modern camera designers. After all, whenever the ambient light level falls below “midday sun,” nearly every automatic camera in existence will raise its tiny flash, and nuke its subject with a potent blast of blinding light — thus insuring all family snapshots resemble a NYC crime scene.

Me? I enjoy the mysteries that lurk in the darkness, the enigmatic shapes, and the cavernous infinity of a bottomless shadow. I’m in love with the night. In fact, I love it so much that I want to photograph night itself — and not flood it with artificial daylight. Those of us who embrace the night but don’t believe in flash photography have only three choices: we can use a fast lens; we can shoot at high ISO; or we can put our cameras away and hit the bar for a drink.

I’m not much of a drinker and, frankly, there are at least as many good photo opportunities in the night as there are in the day. So putting my camera to bed each evening is simply not an enticing option.

Shooting at higher ISO speeds only gets me so far. With film, the grain becomes gravel at about ISO 1600, and by ISO 3200 I’m forming photos out of boulders. In spite of the marketing hype, I don’t find the high ISO settings on full-frame 35mm digital cameras all that appealing. Granted, I can shoot my 5DmkII at ISO 25600. And this does let me get a shot that would be impossible with film, but it’s not a setting I’d choose to use on a regular basis. For me, the 5DmkII’s high ISO settings are the photographic equivalent of an automobile’s miniature spare tire — a crutch for emergency use, but not something you’d ever use to drive around town. Even amongst the ‘reasonable’ high ISO speeds, like 1600 and 3200, I find the organic nature of film grain to be much more visually appealing than the harshness of digital noise and its requisite smoothing algorithms. Since I’m already in metaphor mode, I’ll say this: ISO 3200 film looks like a richly textured wool fabric, while noise-reduced ISO 3200 digital looks like 1970’s polyester that’s been picked and pilled. Sure the polyester is technically ‘smoother,’ but the textured wool looks so much better.

For these reasons, whether I shoot film with a Leica M6 TTL or digital with a Leica M9, I prefer not to exceed ISO 1600. When I combine these ISO speeds with one of my Leica f2 Summicron lenses, I can extend my camera’s bedtime by about 30 minutes — the time between sunset and dusk. But darkness? I need to mate those higher ISO settings with a much faster lens.

Fortunately for us Leica M-mount users, lens manufacturers have long recognized the need for fast glass, and they’ve obliged this need for several generations. Unfortunately, we’ve obliged them right back by paying handsomely for the privilege.

Between 1966 and 1975, Leica “gave” us the 50mm f1.2 lens. I couldn’t track down its original selling price, but what’s relevant is what it costs today. Assuming you can even find one, you’ll likely have to cough up at least $5000 to get it. Double (or triple) that if you like your lenses in ‘mint’ condition. On one of my internet surfing waves, I found mention of a prototype version that sold for $30,538 at auction. Ouch.

Those with smaller wallets and a taste for newer lenses have long been tempted by the Konica M-Hexanon 50mm f1.2, which you can probably dig up on eBay for about $2500 (give or take the usual eBay fudge factors). And as long as we’re talking about 50mm f1.2 lenses, you can always try to find an old Canon 50 f1.2 and shoehorn it onto your Leica. But if you’re thinking “fast Canon,” why not think really fast and consider Canon’s fifty year old 50mm f0.95 lens? With the help of an adapter kit, crossed fingers, and $3000 (depending on condition), you could adorn your Leica with some old-world Canon charm.

Since 1975, photographers who demand their fast lenses bear the same nameplate as their camera have opted for Leica’s 50mm f1.0 Noctilux. It produces a creamy, dreamy softness totally at odds with today’s pixel-peeping mentality. Should you feel the urge to expose your photographic inclinations to ridicule amongst today’s kit-lens-wielding, entry-level dSLR owners, you can pony up about $7000 for a ‘new in box’ version with digital coding. Older versions can sometimes be found for a downright ‘respectable’ $5000.

In 2008, Leica replaced the 50mm f1.0 with the new 50mm f0.95 Noctilux. Now that’s a nice lens — $10,500 worth of nice lens, in fact!

Given these economics, it’s easy to see why many of us night-loving photographers have long been forced to put our cameras to sleep before we, ourselves, are ready for bed — until now…

Last year, Voigtlander introduced the 50mm f1.1 Nokton M-mount lens for less than 10% of the price of Leica’s new 50mm f0.95 Noctilux. Yes, less than 10% of the cost! OK, the Nokton is a bit slower than the Noctilux… but you did see that it cost less than 10% as much, right? I wanted one. Instantly. But to fund it, I needed to sell some lesser lenses first. They say that good things come to those who wait, and I waited over a year for the necessary equipment transactions to occur before finally getting mine. So is the Voigtlander 50mm f1.1 Nokton a “good thing?”

Short answer: “Yes.” Those of you who are satisfied with this answer can skip to the bottom of this post, click the DONATE link, shoot some money into my Paypal account, and you’re all done with this article.

Long answer: “It depends on the photographer, his photographic style, and the reasonableness of his or her expectations.” Those of you who wonder whether the 50mm Nokton will match your particular requirements should take the long road to the DONATE button, and read the remainder of this post.

Before I begin, let me state unequivocally that I’m no Sean Reid, and this isn’t Reid Reviews. Anyone contemplating the purchase of an M-mount lens owes it to himself to subscribe to Sean’s site. It’s worth every penny (and then some). Sean doesn’t just measure a lens’ performance — he puts that performance into a real world context (a practice I strive for in my own quasi-reviews). Unfortunately, as of this posting, Sean has not reviewed the 50mm f1.1 Nokton. This, I suppose, is why I feel compelled to offer my own ruminations.

The Nokton is nearly 2-stops faster than my f2 Summicron lenses. You can’t suck up all that extra light and be “dainty.” In the rangefinder world, the 50mm Nokton is a behemoth. Because of this, you’ll likely read a lot of moaning and groaning about how big it is. Heck, I’ve even moaned once or twice myself. But let’s shine the light of perspective on this issue, shall we? Take a look at the following photo:

In the middle is the Voigtlander 50mm f1.1 Nokton. Immediately to the right of it is a Leica 50mm f2 Summicron (v5). No one would deny the 50mm Nokton is significantly larger than the 50mm Summicron, and therein lies the belly-aching. To the left of the Nokton is the Canon 35mm f1.4L lens for my 5DmkII. In the pro dSLR world, this lens is considered quite portable. In fact, on those rare instances when I carry my 5DmkII on the streets, the 35L is my “walk-around” lens. Obviously, if I consider the 35L to be a portable lens, I’d be hard pressed to designate the 50 Nokton as “not portable.” As you can plainly see, the 50mm f1.1 Nokton is markedly smaller than the Canon 35L. Just for grins, compare the size of my ‘walk around’ Canon 35mm lens with my ‘walk around’ Leica 35mm lens, which is the tiny little bump you see next to the iPhone. Then, for good measure, take a look at the white 70-200mm Canon lens on the far left — although an f2.8 version of this lens is available (and extremely popular), I chose the smaller f4 version (shown here) because it was “light and portable.” Given these comparisons, it would be pretty darn odd to complain about the Nokton’s size.

Still, with all things being equal, size would help guide my decision to carry the 50mm f2 Summicron on an all-day hike, while low-light capabilities would govern my decision to carry the 50mm f1.1 Nokton on an all-night hike. But rarely are things equal, nor are choices so cleanly cut. There are times, for example, when circumstances might require me to use my daytime 50mm at night — that’s why it’s important to understand the tradeoffs concerning high ISO speeds and possible flash usage. Similarly, there are times when I might need to use my nighttime 50mm in daylight. So it’s equally important to understand the tradeoffs regarding the use of narrow apertures on fast lenses.

A simple fact: stopped down to f8 or more, the f1.1 Nokton will not be nearly as sharp as the f2 Summicron. Just as, at night, higher ISO speeds will dictate that an image taken with the f2 Summicron will be far noisier than one taken with the Nokton. This is called physics. And these are the tradeoffs inherent within its laws. If you’re only going to own one 50mm lens, and you choose the Nokton, then you might be disappointed if you take most of your photos in the daytime. Diffraction effects mean that this lens gets softer once you stop it down past f5.6. Is this a reason to dislike the lens? Only if you’re buying it for daytime photography. But why would you buy an f1.1 lens to take to the beach?

There’s another issue related to stopping down the Nokton — focus shift. With the majority of fast lenses (particularly those that don’t cost $10,000), the focus plane shifts slightly as you narrow the lens aperture. Once again, this is called physics. Small amounts of focus shift, though easily measured, may frequently pass unnoticed in real-world situations. I’ve read many internet forums where people obsess over a focus shift of, say, 2cm. In reality, your own body can introduce this much shift, and the simple act of breathing can easily shift focus by a couple centimeters. Unless the camera is locked down on a tripod, the average person’s own natural sway is likely to cause as much or more focus shift than some lens designs. And lest we forget, stopping down a lens increases its depth of field — so it’s possible that any measurable focus shift will simply be obscured by the deeper focal plane of a stopped-down lens.

Regrettably, none of this is meant to imply that focus shift isn’t a problem on the 50mm Nokton. It depends, instead, on your definition of ‘problem.’ My copy exhibits measurable focus shift — about 7-8 cm worth at 1.5 meters. Depending on subject matter, this is definitely something you’ll see in the real world. Prior to purchasing this lens, my dealer allowed me to test both of his in-store copies, then cherry-pick my favorite. Both of the lenses I tested displayed an identical amount of focus shift, which I suspect is simply commensurate with this particular optical design and not the result of any manufacturing defects. A few days after I purchased the lens, I ran some tightly controlled tests, using my usual homemade setup. The setup is simple. I place 7 batteries on a custom-made template. Each battery is exactly 2cm over and 2cm back from the battery next to it. By focusing precisely on one battery, I can see a reasonable ‘real world’ approximation of a lens’ focus shift.

The results of my 50mm Nokton test are shown in the following series of photographs (click any photo to enlarge it).

At f1.1, the Nokton focuses where intended. The narrow depth of field is very evident.

At f1.4, the Nokton continues to focus where intended, but depth of field has increased such that the battery 2cm further away is also nearly in focus.

At f2, we begin to see some minor focus shift. Although the camera is focused on the closest battery, the battery 4cm further away is actually the most in-focus.

At f2.8 the lens seems to be at or near its optimum resolution. Unfortunately, it’s also focusing on a plane 6cm further away than the intended focus plane.

At f4, the resolution appears to equal the results obtained at f2.8. Unfortunately, the focus plane seems to have shifted another cm further away from the intended plane — to approximately 7cm. However, the more extensive depth of field makes the focus shift slightly less evident than it was at f2.8.

By f5.6, lens diffraction is beginning to affect image quality, and maximum sharpness is on the decline. Depth of field is becoming more significant, and it’s really quite difficult to determine where, exactly, the actual focus plane lies — but its center appears to be somewhere around 7-8 cm behind the desired plane.

At f8, diffraction effects further soften the overall image, and deeper depth of field makes the actual focus plane difficult to determine. Ultimately, given the extensive depth of field, the shift is unlikely to be visible in real-world photos.

Come f11, diffraction is really taking its toll on overall sharpness, and depth of field is so extensive that one can no longer tell where the actual focus plane rests. As a result, focus shift is now inconsequential.

By f16, both maximum diffraction softness and maximum depth of field combine to totally obscure any actual focus shift, making it completely irrelevant.

BOTTOM LINE: The 50mm Nokton performs flawlessly at both f1.1 and f1.4. At f2 there is some focus shift evident, but real world variances are nearly as likely to cause minor focusing errors. Between f2.8 and f5.6, the focus shift will undoubtably be visible within some photographs. By f8, the depth of field and lens diffraction mask any focus shift errors. What’s this all mean? It means that from f1.1 to f2, I use the Nokton without any fear that focus shift will harm my images. That’s good, because 90% of the images I take with this lens will be at f2 or wider. If, however, I’m using this lens in the f2.8 to f5.6 range and I’m photographing subjects that are fairly close to me (within a few meters), I’m going to have to be aware that focus shift exists. What do I do about it? I simply focus, then lean my head back slightly before taking the shot — focus issue resolved. Once I reach f8, I stop worrying about focus shift again.

In the over-amplifed din of the internet, the 50mm Nokton’s focus shift garners the most consternation. But there are questions and concerns about several other issues, which I’ll address next.

Bokeh quality? In high contrast situations, such as back-lit tree leaves, it can be a bit jumpy. Or edgy. Or caffeinated. Pick whichever term you like to describe a sort of uneasy jitteriness within the out-of-focus areas. This may impact your opinion of this lens depending, again, on how you choose to use it. In 99% of my shots, the bokeh is perfectly fine. It looks wonderful with low- and medium-contrast backgrounds. And its high-contrast edginess is actually a boon with nighttime street shots, since it gives them a tiny bit more ‘attitude’ than, say, the creamy bokeh that my 90mm Elmarit lens produces. The 50mm Nokton lens would not, however, be my first choice for taking shallow DoF photos in high-contrast nature surroundings. For that, I’d take a few steps backward and use a longer lens (like that 90mm f2.8 Elmarit).

Chromatic aberration? Yeah, wide-open it’s thick and purple and pervasive. If you’re a color photographer who, for some reason, likes to point his lens skyward to photograph treetops, you’re going to spend a fair amount of time cursing this lens in front of Photoshop. For the way I shoot, the chromatic aberration is not much of a problem. If I shoot color on the streets with my digital M9, there’s usually enough neon and other visual chaos that the chromatic aberration isn’t an obvious problem. Also, since I work mostly in black & white, I’m likely less bothered by purple fringing than the average color photographer. Needless to say, when I load my M6 TTL with black & white Tri-X film, and front it with the 50mm Nokton, then chromatic aberration is a total non-issue.

Vignetting? Absolutely. It’s part of the look. Should you wish to correct it quickly and painlessly, both Lightroom and Photoshop are more than up to the task. But I actually prefer to embrace the look rather than fight it. I’m from the old school, where we actually liked our lenses to have some personality.

Viewfinder blockage? Well, if it’s any consolation, the lens blocks only the portion of the scene that will be partially obscured by its vignetting (kidding). My seat-of-the-pants estimate is that, with hood, the Nokton blocks about 15% of an M6/M9 50mm demarcated viewfinder. Unscrew the hood, and the blockage drops to nearly half that amount. By the way, this might be an ideal time to mention that the Nokton actually ships with a lens hood — an increasingly rare occurrence these days. Should habit or guilt force you to feel the need to actually purchase a lens hood, there is a vented hood available that provides some flare protection while not blocking as much of the Leica’s viewfinder.

Obviously, darkness isn’t the only reason to shoot with the 50mm f1.1 Nokton. The narrow depth of field this lens produces when wide-open is, for some photos, a rather desirable feature. It’s for this very reason that I purchased a 64x Neutral Density filter. When screwed on the lens, this filter blocks a full 6-stops of light. On a typical bright day, I might normally shoot at f11, 1/500s, ISO 200. Screw on the 64x neutral density filter, and I’m suddenly shooting f1.4 at the same shutter speed and ISO! Obviously, this lets me use the Nokton at wide apertures on bright days, which (as shown above) can yield some interesting results.

This approach does, however, make street shooting quite difficult. With a wide open lens, the depth of field is razor thin — not exactly conducive to successful zone-focusing techniques. No matter. Some subjects seem to benefit from inexact focus:

There’s really nothing I don’t like about the Nokton. It is, after all, a specialty lens. And it performs its specialty with aplomb. It has its quirks and these will inevitably bother some users — but everything in life comes with tradeoffs. It’s up to each of us, individually, to assign value and meaning to these tradeoffs. For example, I have little doubt I would prefer Leica’s $10,500 f0.95 Noctilux, but the $9,500 cost differential is not a tradeoff that I, personally, am willing to accept. Neither is the opposite option of foregoing a fast 50mm lens, and putting my Leica to bed whenever it gets dark. I bought the 50mm Nokton to solve a problem — shooting in dark environments. But I find myself constantly seeking other photographic opportunities that will benefit from its unique properties. In my estimation, any lens that solves problems while unlocking creative options is “a winner.”

Darkness has always been my friend, and thanks to the Voigtlander 50mm f1.1 Nokton, it’s now my Leica’s friend, too.


©2010 grEGORy simpson

ABOUT THESE PHOTOS: “After Midnight Cowboy” and “A Romero Moment” were shot with a Leica M9 digital and a Voigtlander 50mm f/1.1 Nokton lens. “Wandering Troubadour” and “Sushi Window” were shot with a Leica M6 TTL and a Voigltlander 50mm f/1.1 Nokton lens, using Tri-X film exposed at ISO 1600 and processed in Diafine.

If you find these photos enjoyable or the articles beneficial, please consider making a DONATION to this site’s continuing evolution. As you’ve likely realized, ULTRAsomething is not an aggregator site — serious time and effort go into developing the original content contained within these virtual walls.

Categories : Photo Gear
Tags : Candid Photography, Cosina Voigtlander 500mm f/1.1 Nokton lens review, Documentary Photography, Fast Lenses, Leica M6 TTL, Leica M9, low light photography, night photography, Street Photography
Posted by Egor 
· August 8, 2010 

And the Meaning of Life Is…

Survival. Every carbon-based organism enters this world with a fundamental will to survive — either as an individual or as a species. Every life form adapts, evolves, fights and maneuvers for a single purpose — to survive another day. Survival is the meaning of each and every life. But what is the meaning of all life? What is the ultimate purpose of all this surviving? What are we surviving for?

Usually, I avoid such bouts of existential pondering. But a couple weeks ago, I had one of those birthdays — the type where the leading digit clicks forward a notch and thus, in a single day, hurls you an entire decade closer to oblivion. These birthdays are life’s milestones — checkpoints at which we assess our path to date, and our road ahead. But what, exactly, do we need to assess? If we’re having cognitive thought, then we must be alive — which means we continue to survive. If survival is the meaning of life, then there should be nothing left to evaluate. But each of us, in order to give purpose to our life, creates our own individual artificial definition of “survival.” It is this definition that we assess at these milestones.

The majority of people define survival not by whether they’re still breathing, but by how comfortably their life functions are being sustained. Spiritualism and capitalism are two sides to this same coin — both provide a level of comfort, whether emotional or physical. For those most concerned with self-preservation, survival is seen as either a qualitative or quantitative measure, rather than an absolute.

The more nurturing members of humanity view survival on a Darwinian level. They see survival in terms of their children, and their children’s children. Consciously or not, they view survival on a macro level, and they assess their lives based on the health and welfare of their offspring.

Then there are the artists. And the writers. And the mad scientists. Like the nurturers, this group views survival as a species-wide quest. But these people — my people — see survival as an intellectual continuance rather than a physical one. We view survival as the propagation of our thoughts, ideas and intellect, and not our DNA. We have little regard for ostentatious personal comforts and, in general, are rather poor practitioners of self-survival. To us, it’s the thought that must survive.

Photography is now my third attempt at intellectual survival. The first was music. Music has always had a profound effect on me. Its patterns, poetry, and cadences had the power to control emotion, and I soon learned that much of the music I heard came not from the radio, but from within me. I felt compelled to realize those inner sounds, and I became a musician, composer, sound designer, and recording artist. To say I had a modicum of success would be disrespectful to the word “modicum.” I had a few releases. A few fans. Perhaps I impacted a few lives. Even today, 20 years after making these recordings, I get an occasional fan email. But my music won’t survive the test of time and, when I die, so will those musical thoughts.

Curiously, it was the need to record what I heard in my head that launched my second attempt at intellectual survival — invention. My music career coincided with the birth of the personal computer and a nascent software industry. I discovered I could use this new technology as a means to help extract and realize the music within me. This launched a 20 year career in which I designed computer music software and techniques. My goal was noble — to provide mankind with a new set of tools that would help them better-communicate their musical ideas. At this, I was a success. Many of my innovations are now common to all music software, and musicians the world over are making music with techniques that I developed and tools that I designed. For these efforts, I achieved almost no financial reward — those who define survival by the size of their bank accounts saw to that. But, for me, financial success was secondary to making the world a better place.

Except the world didn’t become a better place. It became worse. Far worse. Technology didn’t just become an enabler for the musically gifted. It became a crutch upon which people with no musical gifts could now generate musical output. Lowering the barriers to musical creation diluted the talent pool to such an extent that any musical cream would simply drown before it ever rose to the surface. Before the advent of music technology, people had to learn to play an instrument — and it was through this instrument that their own unique personality, quirks, and nuances could flow. Before music technology, people created rhythm, melody, and harmony from within their own minds. Today, they purchase pre-packaged, pre-recorded musical phrases and combine them into a soulless collage. If your collage sounds a whole lot like everyone else’s collage, you have a ‘hit.’ Making music became about as soulful as heating up a frozen dinner in a microwave oven — convenient, but ultimately unsatisfying. Music has suffered as a result. And the world has suffered with it.

The more music technology I created, the less I enjoyed the music created by that technology until, ultimately, I loved neither the technology nor the music. If I’m going to leave a legacy, I certainly don’t want it to be as “the destroyer of the very thing I loved.” So, with the lessons I learned from my first two attempts at survival, I began to pour all my efforts into my other love — photography. Here, at last, is where I’ll create my legacy — a photographic legacy! If only I knew what that meant…

21st century photography has seen a demise commensurate with the music industry’s. Auto-everything digital cameras, Photoshop plugins and web publishing have, as with music, lowered the entry point and diluted the talent pool. I have no doubt there are as many (if not more) talented photographers working today as in 1955 — the problem is we can no longer find them. They’ve become the needles in the haystack. How do you find one or two subtly magnificent images within a billion over-amped and tedious HDR shots? How do you find the one unique vision within a sea of sameness?

I once believed I could make a difference by creating a single iconic image. Something like W. Eugene Smith’s Walk to Paradise Garden would be nice. Timeless. Powerful. Universal. I felt, if I created just one iconic image, then I would secure my intellectual survival. But my style is subtle and my images are quiet. I read that there are 30 billion photographs uploaded to Facebook each year. That’s a lot of competition — particularly when you consider that I, personally, don’t even post images on Facebook. Besides, even if I did miraculously have a “hit” photo, I’m not the one who will determine which of my photos is the “hit” — the general public decides that. What if my one “hit” photo wasn’t the equivalent of, say, ? and the Mysterians’ 96 Tears or Iron Butterfly’s In-A-Gadda-Da-Vida? What if it turned out to be the photo synonym of Tony Basil’s Hey Mickey! or Right Said Fred’s I’m Too Sexy? Then what? My photographic legacy would be every bit as damaging to mankind as my inventing legacy!

Fortunately, I learned rather early in my photographic explorations that I wasn’t a “singles” photographer. I was an “album oriented” photographer. I wanted to tell stories. I wanted to document life. And, most importantly, I wanted to find some kind of meaning to it all. In this, I’m not alone. Besides the previously mentioned W. Eugene Smith, there’s Robert Frank, Lee Friedlander, and Garry Winogrand. There’s Elliott Erwitt, Sebastiao Salgado and Philip Jones Griffiths. Martin Munkacsi and Henri Cartier-Bresson. Dorothea Lange and Larry Towell. And I’ve only scratched the surface.

The images these photographers capture create a portrait of mankind. When you view them as a whole, you feel as if the answer to all our questions lies somewhere within — like a puzzle box yet to be unlocked. The world needs more of this: more introspection, more compassion, more awareness. What it doesn’t need, in my opinion, is another HDR photo of a rusted truck against an overwrought sky.

There’s nothing inherently wrong with making pretty pictures. Pretty pictures make money, and money makes a whole lot of survivalists happy with the way they’re surviving. But I’m looking for something deeper, something meaningful. I know, full well, that I will not find this meaning in my own lifetime. But if I can take photographs that, together with those of the aforementioned photographers, help future generations unlock the mystery of life, then I will have survived. My will, my soul, and my beliefs will have survived.

At least, that’s the plan. In ten years, I’ll reassess — that’s when I’ll have another one of those birthdays.


©2010 grEGORy simpson  

ABOUT THESE PHOTOS: “Fresh Fruit” was shot with a Lecia M6 TTL and a Voigtlander 15mm f/4.5 Super Wide Heliar lens, using Tri-X film exposed at ISO 1250 and processed in Diafine. “Pipeless Pied Piping” and “What Johnny Said” were shot with a digital Leica M9 and a 28mm f/2 Summicron lens. “A Withering Scrutiny”, “Spirit in the Sky” and “Derby Girl” were taken with a Leica M6 TTL and a Voigtlander 15mm f/4.5 Super Wide Heliar lens, using Delta 400 film exposed at ISO 400 and processed in Ifotec DD-X.

If you find these photos enjoyable or the articles beneficial, please consider making a DONATION to this site’s continuing evolution. As you’ve likely realized, ULTRAsomething is not an aggregator site — serious time and effort go into developing the original content contained within these virtual walls.

Categories : Musings
Tags : Black & White Photography, Candid Photography, Documentary Photography, Leica M6 TTL, Leica M9, Street Photography
Posted by Egor 
· July 13, 2010 

To Whom It May Concern

Hello, __________ (insert your name here):

It was nice bumping into you on ___________ (insert street name here). You certainly looked uncomfortable lugging around that __________ (Nikon/Canon) SLR and all those lenses. I know you were disappointed to discover that my “cool” little camera wasn’t actually a top secret __________ (Nikon/Canon) Micro Four Thirds camera. Don’t worry, I’m sure they’ll develop a mirrorless camera with interchangeable lenses sometime soon.

When you nodded toward my camera and asked, “How many megapixels is that?” I answered with either the truth or a lie. Specifically, if I said “18,” then I was carrying a Leica M9 digital rangefinder and I told you the truth. If I said “12,” then I was carrying a Leica M6 TTL and I lied. The Leica M6 TTL is a 35mm film camera, and not a digital camera. In my experience, most people who ask about the megapixel count in my M6 simply don’t know what a film camera is. I find this a rather startling development, but I am getting older and the world is getting younger. In any event, I’ve spent too much time on too many street corners trying too often to explain that film cameras don’t actually have megapixels — only to see people shake their heads and walk away in disgust. So anytime somebody asks how many megapixels are in my M6, I just say “12.” That’s the file size that results from each scanned negative. I hope you’ll forgive the fib.

You mentioned that the Leica’s body shape caught your eye and that you, too, were looking to get a rangefinder — specifically the __________ (Panasonic GF-1 / Olympus Pen / Sony NEX / Ricoh GXR).

I explained that the camera you mentioned is not actually a rangefinder, and that it was just styled to look like a classic rangefinder. You seemed to doubt me, so I pointed out that my camera has no live view, no video, no auto focusing, no face detection, no scene modes, and no matrix metering.

You seemed quite __________ (horrified / befuddled / disgusted) by the sparsity of features on the Leica, and mentioned that you couldn’t possibly live without __________ (live view / video capability / auto-focus / face detection / scene mode / matrix metering). I assure you, the __________ (Panasonic / Olympus / Sony / Ricoh) camera you purchase will have all those features, but it’s definitely NOT a rangefinder.

You asked why I was so __________ (stupid / old-fashioned / technophobic) that I would choose to shoot with this camera, instead of the model you’re considering. I answered that it was because all those faux-rangefinder cameras lack the one single feature I need most in a camera. When you asked what that feature was, I replied “an actual rangefinder.”

That unleashed a barrage of questions about what makes a camera a rangefinder; what’s different about a rangefinder; and why someone might choose to use a rangefinder. It was at this point that I gave you my card, and invited you to visit my website and read this “open letter.” Hopefully it will answer all your questions.

First off, just because a camera is styled to resemble a rangefinder doesn’t mean you can call it a rangefinder. You can buy an adapter kit that makes an old Volkswagon Beetle look like a Formula 1 racer, but that doesn’t mean it could compete on the Formula 1 circuit. Rangefinder cameras get their name for a very specific reason — they contain a mechanical range-finding focusing mechanism, hence the name “rangefinder.” Rangefinder focusing is fundamentally very different than the contrast-detect focusing employed by the __________ (Panasonic / Olympus / Sony / Ricoh) camera that you’re considering.

Before we look at rangefinder focusing, let’s look at how the contrast-detect focusing works on the camera you want. Contrast-detect focusing does exactly what it sounds like — it automatically adjusts the lens’ focus until your camera’s on-board computer determines the maximum amount of contrast between adjacent pixels on the sensor. Contrast-detect focusing works under the assumption that an object is in focus whenever the contrast intensity between it, and the objects around it, is maximized. It doesn’t focus as rapidly as the phase-detection method used by true SLR cameras, but today’s higher-end contrast-detect models are responsive enough to satisfy most casual situations. I once owned a Panasonic DMC-G1 Micro Four Thirds (mFT) camera, and had no complaints about its contrast-detect focus.

Rangefinder focusing works in a more direct way — it determines focus by measuring exactly how far an object is from your camera. Rangefinders do this by using a pair of windows, spaced some distance apart on the front of a camera. If you look at the photo of my Leica M6, you’ll see all manner of little glass windows on the front of the camera — windows that you won’t see on any of the faux-rangefinders. Looking directly into the Leica’s front (with the lens facing you), you’ll see a big window on the far right and a tiny window on the far left. When you turn the camera around so that the lens faces away from you (and toward your subject) you’ll see only one window — the viewfinder. When you look through the viewfinder on the back of the camera, you’re looking straight through that big, bright glass window that you see on the front. In the middle of your view is a small rectangular patch with a double image. That second image comes from the second, smaller window on the front of your camera. An internal mirror projects that second window’s image into the center of the main viewfinder. When you rotate the focus dial on a Leica M-series lens, the double image converges and diverges. When the two images align perfectly, then the lens is focused.

Probably the easiest way to understand this is to use your own eyes. Hold your right hand in front of your face, at arms’ length. Hold your left hand just a few centimeters from your nose. Focus your eyes on your right hand, and notice that you now appear to have two left hands — a double image. Refocus your eyes on your left hand, and notice that you now appear to have two right hands — again, a double image. That’s right — rangefinder cameras and human eyesight work exactly alike.

If you have only ever shot with auto-focus cameras, you may wonder why anyone would want to manually focus a camera using a rangefinder. Similarly, you may wonder what possible benefits could come from looking through a viewfinder that’s beside the lens, rather than looking through the lens itself. “Why,” you ask, “would anyone actually choose to shoot with a real rangefinder when the __________ (Panasonic / Olympus / Sony / Ricoh) faux-rangefinder has the ‘advantage’ of both auto-focus and through-the-lens viewing?”

The short answer is simple. It’s because everything has an equal and opposite reaction — meaning every advantage creates an equal and opposite disadvantage. What follows are 10 reasons why neither auto-focus nor through-the-lens viewing are advantageous to me, and why I choose Leica rangefinders for the majority of my street, documentary, reportage, and candid photography:

Reason 1: Because the system has been designed from the ground-up for manual focusing, the lenses all have large, legible distance and depth-of-field scales marked right on the barrel. The advantages of this become apparent if you’ve ever wanted to take a photo, but either time or circumstance prevented you from lifting the camera to your eye. Maybe the moment was fleeting, and you just weren’t fast enough. Or maybe you didn’t want to give away the fact you were about to take a photograph — after all, people change their behaviour when they know they’re being photographed. If your goal is to document “life as it exists,” then advertising your photographic intentions will irrevocably alter the scene you wish to photograph. Autofocus cameras almost always require you to look through the viewfinder or at the rear LCD — if you don’t, then there’s no way to position the autofocus point correctly. By contrast, rangefinders are designed for this very situation. Because there are distance scales on the lens barrel, you can set the focus of the lens without looking through (or at) a viewfinder. If your subject is 5 meters away, simply rotate the lens to 5m, and snap off a shot from the waist. It takes a little bit of practice before you’re an accurate judge of distance, but it’s a valuable skill on the streets.

In addition, since rangefinder lenses are designed specifically for manual focusing, their focus rings are mechanically linked to the focus mechanism. Because of this, it’s very easy to set lens focus “by feel” — particularly for those lenses with tabs. Through practice, I always know a lens’ distance setting by simply feeling the rotational angle of the focus tab. Conversely, most modern lenses “focus by wire,” meaning there’s no mechanical correlation between the rotation of the lens and the actual focus distance.

Also, since rangefinder lenses have depth-of-field markings, I always know how much focusing “slop” I can play with. This, too, is extraordinarily handy. For example, if my 35mm lens is set to f/8 and focused to a bit more than 3m, then a quick glance at the lens barrel shows that everything from 2m to 8m will be in reasonable focus. That tells me I can shoot any subject between 2m and 8m without obsessing over focus. All these factors combine to make manual focusing actually faster and easier in street/candid situations than autofocusing. Obviously barrel markings aren’t limited to rangefinder lenses. However, since most modern cameras are autofocus and most photographers no longer bother to manually focus, lens manufacturers have stopped engraving distance markings on barrels — except for rangefinder lenses.

Reason 2: Because I frame shots by looking through a window, rather than through the lens itself, I can see everything that’s in front of my camera — and I see it with an extensive depth-of-field that’s limited only by my own eyesight. By contrast, when I look through an SLR’s viewfinder (or an electronic viewfinder on a mFT camera), I see the scene through the ‘eye’ of a ‘wide open’ camera lens. If I’m shooting through an f/2 lens, then I see the world in front of me with a shallow f/2 depth-of-field. If my camera is focused on a near object, then any distant objects appear blurred. Similarly, if my camera is focused on a distant object, then the near objects are blurred. If I’m focusing on something close-up and something interesting occurs in the distance, I’ll likely be unaware because of the limited depth-of-field. My situational awareness diminishes greatly with through-the-lens viewing and, if I’m performing candid, street or documentary photography, that means I’m going to miss situations I should be photographing. Compare this to a rangefinder, in which you look through a window, instead of through a lens. The window is clear and bright. There’s no strobing like an mFT. There’s no tunnel vision, like an SLR. There’s no need to hold the camera at arms’ length, like a point-and-shoot. Instead, your eye is free to wander the scene in front of your camera, unencumbered by limited depth-of-field, or other through-the-lens artifacts.

Reason 3: The rangefinder’s internal viewfinder always shows the same field of view, no matter what lens is mounted on the camera. With my eye pressed tightly against the Leica’s .72x viewfinder, I’ll see approximately a 24mm field of view. With a 50mm lens mounted on the camera, I see the same 24mm field of view, plus some frame lines demarcating how the 50mm lens will “crop” that view (see the viewfinder mockup photo earlier in this article). The result is that I can see, and therefor monitor the action going on outside the area being photographed. This is a gigantic benefit because, again, it gives me situational awareness. If I’m using an SLR or mFT, then I’m looking through the lens itself — I cannot see objects outside the frame. With a rangefinder, I’m aware of everything that’s in front of my camera, not just what my lens sees. This lets me time shots precisely, since I can see when something is about to enter the frame. Similarly, it lets me see other action outside the frame, and respond appropriately. Again, if your goal is documentary style photography, a rangefinder’s viewfinder keeps you in touch with your surroundings, and fully engaged with your environment.

Reason 4: I never lose sight of my subject. With all the other cameras — the ones that show you the view through the lens — you completely lose sight of your subject the instant you take a picture. Either the mirror flips up and out of the way (as with an SLR), or the screen freezes or blacks out (as with live view cameras). The result is that you, the photographer, are momentarily blind at exactly the moment you care about the most — the moment you take the photo. With a rangefinder, you’re looking through a window, not the lens. Taking a photo never obscures your view of the subject — you always have your window on the world and, again, your situational awareness.

Reason 5: Using a rangefinder, I can simply flip a little lever to bring up different framelines within my viewfinder. If, for example, I want to see how much of a scene would be captured with a 90mm lens, I don’t actually have to mount the 90mm lens to find out — I simply poke the frame select lever, and the 90mm framelines appear — allowing me to select the right lens instantly.

Reason 6: Rangefinders and mFT cameras share one major advantage over SLRs — neither has a large reflex mirror that needs to snap up and out of the way every time you take a photo. This provides two benefits: First, the cameras are quieter. And, if you get a rangefinder with a cloth shutter (like my M6 TTL), they’re quieter still. Second, you can handhold much longer shutter speeds with a rangefinder than with an SLR. The rapid speed at which an SLR’s mirror swings up generates a lot of internal vibration. As a ‘rule of thumb,’ SLR shooters know they can’t reliably handhold a camera with a shutter speed any slower than “1 over the focal length.” With a 50mm lens on an SLR, that means the slowest shutter speed you can safely handhold is 1/50s. Rangefinders easily let me double that and, with a soft release and good technique, I can sometimes handhold a 50mm lens at 1/15s — again, its all about being able to adapt quickly and effortlessly to your environment.

Reason 7: As with the previous reason, this is more of a justification for choosing a rangefinder over an SLR than an mFT but, in general, rangefinder lenses are demonstrably smaller and lighter than their SLR counterparts. I can easily and inconspicuously carry a couple extra rangefinder lenses in a pocket — no bag required. Try that with your SLR! With smaller lenses and a smaller camera, I can dodge and weave through a scene easily, and not draw too much attention to myself or my camera (the following photo excepted).

Reason 8: The fidelity-to-size ratio. My Leica has a full-frame 35mm sensor — 4 times larger than the sensor in an mFT — yet the camera is roughly the same size as one of the popular mFT bodies. My images are cleaner, crisper, and possess much greater dynamic range than any mFT camera. Yet I don’t have to put up with the bulk or weight of a full frame SLR in order to achieve images of this quality.

Reason 9: The camera doesn’t fight me. Photographers have only four parameters to set when taking a picture: 1) ISO/film speed, 2) aperture opening, 3) shutter speed, and 4) focus. Does a camera really need to have hundreds of different modes and options, all of which are designed to automatically set these four parameters so the photographer doesn’t have to? Personally, I think it’s easier and more beneficial to spend the time to learn the basics of photography — how to control these four parameters and how they interact — rather than to spend it learning to use a camera’s myriad gimmicks and gadgets. Every “gee whiz” camera I’ve ever owned has put unnecessary and obstructive barriers between me and the four basic parameters. Leica M-series cameras (and most other models of rangefinder) all assume that the photographer knows more about how he wants to capture a specific scene than does a generic computer program… and they’re right!

Reason 10: Leicas are built for use, not for coddling. This may seem a curious statement, since some Leica owners actually do coddle their cameras — displaying them in glass cabinets as if they were priceless museum artifacts. For me, Leicas are priceless — as rugged photographic tools, and not as objects d’art. And it’s this ruggedness that makes them so valuable on the streets. Instead of plastic, the camera body is built from a high-strength magnesium alloy. Instead of plastic, the camera is wrapped in vulcanite. Instead of plastic, the top and bottom plates are machined from single, solid blocks of brass. The camera is built like an actual tool, and not just this years’ disposable photographic toy.

So, __________ (insert your name here). I’m sure you can see why I invited you to visit my website, rather than having this discussion on the street. Obviously, there is no such thing as a perfect camera, and different types of cameras excel at different types of photography. I am, in no way, trying to suggest that a rangefinder is the “best” camera, nor that a Leica is the “ideal” rangefinder to own. In fact, I can assure you that if you shoot sports, wildlife or macros, then a rangefinder is definitely not the camera for you. But if you’re looking to shoot a lot of candid or ‘documentary’ type photography, then a real rangefinder’s size, responsiveness, situational awareness, build quality, and image quality might be just what you’re after.

Hope to see you again sometime. Happy shooting!

Respectfully,

Egor


©2010 grEGORy simpson

ABOUT THESE PHOTOS: “The Art Of Being Awesome” and “A Spontaneous Display of Canadian Exuberance: Canada Day 2010” were both taken with a Leica M9 and a v4 Leica 35mm f/2 Summicron lens. “Invisibility Malfunction” was shot using that same lens, but on a Leica M6 TTL, loaded with Tri-X film rated at ISO 1600, and developed in Diafine.

If you find these photos enjoyable or the articles beneficial, please consider making a DONATION to this site’s continuing evolution. As you’ve likely realized, ULTRAsomething is not an aggregator site — serious time and effort go into developing the original content contained within these virtual walls.

Categories : Photo Gear, Photo Techniques
Tags : Candid Photography, Documentary Photography, Leica M6 TTL, Leica M9, Rangefinder Cameras, Rangefinder photography, Street Photography
Posted by Egor 
· June 27, 2010 

Click Clique

There is no such thing as a generation gap. Since the dawn of man, each generation has believed that all preceding generations are “primitive,” and all subsequent generations are “clueless.” Each generation believes that theirs is the one true “rebel” generation — the one generation that neither capitulated to the dogma of their elders, nor bowed to the stifling constraints of conformity.

Yet each generation, in an effort to carve its own unique niche, does exactly the opposite of its supposed manifesto. By consciously dismissing the practices of previous generations, each new generation is effectively guided by them — albeit in a contrarian fashion. As each generation wages war upon the preceding generations, it adopts an “us or them” mentality that, by very definition, necessitates conformity. Ultimately, each generation of “non conformists” is, in fact, acutely homogenous in thought. And each generation is, therefore, fundamentally the same as every other generation.

In all likelihood, a more exhaustive and eloquent postulation of this theory exists in any number of basic Sociology textbooks. I wouldn’t actually know because, through a misguided notion that I should become an electrical engineer, I spent the better part of my youth reading and re-reading technical tomes. Against both my nature and aptitude, I spent my weekdays, weeknights, and weekends trying to make sense of nonlinear differential equations. Meanwhile, my peers gathered in social establishments where they developed the bonds and beliefs of our generation. By consequence, since I never truly became one with my generation, I never swallowed its beliefs as gospel. I became a man without a generation — a cultural nomad.

Free from the shackles of a generational credo, I formed my own ideas, my own likes, and my own theories. I developed an eclectic collection of interests, and relished in the artistic creativity of multiple generations. Unconfined and unconcerned with “cool,” I was free to wander a cultural landscape many thousands of years in the making. I could draw liberally from every generation — picking and choosing what I liked and what I didn’t. 11th century Hurdy Gurdy music? Love it! The zeal with which the Normans subdued and repressed the religious and cultural freedom of others? Not a big fan.

The privilege to pick and choose from multiple generations is liberating. It’s also, more often than not, extremely frustrating. If your beliefs align with current generational thinking, your needs are easily met. If your beliefs diverge from current generational thinking, you’re in for a world of hurt. Need proof? Go to the iTunes store, type “hip hop,” and see how many thousands of album choices you have. But what if you want to chill to a classic 2-man hurdy-gurdy groove? Type “organistrum” into iTunes and count how many choices you have. Sadly, here in Canada, I have none. Instead, iTunes suggests that I must actually be searching for “organist.” I’m not.

In all likelihood, you’re reading this article because of an interest in photography and photographic equipment. And, assuming you’re still reading, photography is exactly the point of this entire preamble.

Do you strive to take colorful, contrasty photographs — void of noise, clear as glass, and smooth as butter? Congratulations! Today’s generation will adore your photos. Friends will fill your Facebook wall with accolades, and dozens of group administrators will request your Flickr shots for their photo pools.

Are you saving your pennies to purchase a new, wickedly sharp, distortion-free lens? Good news! Today’s lens manufacturers have joined forces with today’s software developers and, in tandem, offer you the ability to create laser-accurate geometric renderings that are sharp enough to reveal a flea in your dog’s undercoat.

Do you take all sorts of photographs of all manner of subjects in all kinds of situations, and relish the thought of having a small, powerful computer aid you in exposing, focusing, and choosing the shot? Hurray! Today’s camera developers are aggressively addressing your needs — insuring that all your photos will be exposed and focussed to comply with generally accepted standards.

Do you think the noise reduction algorithms in today’s cameras make your subjects look like plastic models? Do you prefer subtle gradations in tone over cartoonish, posterized, over-hyped contrast? Does color sometimes obliterate the emotional impact of your photos? Is a certain dreaminess and glow more important to your portraiture than being able to count peach fuzz hairs on your model’s cheek? Do you gravitate toward particular lenses because of their flaws? Do you ever want to take a picture that common wisdom would consider to be incorrectly focussed? Incorrectly exposed? Would you like to have more dynamic range without resorting to HDR photography? Have you ever missed a priceless photo opportunity because there wasn’t enough time to lift the camera to your eye and focus? Did you ever wish you could see what was going on outside your SLR’s field of view, so that you could time a shot perfectly?

No Problem! Previous generations have already addressed all of the above needs — it’s just that the current generation has abandoned past ideals and, therefore, also abandoned the equipment that was created to achieve them. Lenses were once valued for their quirks and signature looks. Although “clinical” lenses existed, they were more desirable for scientific work than for something as soulful as a photograph. Black and white negative film has extended dynamic range, along with a non-linear response curve that mirrors human eyesight more faithfully than a digital sensor. And if you add a rangefinder camera to your kit, you’ll open up a whole new world of shooting, framing, and capture options that would elude your SLR.

None of this is to say that modern lenses, digital sensors and SLRs are “bad.” They’re not. They’re just popular. But because each generation adopts an “us or them” attitude, the unpopular options of previous generations are abandoned. Diversity suffers. Choice is eliminated. Individual expression deteriorates. There’s simply no reason, other than generational tenets, to eliminate alternatives.

Personally, I’m thrilled with many of the latest advances in photo technology. With my SLR, I can practically shoot in the dark. I can mount telescopic lenses, tilt-shift lenses, and macro lenses that would never be practical on a rangefinder. But does that mean I must buy an SLR instead of a rangefinder? It shouldn’t. I should be given the option to buy both, and thus leverage the benefits of both. But since each generation feels the need to discard the methods of a previous generation, modern rangefinders are in extremely limited supply.

Similarly, my digital sensors and modern lenses give me a level of image detail I could never achieve with 35mm film. Digital cameras provide me with immediate access to my captures, an easy shot-to-publication workflow, and the freedom to experiment with new concepts and techniques without the cost and complexity of film. But does that mean I must buy a digital camera instead of a film camera? It shouldn’t. I should be given the option to buy both, and thus leverage the benefits of both. But since each generation feels the need to discard the methods of a previous generation, modern film choices are diminishing rapidly — darkroom supplies must be mail ordered, and new film cameras are all but extinct.

New product developments should enhance the old ones, not supplant them. With each generation, photographers should have an increasing array of marvelous contrivances to support their photographic vision but, instead, we have a diminishing number. That’s because it’s not just our tools that fall victim to generational ideology — it’s the very idea of what makes a photograph “good” or “appealing.”

Consider, for example, Henri Cartier-Bresson’s “Rue Mouffetard 1952.” That photo is shown here as part of a “still life” study (which I obviously shot in a blatant attempt to avoid infringing on Magnum Photos’ copyright).

This is one of the most admired and respected photos of the 1950’s — an absolute classic of the medium. And, though it’s the product of a generation much earlier than mine, it still speaks to my own culturally agnostic soul. Today, a photo like this is hopelessly out of fashion. I can only imagine the derision this shot would get if it were taken this year, instead of 1952, and a young Henri Cartier-Bresson posted it to an online photography forum. The comments might read something like this…

Joe79: “It’s just a snapshot, and not even a good one. The horizon’s not even level.”

T8kPix: “Wow, nice capture but the noise spoils it. Have you tried noise reduction software? I run everything through Noise Ninja, but there are others (just search Google). I’m guessing you shot this with a Micro Four Thirds? You’ll get a more professional look if you invest in an SLR. The bigger sensor will give you much cleaner images.”

Twitterbunny: “The tonal range is too flat. Try auto-leveling it in Photoshop to maximize the contrast.”

slrSAM: “Twitterbunny is right about the image being flat, but it’s better to capture a wider dynamic range in-camera. I suggest you invest in a good flash and learn to use it off camera. Strobist.com is a great source of information, and I highly recommend all of Joe McNally’s books. Good luck! Don’t get discouraged, Henri. We all have to start somewhere.”

6Pack: “Could have been a cute picture, except you cut off his feet. Can you take it again without amputating any body parts?”

FotoXpert: “I’d clone out that girl’s arm and her dress on the far left of the frame.”

digitalTOM: “Hey, Henri! Are you French? I went to Paris a couple years ago. My wife keeps bugging me to go back, so maybe we should hook up?”

Xenon: “Dude, I hope you don’t mind me saying this, but what’s with the Leica? No real photographer would use one of those. They’re just man-jewelry for a bunch of doctors and dentists who wouldn’t know a good camera if they tripped over it. You could dump your Leica and, with the money you save, you could buy an SLR and a whole bunch of new lenses. Seriously, man, that 50mm you keep using is so boring.”

Maggy: “Nice bokeh, but I would have stopped the lens down a little. It would be better if the girl in the background were in focus.”

LazerBeam: “I flagged this as inappropriate. I hope you rot in jail for taking pictures of children on the street.”

MikeK_13: “Not bad. Can you post the original color version for comparison?”

iHeartCanon: “Ever hear of the rule of thirds? You should never put the subject in the middle of the picture!! Only amateurs use the center focus point. Try using one of the outer auto-focus points instead. That will force you to move your subject away from the center, and your pictures will be better.”

TKO: “The background is really distracting. You should either crop this tighter, or use a longer lens so the people in the back don’t distract from your subject.”

Alright, I admit the previous comments were all “imagined,” but they’re not unrealistic. I’ve seen stellar images get lambasted on review sites — simply because the images aren’t fashionable, or because they don’t follow the commonly accepted practices of today’s photographic generation.

Each new generation defines its own set of acceptable tools and technologies, and it uses these to define the social and artistic aesthetics of the time. Simultaneously, these social and artistic aesthetics dictate the tools and technologies one must use in order to conform. The circle closes upon itself — insuring that contrary thought can neither invade nor escape the circle.

The reach of my writings is limited, and my voice is but a whisper against the din of each generation. But if you can hear me, even just a little, please hear this: For you young ‘uns, please realize that anything new does not negate everything old. And for you old timers, respect that the old ways are not always better. Choice is never a bad thing.

So take a step back from your generational tenets, and try something different. Try something new. Or try something old. Drop the cliques, and you might just improve your clicks.


©2010 grEGORy simpson

ABOUT THESE PHOTOS: “Whistler’s Great Grandson,” “Why I Live in Cities – Reason #17,” and “Modern Love” were shot with a Leica M6 TTL, using Tri-X film rated at ISO 1600 and developed in Diafine. “Robson Street, Par 5” was shot with a Leica M6 TTL, using Tri-X film rated at ISO 400 and developed in Ilfotec DD-X. “Free Thinker” was shot with a Canon 5D, using a 70-200 f/4 L IS lens. “Duality” was shot with a Leica M9 and a Voigtlander 75mm f/2.5 Color-Heliar screw mount lens. “Mouffetard Studies” features a photograph from the book, “Henri Cartier-Bresson – The Man, The Image & The World.” I strongly encourage everyone to purchase photographer monographs and study them carefully — therein lie a wealth of answers.

If you find these photos enjoyable or the articles beneficial, please consider making a DONATION to this site’s continuing evolution. As you’ve likely realized, ULTRAsomething is not an aggregator site — serious time and effort go into developing the original content contained within these virtual walls.
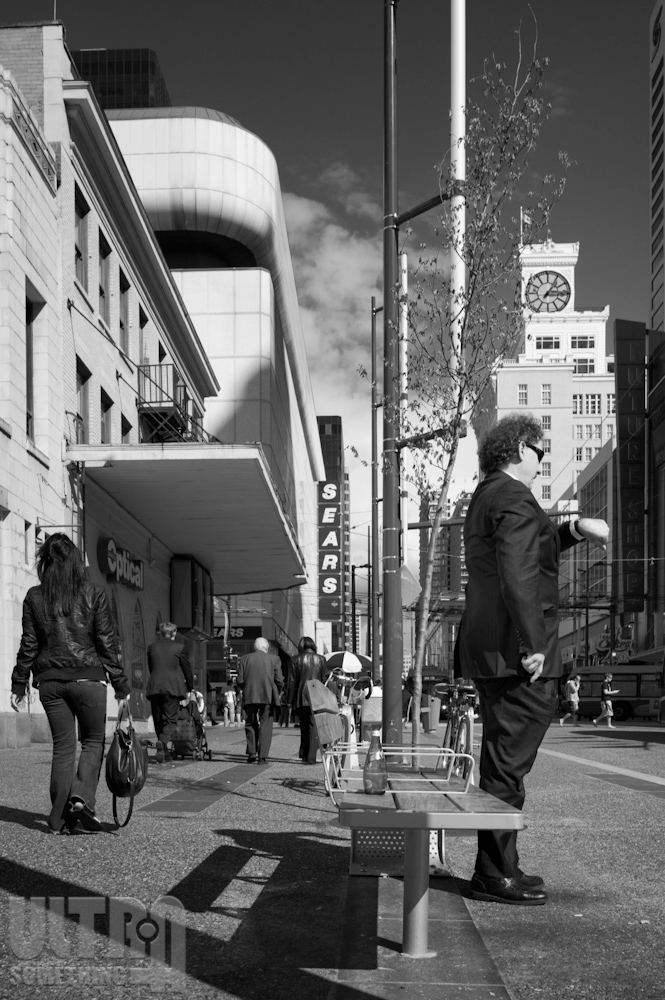
Categories : Musings
Tags : Black & White, Film Photography, Rangefinder photography, Street Photography
← Previous Page
Next Page →

CATEGORIES

SEARCH SITE

SUBSCRIBE

Receive new post announcements via Email

LATEST POSTS

Something Pleasant

Tell Us How We Did Today

Book Report

EXORCISM 08

Dredging the Tide Pools

Drift

© 2025 ULTRAsomething
Articles | About | Privacy Policy | Donate | Contact
Manage Cookie Consent
ULTRAsomething uses plugins (which use cookies) to organize and optimize the site. It's kinda how blogs work.
Functional Always active
The technical storage or access is strictly necessary for the legitimate purpose of enabling the use of a specific service explicitly requested by the subscriber or user, or for the sole purpose of carrying out the transmission of a communication over an electronic communications network.
Preferences
The technical storage or access is necessary for the legitimate purpose of storing preferences that are not requested by the subscriber or user.
Statistics
The technical storage or access that is used exclusively for statistical purposes. The technical storage or access that is used exclusively for anonymous statistical purposes. Without a subpoena, voluntary compliance on the part of your Internet Service Provider, or additional records from a third party, information stored or retrieved for this purpose alone cannot usually be used to identify you.
Marketing
The technical storage or access is required to create user profiles to send advertising, or to track the user on a website or across several websites for similar marketing purposes.
Manage options Manage services Manage {vendor_count} vendors Read more about these purposes
Preferences
{title} {title} {title}